User Manual -
Mistral M6&M8 -
06-2015 edition
.
PARAMINA SA – Byway Evaggelistrias str. 19300 Aspropirgos, Greece, Tel: 0030 210 5575860-1
Fax: 0030 210 5575868, email: service@paramina.gr - website: www.paramina-compressors.com
8
4. Installation - Operation
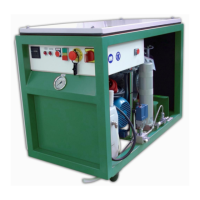
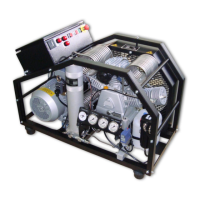
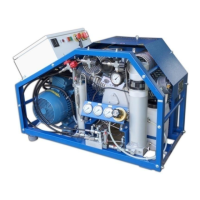
General Specifications
High pressure compressors are complete units for filling cylinders with compressed air at 225 bar (3200
psi) and 330 bar (4700 psi). They are mostly used for compressing breathing air for divers, fire brigades,
military, paint ball applications, etc.
Mistral is a 3 staged, piston, air cooled compressor with 3 cylinders, 2 intercoolers and 1 final aftercooler,
condensate separator after the second stage aftercooler, accompanied with automatic and manual drain,
pressure control in all stages of compression, with pressostat and mechanical safety valve as well as one
filtering stage at the final pressure (after the third stage):
The Final Filter (dehumidification) contains Molecular Sieve and air purification with Activated Carbon.
Installation - First start of the compressor
All compressors are tested and pre-adjusted by the manufacturer before they are shipped to the buyer.
They can start their operation immediately on the following conditions that are considered necessary, for
safety and ease.
Anyone who will be handling the unit, must read carefully all contents of this manual so as to have full
knowledge of the product.
1. Choose carefully the installation place of the compressor. The place must not be burdened by
unfavorable environmental conditions (toxic substances – explosives – fumes – dirt – debris etc.
2. Place the compressor in a well-ventilated area. Make sure that the intake air for the compressor is
clean and cool. Prevent the hot cooling air from recirculating to the cooling air intake. Make
sure that foreign objects cannot get into the compressor with the intake air. Make sure that the
intake air does not contain any smells, fuel or fumes, explosive or inflammable gases or harmful
substances.
3. Turn the compressor using the fly-pulley and make sure it turns freely. Do the same after overhaul
of the unit or a long-term out of service period.
4. Check the rotation direction (follow the arrow) by pressing instantly the start-stop button. The
same check should be carried out after any service or reconnection of electrical supply.
5. Before any start of the compressor, check oil level. It should be between the minimum and
maximum limit.
6. The compressor should be placed in a completely horizontal position. If during operation there are
vibrations, adjust the anti-vibration pads of the stand until vibrations are minimized.
7. Start the compressor by pressing the start button on the electrical box.
8. Stop the compressor by pressing the stop button on the electrical box when the pressure reaches
the maximum or when the final stage safety valve opens. In auto-stop version the compressor
stops automatically at the pre-adjusted final pressure.
9. After stopping the compressor open the manual drains (one under the separator and one under
the final filter) so as to remove condensate.
10. During every start of the compressor (in versions without auto drains), open only the drain
valve of the 3rd stage. Then during the regular operation of the compressor open both 2
nd
and 3
rd
stage drain valves every 15 minutes.
ATTENTION:
Larger oil quantity may increase pressures inside the block, cause leaks of larger oil quantity in the
pneumatic air resulting in the creation of chars in the valves, burden the filters and affect their life duration,
as well as the quality of breathing air.
Smaller amount of oil means inadequate lubrication affecting the life duration of the compressor.
 Loading...