Page 28
Positioner Installation
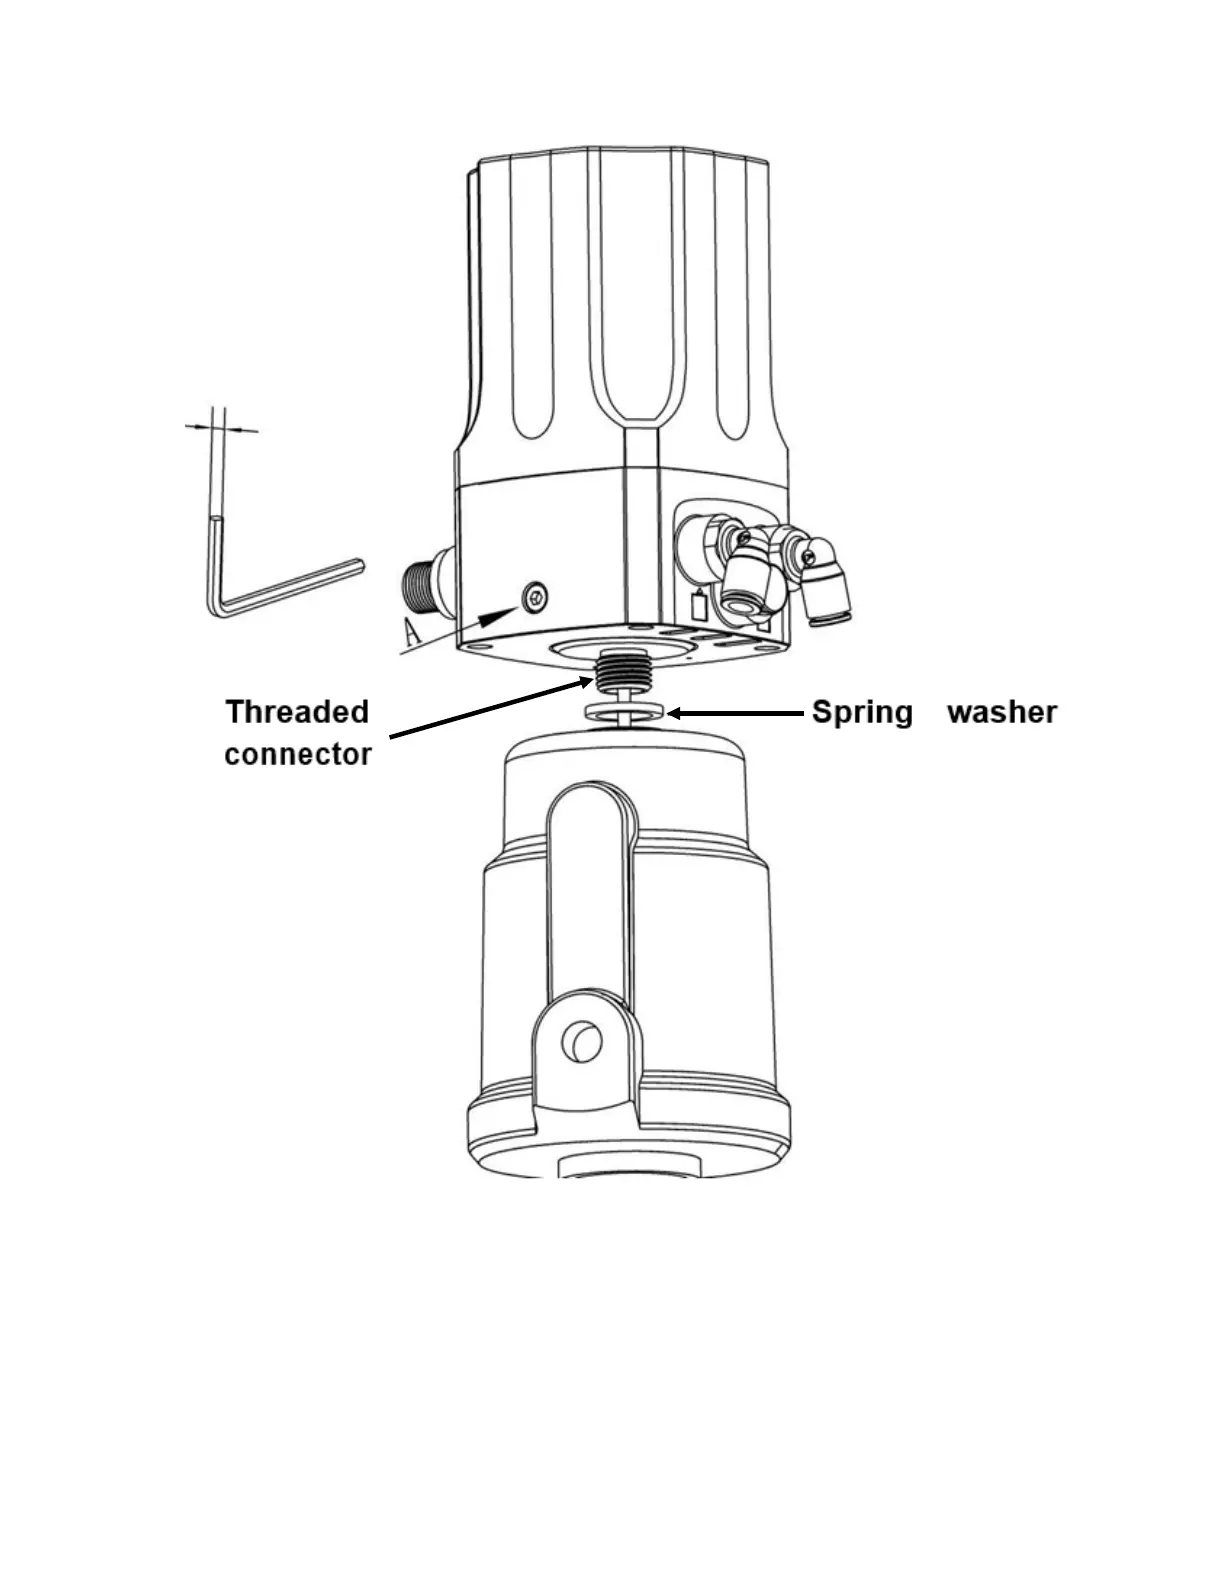
Figure 32. Displacement sensor adjustment and measurement
9. Use a 3 mm hex key wrench to tighten the screw at position A to tighten the positioner housing and the threaded
connector.
10. Insert the spring washer into the bottom thread.
11. Screw the replacement positioner clockwise into the threaded connection of the actuator housing and tighten as shown in
Figure 32.
12. After connecting the positioner to the valve actuator, the angle between positioner and valve can be adjusted. If you need
to adjust the angle of the operation interface of the positioner, loosen the hexagon socket screw at position A as shown in
Figure 32, you can rotate the main housing to the required angle in the range of 180° clockwise or counterclockwise
shown in Figure 33, and then tighten the screw.
 Loading...