SeeGull CW Transmitter User Guide
Rev. D PCTEL 14
4.3 Starting a Test Scenario
4.3.1 Start a New Test
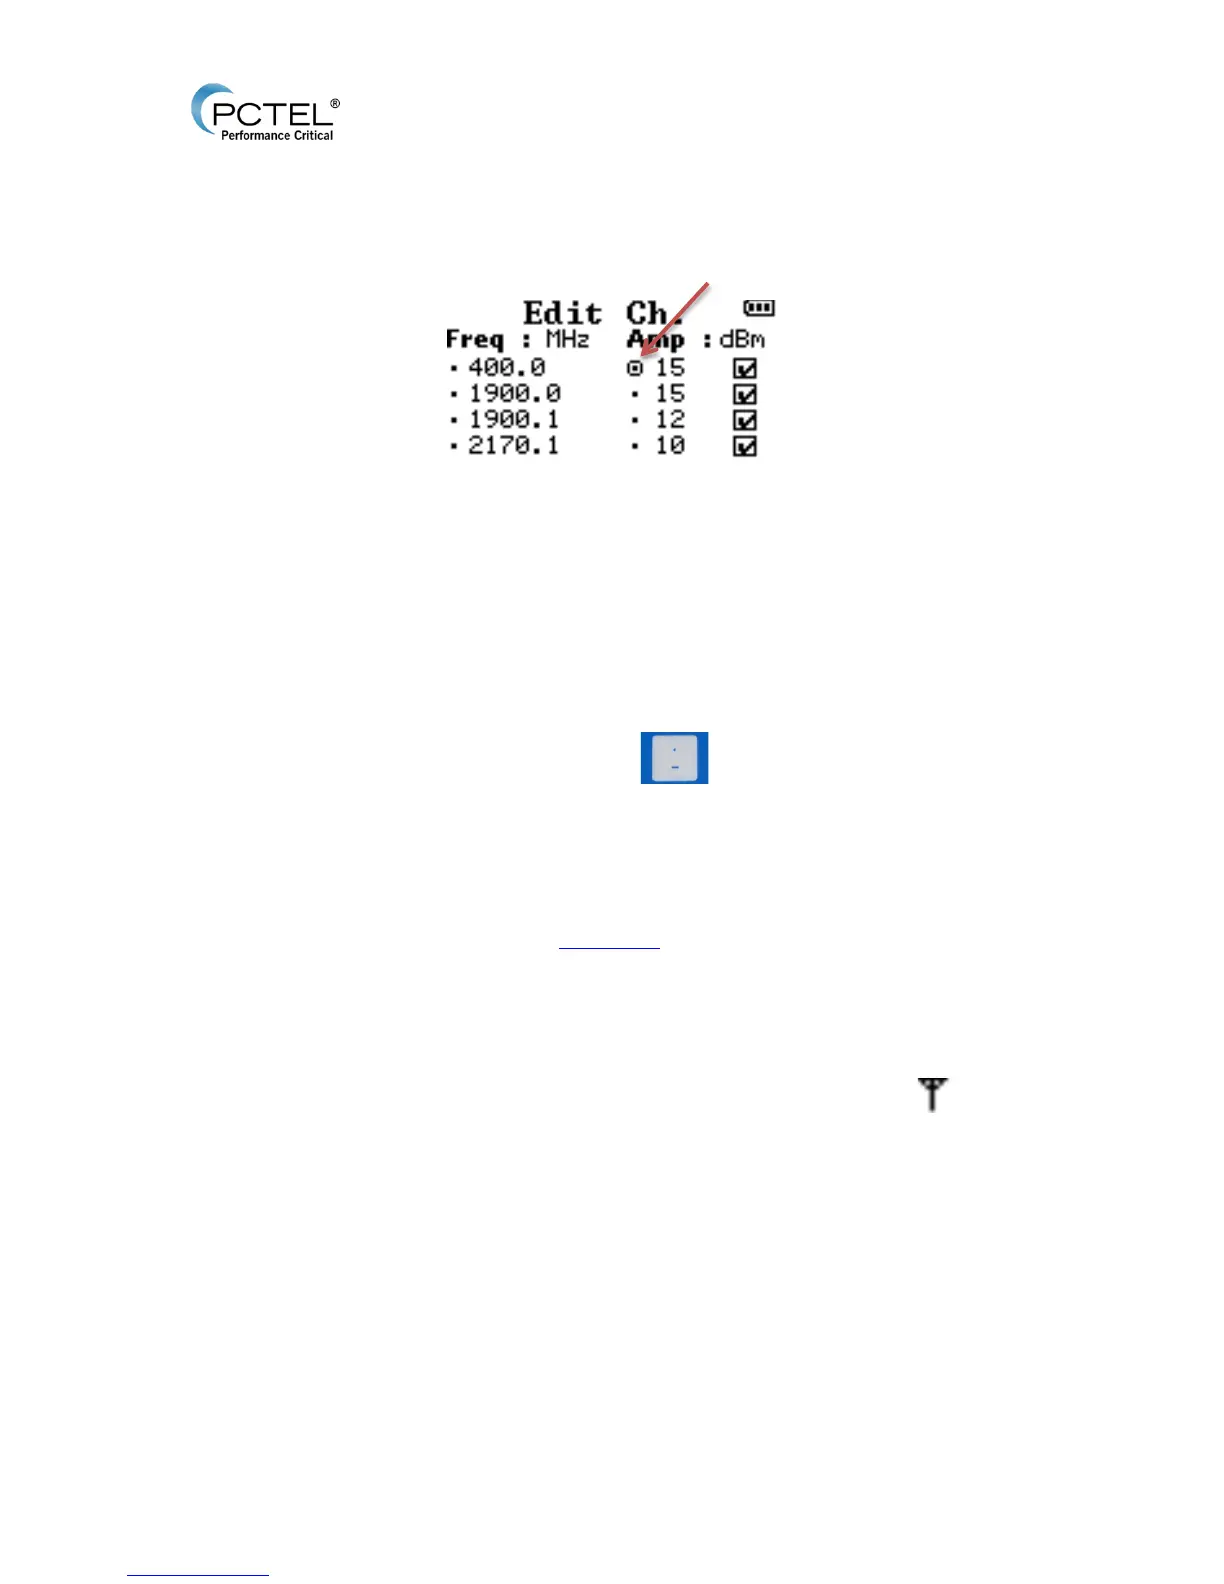
Figure 12 - Ch. Info
1. Press the RF ON/OFF key. This will recall the last test configuration. The menu page is
labeled: “Ch. Info.”
2. To edit parameters:
o Use the Arrow Keys to scroll through Freq and Amp. A circle icon indicates which
value is highlighted for edit.
o Press Enter to select a value to edit.
o Use Keypad numbers and Edit Key (for negative sign or decimals) to
input desired value and press Enter to apply.
o Example: In Figure 12 - Ch. Info, the Amp of port 1 is currently 15. Press Enter to
select, then the number pad to enter a new Amp, and Enter again to confirm.
Max dBm is dependent on Freq range and will auto correct if the user
inputs a number out of range. Ex: 14 dBM for 2170.1 Freq will auto
correct to 10. See Spec Chart
below for details.
3. Use the number Keypad 1-4 to check or uncheck the corresponding antenna ports 1-4. A
box with an check depicts the port will be active when RF transmission begins. A box with
an X is inactive. As seen in figure 12, all four ports are active.
o If the transmitter is set to 2 port configuration, ports 3 and 4 will not be available.
4. Press RF ON/OFF again to begin transmitting. This will be indicated by the icon. A
temporary message will flash, indicating which ports are active. If no ports have been
activated, a “No Port is Selected” error message will display. Refer to step three to use
the check box to activate the desired ports for RF transmitting.
o A second method is to select “Start Test” from the Main Menu and press the
Enter Key.
4.3.2 Save a Reusable Configuration
After setting new test configuration parameters the user can save for quick access for future
testing needs. Up to 24 configurations can be stored on the CW Transmitter’s memory at a time.
1. When parameters are set, press the Save Key. A box will appear on the screen with a
default name.