PAGE 20
Class 1 Medical
Rev. 2
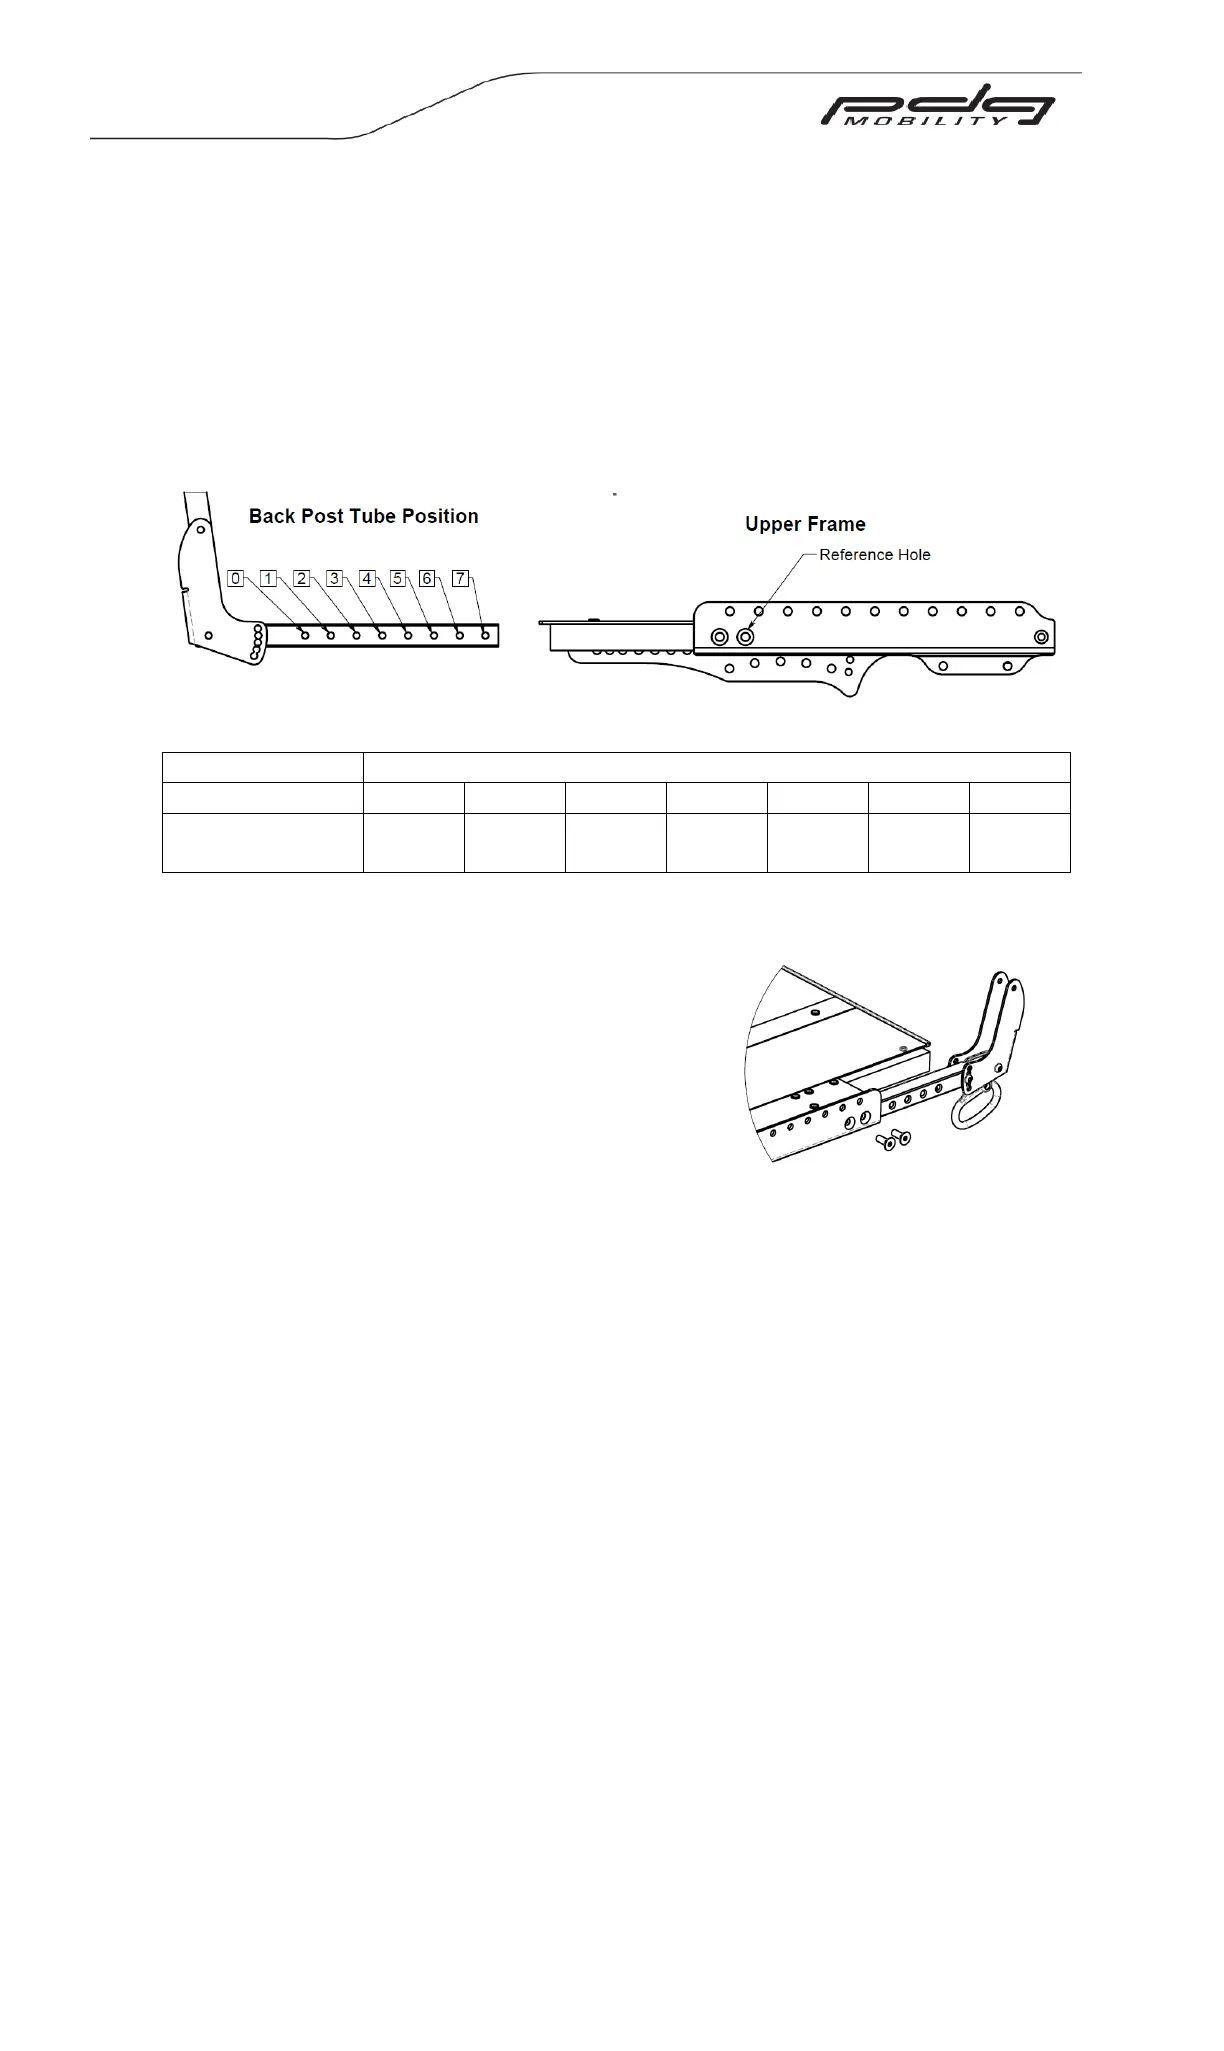
Figure 14.4: Seat Depth positions and Setup
Figure 14.5: Adjusting the seat depth
14.3 Seat Depth
WARNING – After adjusting, always make sure that parts are properly tightened
BEFORE using the wheelchair. The seat depth can be adjusted from 16” to 22”,
depending on the position of the rear seat depth insert. The illustration and table in
figure 14.4 show the seat depth set-up positions and can be referenced for making
adjustments.
Adjusting the Seat Depth
1. Loosen and remove the two 5/16-18
flat head fasteners on each side (see
Figure 14.5).
2. Adjust the rear seat depth insert to the
desired position.
Retighten the fasteners. Torque to 18 ft.lbs
14.4 Seat-To-Floor Height
WARNING – After making adjustments, always make sure that parts are properly
replaced and tightened BEFORE using the wheelchair.
The seat to floor height is measured from the top of the seat pan to the floor. It can be
adjusted from 14” to 20” (Stellar) or 13” to 18” (Stellar GL/ GLT) depending on front
caster and rear wheel combinations. The frame consists of 3 main components: the
upper frame, sub-frame and lower frame. Additionally, a shim, or tie down plate, will be
present between the lower frame and sub-frame on some models.
Adjusting Seat to Floor Height
1. Remove the wheels, front rigging, and arms from the chair. Tip it forward so that
it is resting on the back post and front rigging receivers as shown in Figure 14.6.
2. Remove the nuts from the 3/8” hex head seat height adjustment bolts; there are
two 3/8” hex bolts on each side of the frame, as shown.
3. Remove the four hex bolts while supporting the lower frame with your other hand.
CAUTION – When the four hex bolts are removed, the lower frame and upper frame will
be disconnected and will drop apart.
 Loading...