PAGE 34
Class 1 Medical
Rev. 2
14.13 Seat Tilt
WARNING – After making adjustments, always make sure that parts are properly
replaced and tightened BEFORE using the wheelchair.
14.13.1 Adjusting Seat Tilt: Operating Instructions
The tilting struts make it possible to set the suitable seat angle within the operating
range. To adjust the tilt angle, activate the tilting lever located on the side of the push
handle or on the armrest, depending on how the wheelchair has been configured. Allow
the seat to be lowered to the desired posterior tilt position and release the tilt lever.
The seat should ‘lock’ at desired tilt angle.
NOTE- Depending on configuration, the tilt lever may be mounted onto the left or right
side of the backrest push bar or on the left or right armrest.
WARNING – When tilting chair, attendant must hold the pushbar or back canes securely
so that seat does not drop too quickly.
14.13.2 Adjusting Seat ‘Uplift’ Force
This procedure may be used to increase or decrease the ‘uplift’ force required to raise an
occupant from a tilt position to a level seat position. Adjustment is made to the lower
end of the Gas Strut Assembly, positioning the end of the Gas Strut upward or downward
of its initial attachment point on the sub frame.
If the wheelchair occupant feels ‘heavy’ when attempting to restore the wheelchair to a
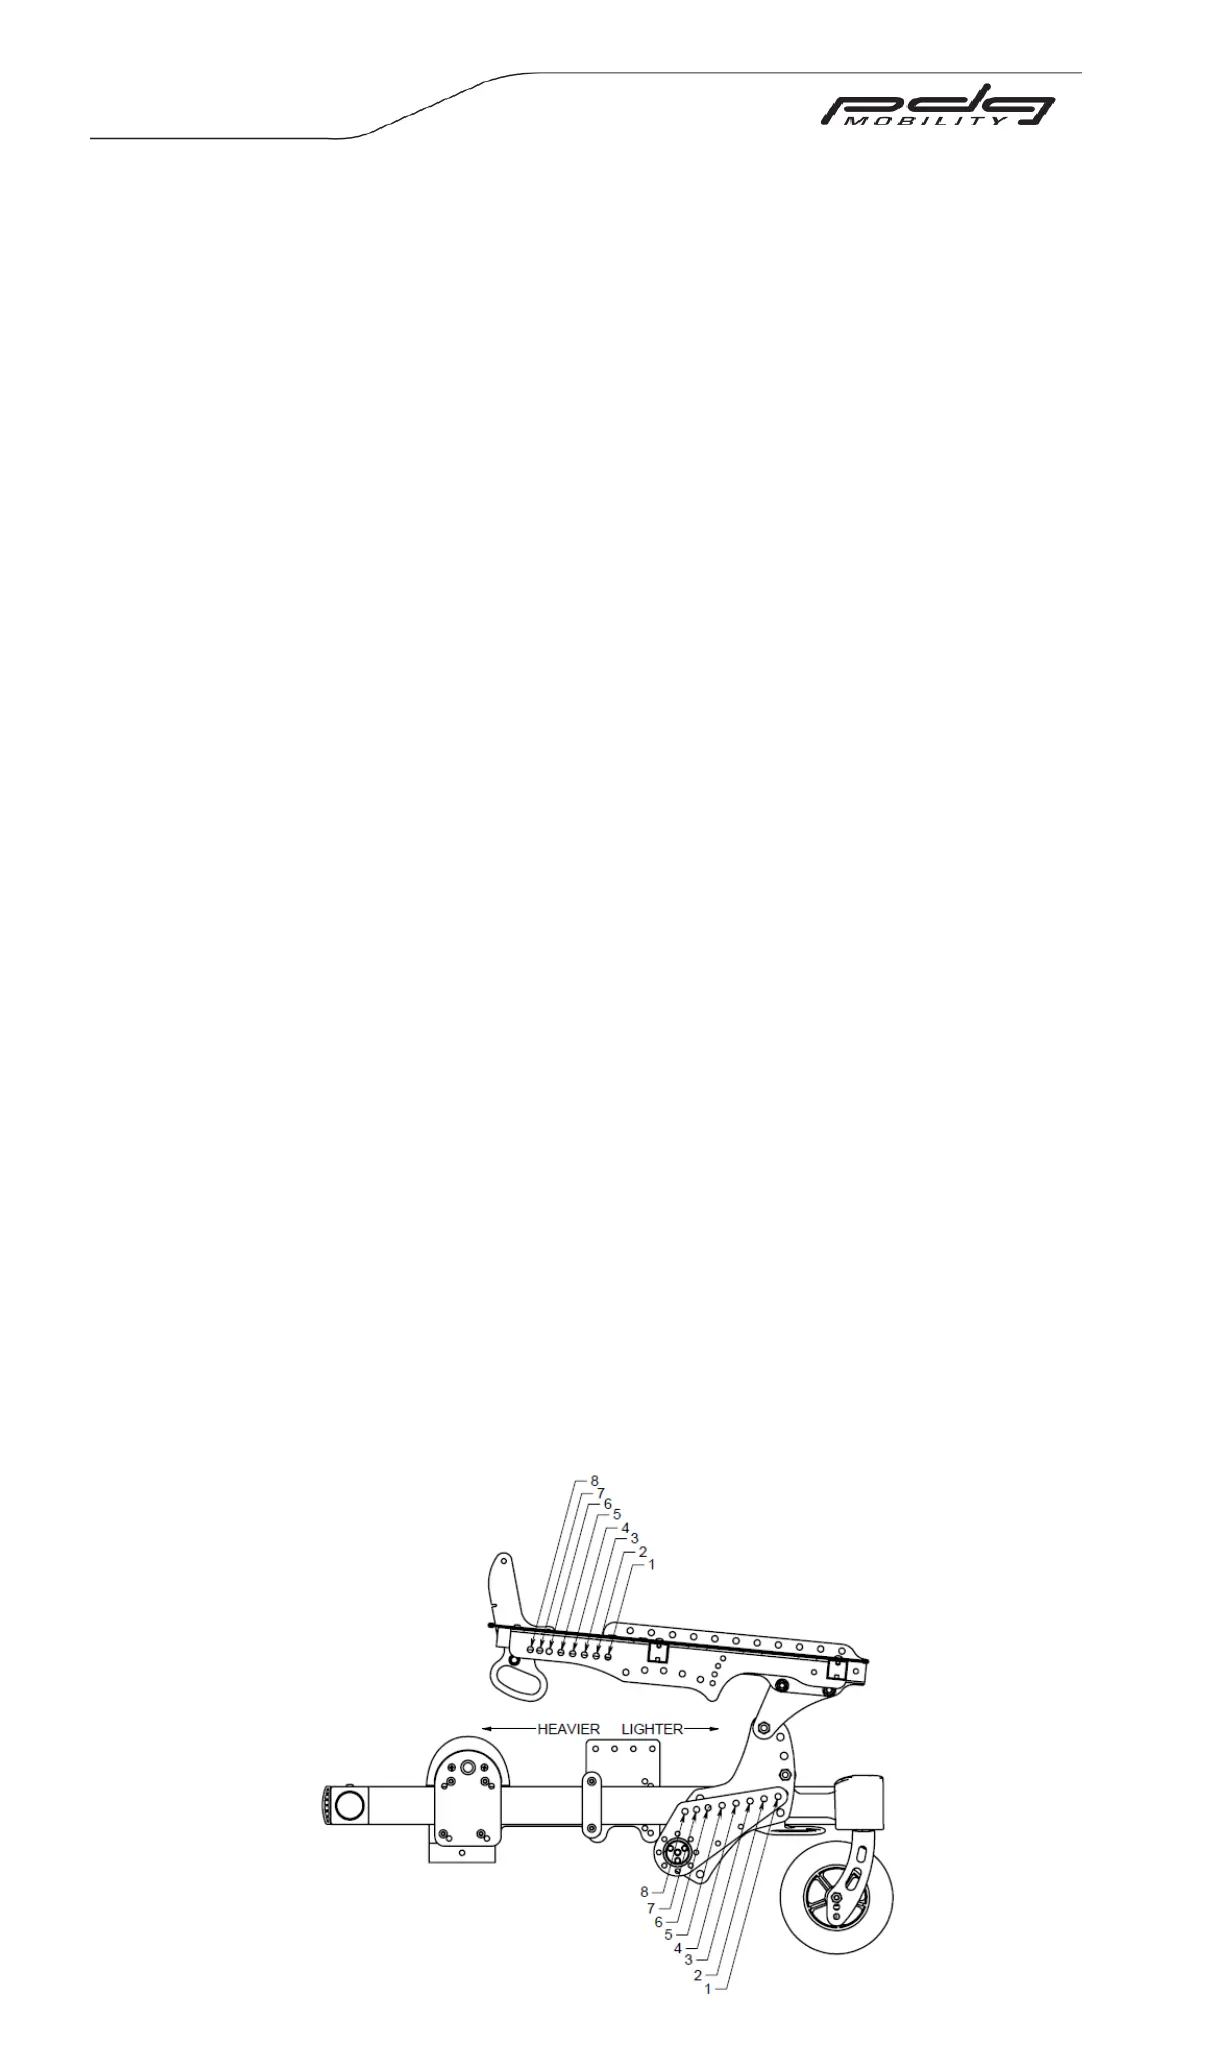
seat level position, the gas strut attachment should be moved rearward for a Stellar and
down for a Stellar GL. (See Figure 14.40)
If the wheelchair occupant feels ‘too light’ or if the attendant has to use force to push
the Seat Assembly in to tilt when activating the tilt mechanism, the gas strut attachment
should be moved forward for a Stellar and up for a Stellar GL. (See Figure 14.40)
1. Determine whether you wish to move the gas strut forward or rearward (see
Figure 14.40). Determine if the desired adjustment is possible (you may have
already set the chair at maximum or minimum ‘lift’.
2. Carefully remove the nut and bolt from the lower end of the gas strut. Note that
the spring is held in compression by a separate pin and will not extend when the
bolt is removed.
3. Re-assemble the gas strut ends to the desired hole position on the subframe.
4. Reinstall the locknuts and tighten securely.