PAGE 36
Class 1 Medical
Rev. 2
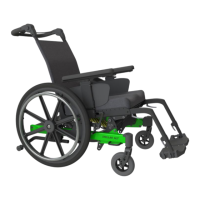
1. If the chair does not tilt when trigger is pulled – the cable wire is too loose and
needs to be tightened. To do so, remove the rubber sleeve above the gas strut
housing that covers the adjustment nuts. Loosen the locknut first and turn the
‘tightening nut’ (shown in figure 14.41) so that more thread is showing above the
nut. Check tilt function and if acceptable tighten locknut and refit rubber sleeve.
2. If the chair tilts without pulling the trigger – the cable is too tight and needs to be
loosened. Reverse the procedure from above, making less thread show above the
‘tightening nut’.
Note: videos illustrating this adjustment are available on PDG Mobility’s YouTube
channel - https://www.youtube.com/user/pdgmobility/
14.14.2 Removing and Installing the Gas Strut Actuator Cable
1. Grasp the cable just in front of the trigger. In one smooth motion, pull straight
down until the cable releases from the end of the trigger. Pull the metal cable-end
out from the side of the trigger.
2. Disconnect the opposite end of the cable from the strut, using a 7/16” and a 3/8”
open end wrench.
3. To install the new cable, refit to the strut by reversing step 2. Be sure to connect
the cable ball to the actuating lever.
4. Attach cable wire onto the strut, slide steel ball through slot on lever (so ball is
underside of the lever).
5. Re-fit the metal cable end by inserting into the side of the trigger.
6. Feed the cable through to the trigger.
Figure 14.42: Installing the cable
7. Hold the plastic parts in place and pull the trigger. The cable should snap into
place. If not, you may need to push the cable housing until it snaps into place.
8. Clip the cable onto the back posts using plastic clips provided.
Note: videos illustrating this adjustment are available on PDG
Mobility’s YouTube channel -
https://www.youtube.com/user/pdgmobility/
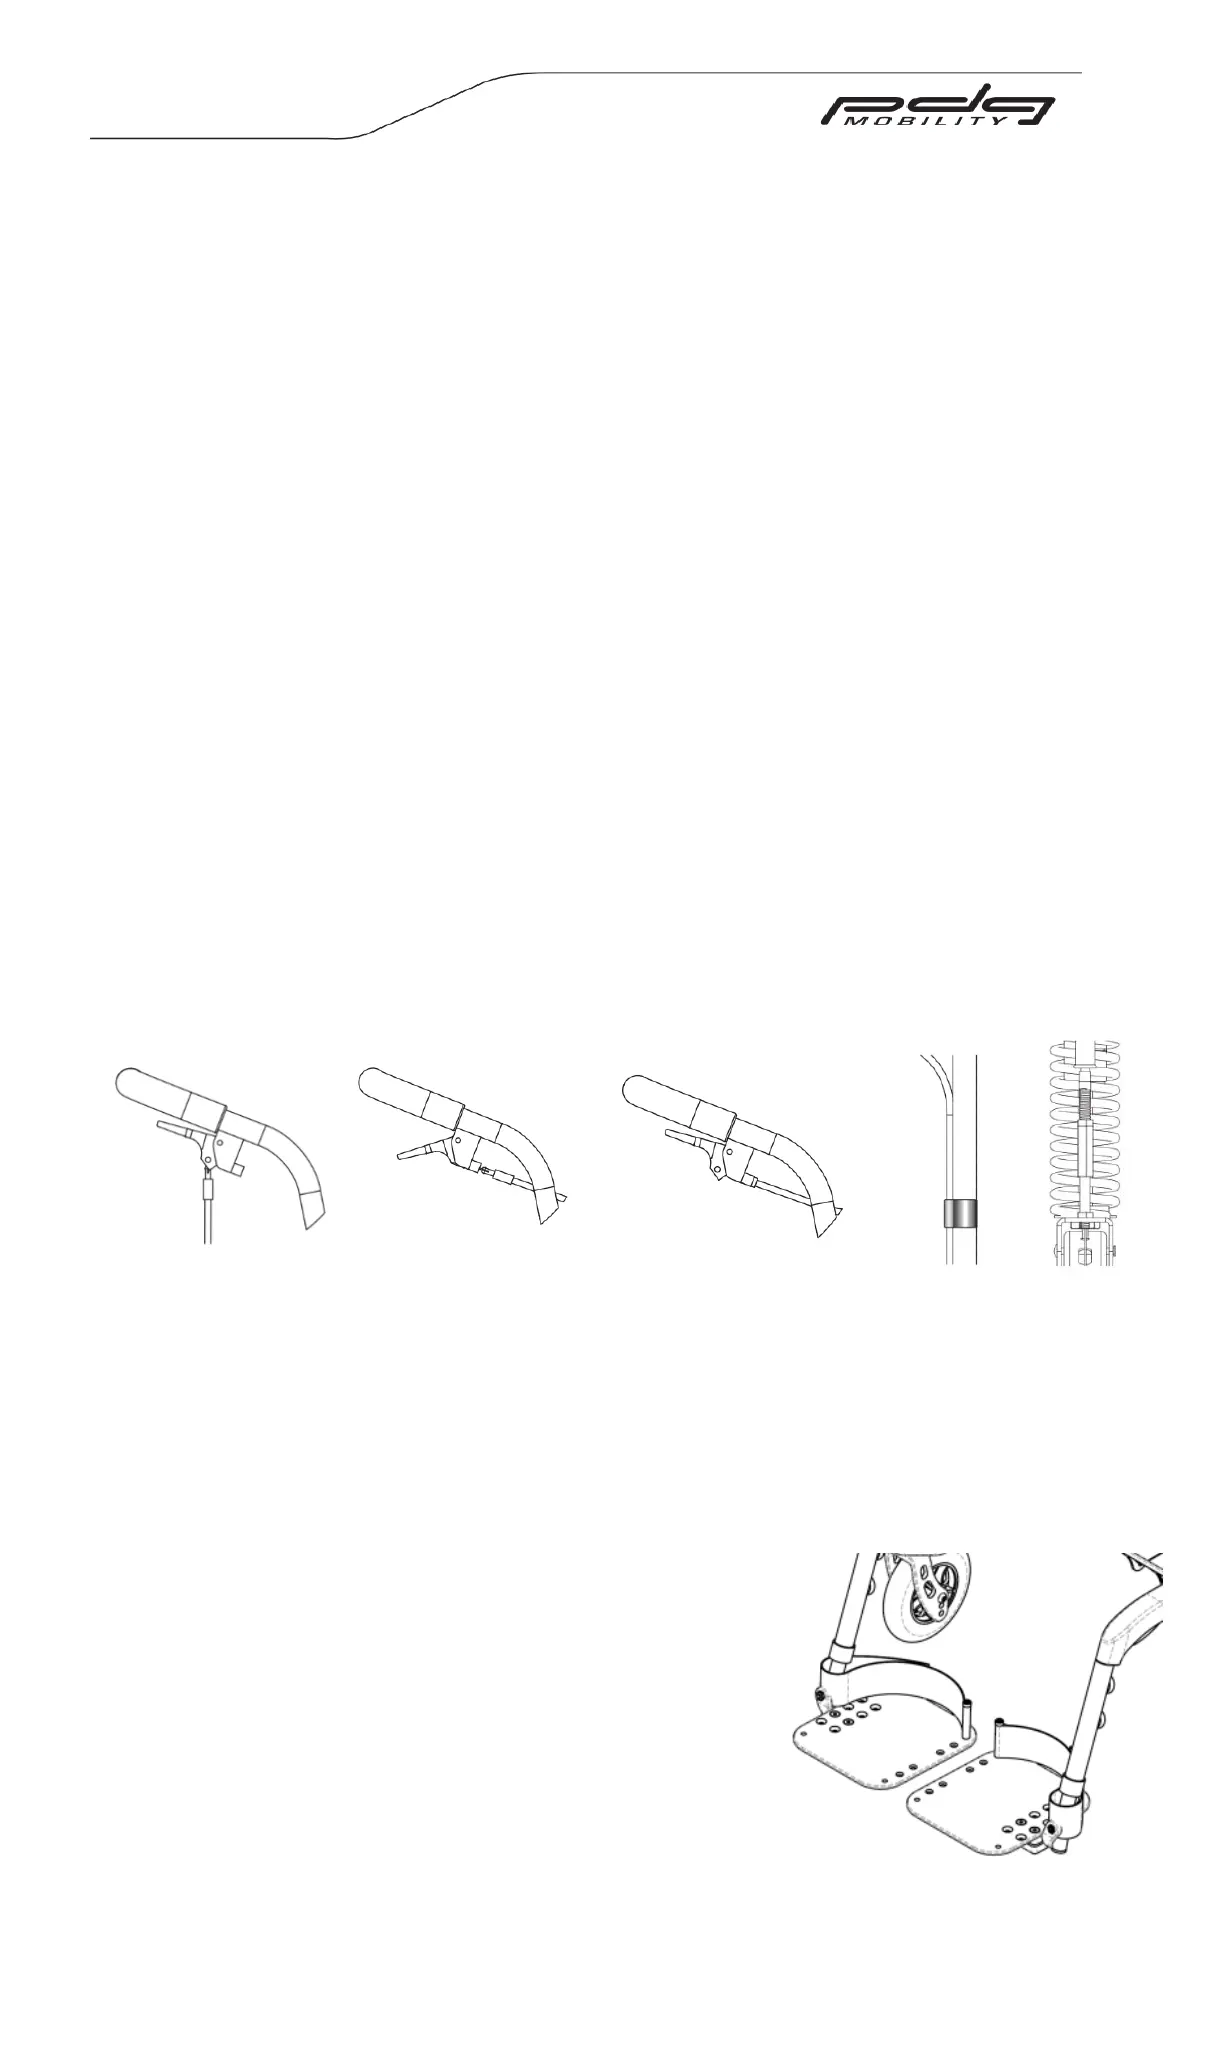
14.15 Heel Loops (Optional)
The heel loops are positioned behind the occupant’s
heels to prevent the feet slipping backwards. Adjust the
hook-and-loop strap to obtain the desired length of
strap to correctly position the feet on the footrest.