PAGE 30
Class 1 Medical
Rev. 2
Figure 14.30: Quick release
axle adjustment
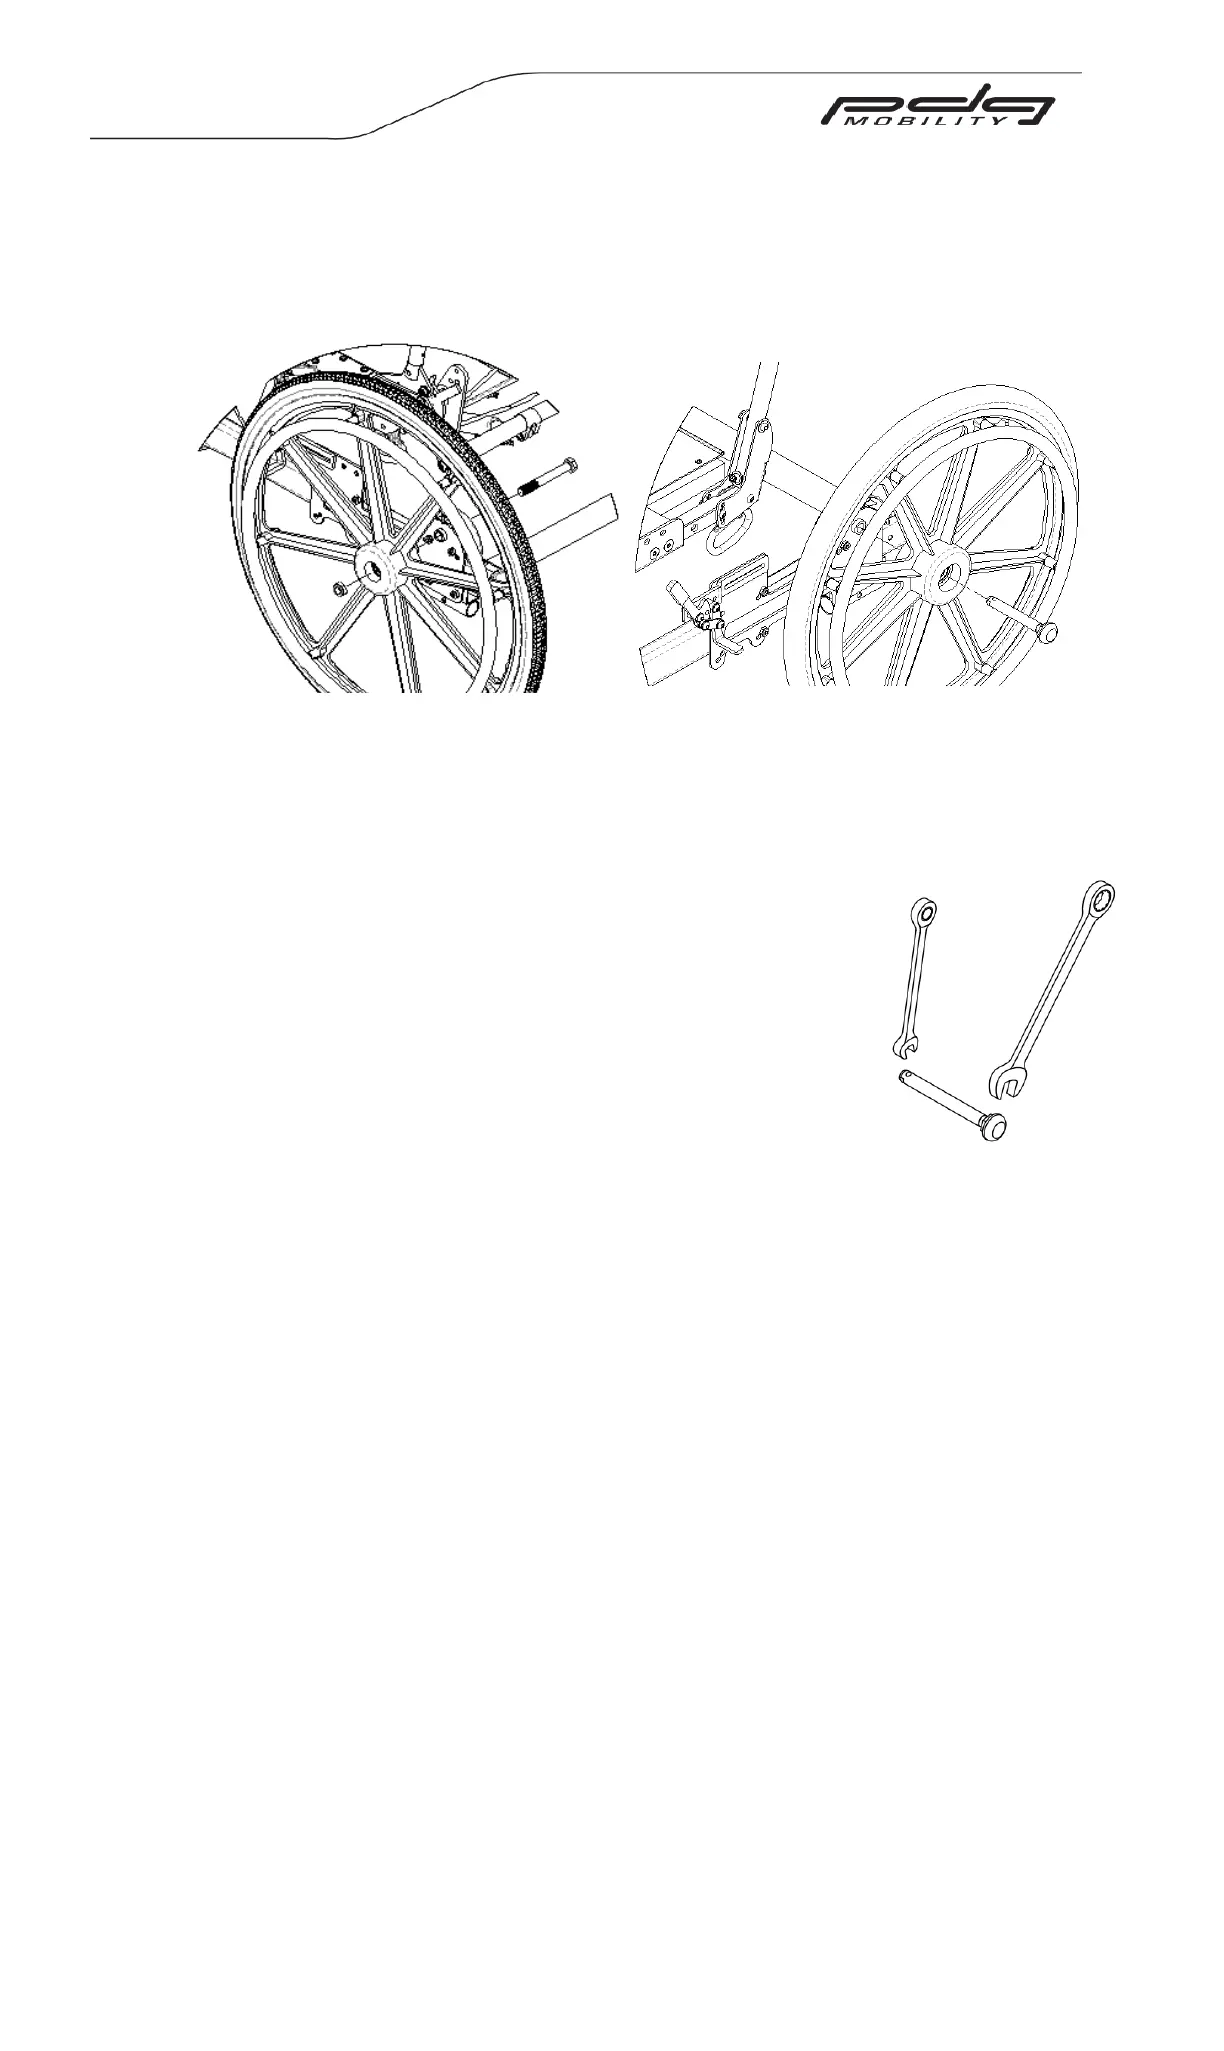
Figure 14.28: Removing rear
wheels fastened with axle bolt.
Figure 14.29: Removing rear wheels
fastened with quick release axle
2. To reinstall the rear wheel onto the wheelchair, reverse step 1.
WARNING – Do not use chair UNLESS you are sure both quick-release axles are locked.
An unlocked axle may come off during use and can cause personal injury.
14.9.2 Rear Wheel Axle Nut Adjustment (For Quick-Release Axles)
The quick-release axle attaches the rear wheel to the
axle receiver. When the axle is fully inserted into both
the wheel and axle receiver the detent balls will lock the
wheel assembly in place. Pushing the button on the
quick-release axle will disengage detent balls to allow
the wheel to be removed. If the wheel and axle will not
lock or there is excessive play when the wheel hub is
being pushed back and forth, the nut on the axle needs
to be adjusted.
If the axle does not lock:
1. Using a 7/16” open end wrench, securely hold the detent
ball end of the axle. (See Figure 14.30)
2. Use the ¾” open-wide wrench to turn the axle nut
counter clockwise.
3. Turn the nut in approximately ½ turn increments.
4. Try to lock the axle into the axle receiver. The axle is locked when the pin at the
ball detent of the axle is flushed with the end of the axle when the button is
released.
5. If it does not lock, repeat steps 3 and 4 until it locks securely.
If the axle locks, but there is excessive play:
1. Using a 7/16” open end wrench, securely hold the detent ball end of the axle. (See
Figure 14.30)
2. Use the ¾” open-wide wrench to turn the axle nut clockwise.
3. Turn the nut in approximately ½ turn increments.
4. Insert the axle and test for play.
5. Repeat steps 3 and 4 until the play has be eliminated and the detent balls are fully
extended.
IMPORTANT – With the user sitting in the chair, check to ensure the wheelchair is stable
in all tilted/un-tilted positions before dispensing the wheelchair.
 Loading...