INTELLIPH
®
ACID DISPENSER Installation and User’s Guide INTELLIPH
®
ACID DISPENSER Installation and User’s Guide
9
Saddle Clamp Mount Installation
The saddle clamp is designed to mount the acid injection fitting on the main water
return line after the heater. The outside of the pipe must be clean and free of surface
imperfections to ensure a leak-free installation.
Drill the Mounting Hole:
1. Select an area on the pipe close to the IntelliChlor
®
Salt Chlorine Generator
(SCG) cell between the filter and IntelliChlor (SCG) cell on the Flow Switch
side of the cell inlet.
2. Drill a 1/2” diameter hole through the center of the pipe wall. Be sure not to
drill through the pipe.
3. Clean all burrs from inside and outside of the hole. If necessary, use fine
sandpaper to remove the burrs.
Install the Saddle Clamp:
1. Thread the injector fitting into the top of the saddle clamp. Place the supplied
o-ring in the groove. IMPORTANT! Be sure the o-ring is properly aligned in
the groove on the saddle clamp.
2. Place the pipe hose clamps around the pipe and the slots on the saddle
clamp. Tighten the pipe clamps using the alternative method (i.e. left, right,
left, etc.).
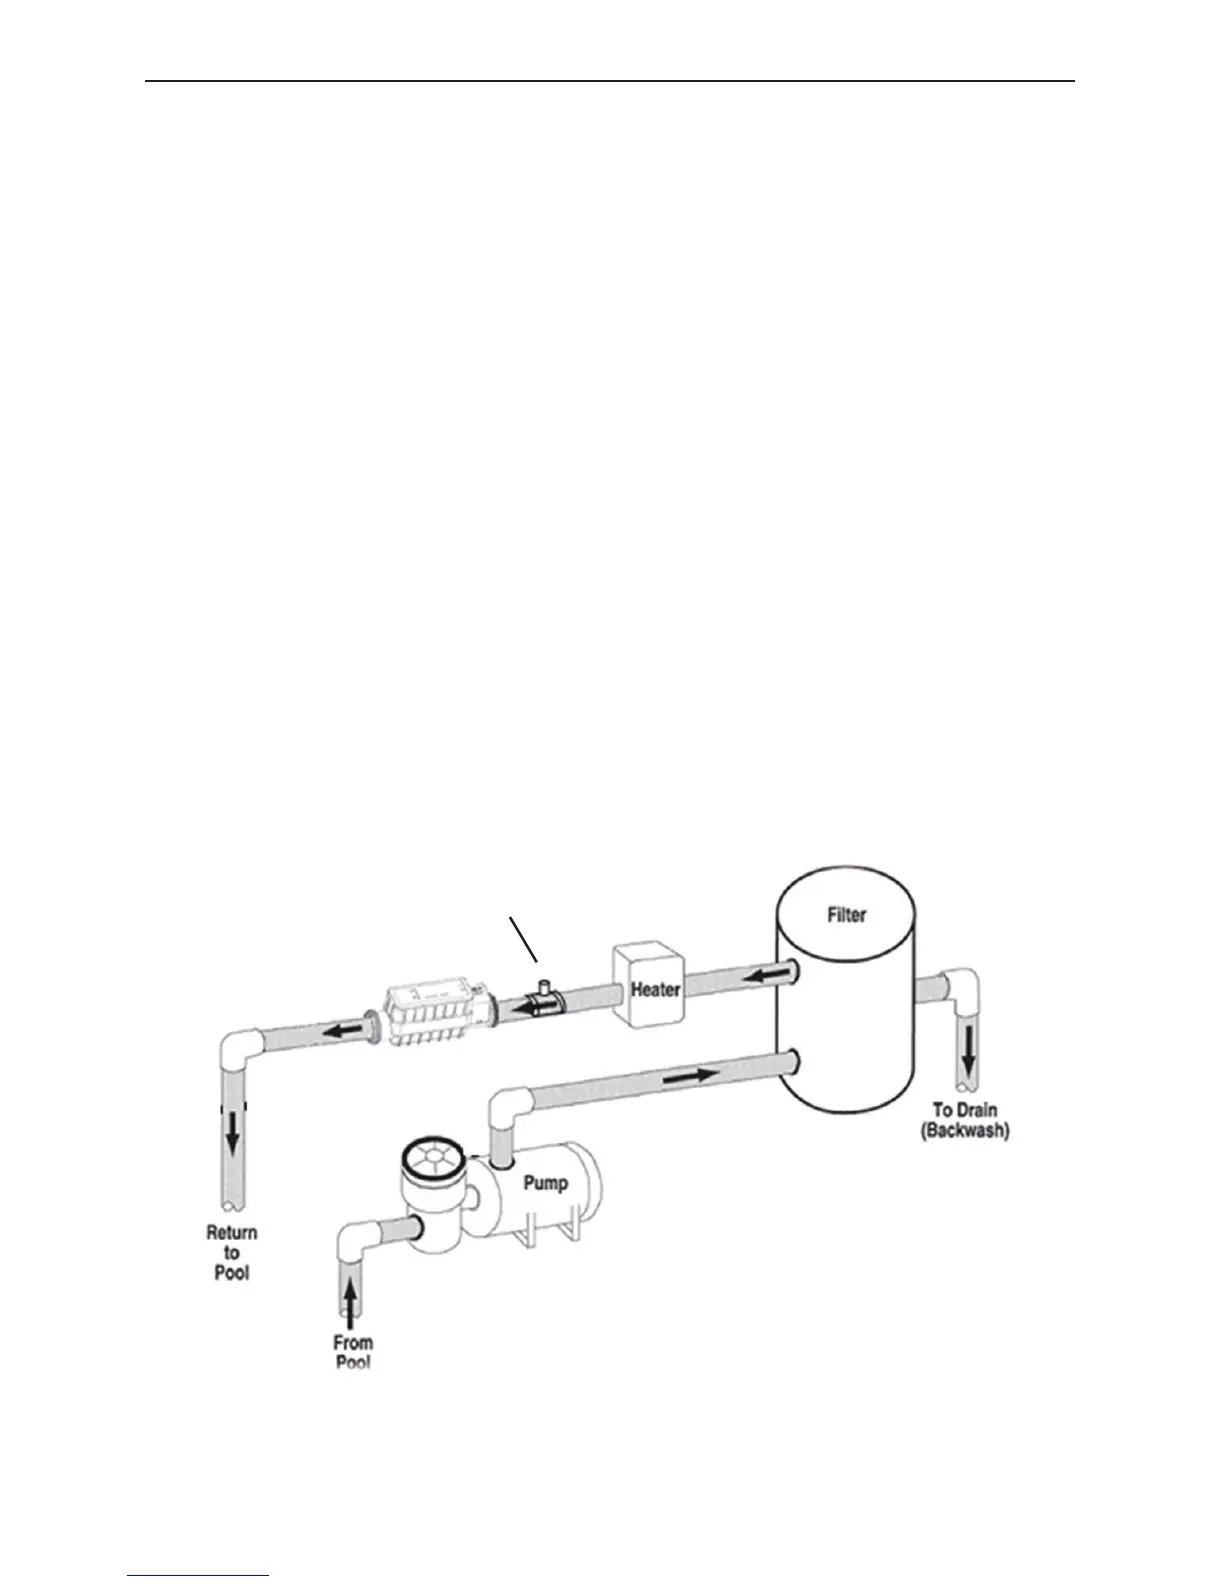
3. Insert acid tubing through the supply injector fitting cap. Connect tubing onto
the acid injection fitting and tighten cap securely before turning the pump on
(See diagram below).
4. The IntellipH
®
Acid Dispenser system is now ready for operation.