31
cord is looped over the ends of the spring through the
coils and tied to maintain the length mentioned above.
Each spring is assembled into the stuffing box. Note
that the spring does not contact the plunger.
Spring-Guide Ring:
Plungers are heavy and the importance of a well-fitted
guide ring that carries this weight is often overlooked.
Discard any guide ring that becomes worn or scored, as
it will then not serve its purpose. It should fit snugly in
the box. Apply oil generously to this ring.
Spring Loaded Packing:
Three (3) rings of chevron or compression packing
are installed next. For compression packing, install
them with the skive intersections 180º apart to
discourage leaking.
Gland Ring:
This ring also fits the plunger and helps support the
plunger weight. Discard it if bore is worn, rough or out-
of-round. Lightly oil the ring before insertion.
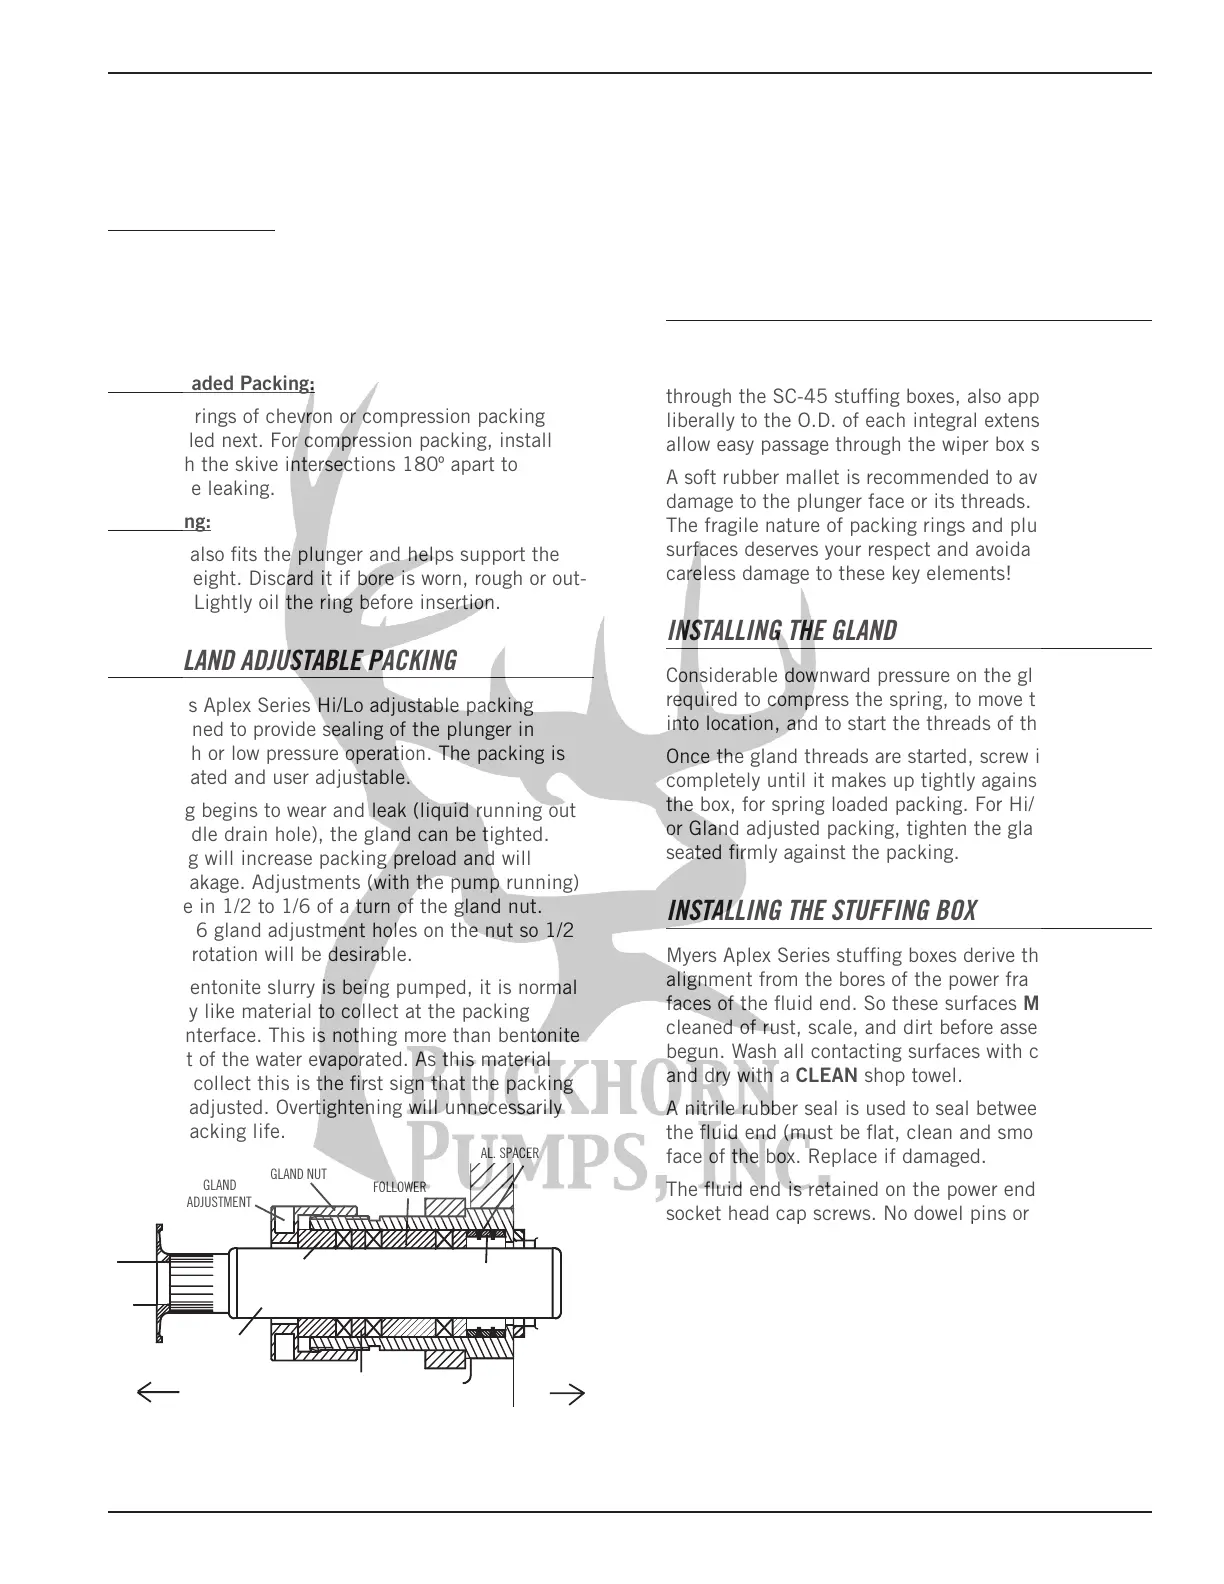
HI/LO GLAND ADJUSTABLE PACKING
The Myers Aplex Series Hi/Lo adjustable packing
was designed to provide sealing of the plunger in
either high or low pressure operation. The packing is
nonlubricated and user adjustable.
If packing begins to wear and leak (liquid running out
of the cradle drain hole), the gland can be tighted.
Tightening will increase packing preload and will
control leakage. Adjustments (with the pump running)
should be in 1/2 to 1/6 of a turn of the gland nut.
There are 6 gland adjustment holes on the nut so 1/2
to 1 hole rotation will be desirable.
When a bentonite slurry is being pumped, it is normal
for a putty like material to collect at the packing
plunger interface. This is nothing more than bentonite
with most of the water evaporated. As this material
begins to collect this is the first sign that the packing
could be adjusted. Overtightening will unnecessarily
shorten packing life.
The Hi/Lo packing is totally retrofitable to existing
Myers Aplex Series pump. Use the drawing for proper
reassembly order.
Initial gland tightening should be 2 to 2-1/4 turns past
hand tight. If there is a grease fitting in the stuffing
box, remove it. Use a 1/8" pipe plug and plug the hole.
CAUTION: Make sure the plug does not protrude down
into the I.D. of the stuffing box. If the plug is too long,
grind off the end and try again.
INSERTING THE PLUNGER
Apply oil liberally to plunger O.D. and lightly tap it
through the packing. When introducing the plunger
through the SC-45 stuffing boxes, also apply oil
liberally to the O.D. of each integral extension rod to
allow easy passage through the wiper box seals.
A soft rubber mallet is recommended to avoid any
damage to the plunger face or its threads. Remember:
The fragile nature of packing rings and plunger
surfaces deserves your respect and avoidance of
careless damage to these key elements!
INSTALLING THE GLAND
Considerable downward pressure on the gland is
required to compress the spring, to move the packing
into location, and to start the threads of the box.
Once the gland threads are started, screw it down
completely until it makes up tightly against the face of
the box, for spring loaded packing. For Hi/Lo, J-Style
or Gland adjusted packing, tighten the gland until it is
seated firmly against the packing.
INSTALLING THE STUFFING BOX
Myers Aplex Series stuffing boxes derive their
alignment from the bores of the power frame and the
faces of the fluid end. So these surfaces MUST be
cleaned of rust, scale, and dirt before assembly is
begun. Wash all contacting surfaces with clean solvent
and dry with a CLEAN shop towel.
A nitrile rubber seal is used to seal between the face of
the fluid end (must be flat, clean and smooth) and the
face of the box. Replace if damaged.
The fluid end is retained on the power end by two
socket head cap screws. No dowel pins or other
alignment techniques are needed since the power
frame provides alignment to the stuffing boxes
individually. These two screws should be tightened
before the stuffing boxes.
SUPPORT RING
FOLLOWER
GLAND
ADJUSTMENT
HOLE
GLAND NUT
GLAND RING
ELASTOMER SPRING
POWER END
FLUID END
PLUNGER
 Loading...