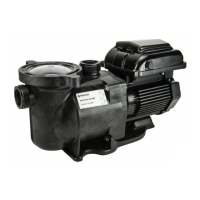
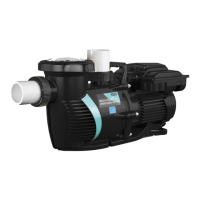
WHISPERFLOXF
®
VS and MAX-E-PROXF
®
VS Commercial Variable Speed Pump Installation and User’s Guide
2
USING THE DRIVE KEYPAD
1. Program Buttons - Used to select a desired program. When the LED above a Program Button is illuminated that
program has been selected or is currently running. A blinking LED indicates that an External Control has activated
that program.
2. External Control Only LED - Indicates whether the pump is in External Control mode. When LED is illuminated
the drive-programmed schedules are disabled and only commands from digital inputs will be acted upon.
3. Start/Stop LED - Indicates whether the pump is in a “Start State”. When illuminated the pump can be started at
any time by external controls, drive-programmed schedules or manual inputs. When the pump is stopped and the
LED is not illuminated, the pump is unable to run from any type of input.
Functionality may vary based on other active features such as external control only mode or keypad lockout.
4. Start/Stop Button - Used to start and stop the pump. When the pump is stopped and the Start/Stop LED is not
illuminated, the pump is unable to run from any input.
5. Display Parameter LEDs - When illuminated, LED indicates the information being displayed on screen. A blinking
LED indicates that the parameter is currently being edited.
6. Display Button - Used to toggle between the dierent available display modes. This button is also used to set the
clock, screen brightness and pump address.
7. Quick Clean Button - Used to run the speed and duration programmed for Quick Clean. When the LED above
the Quick Clean Button is illuminated a Quick Clean cycle is active.
8. Power LED - When illuminated, LED indicates that there is live power being supplied to the pump.
9. “+” and “-” Arrows - Used to make adjustments to the pump settings. The “+” arrow increases a value, while “-”
decreases a value. Pressing and holding either arrow button will increase or decrease incremental changes faster.
(1) Program
Buttons
(2) External Control
Only LED
(4) Start/Stop Button
(8) Power LED
(5) Display Parameter
LEDs
(6) Display Button
(7) Quick Clean Button
(9) “+” and “-” Arrows
(3) Start/Stop LED
Before operating the pump for the rst time, the pump’s internal clock and operational schedules must be programmed.
Please refer to Setting the Clock and Pump Address and Programming Custom Schedules, page 8, for instructions
regarding the programming of this pump for scheduled operation.
This pump is capable of maintaining either constant speeds or constant ows. The default setting is Speed Control. For
information on conguring the pump for Flow Control via 4-20mA owmeter, refer to Operating the Pump in Flow Mode,
page 14.
The pump can be programmed and controlled from the drive keypad. Pump features and settings are also accessed
using this keypad.
Note: Always close the keypad cover after use. This will prevent damage to the keypad and other drive components.
Only press keypad buttons with your ngers. Using screwdrivers, pens or other tools to program the pump will damage the keypad.
If power is connected to the pump motor, pressing any of the following buttons referred to in this section could result in the motor
starting. Failure to recognize this could result in personal injury or damage to equipment.
 Loading...