2021-04
40
VisuNet FLX Panel
Maintenance
7.
These installation steps are only relevant when installing a new BPC3200-*:
8.
To configure the screen resolution set your DIP switches correctly (Refer to the BPC3200-*
manual for detailed information on the DIP switch positions.)
9.
In case you want to operate the serial interface ports in any other mode than RS-232 configure
your serial ports by setting your Jumpers correctly and adjusting the settings in BIOS. Refer to
the BPC3200-* Manual for further information on the serial port configuration.
10.
Leave the side cover of your BPC3200-* open/open the rear cover of your DMU3200-*.
11.
Orient the computer unit to the screw holes to be mounted. Guide the cables of the DPU
through the opening provided.
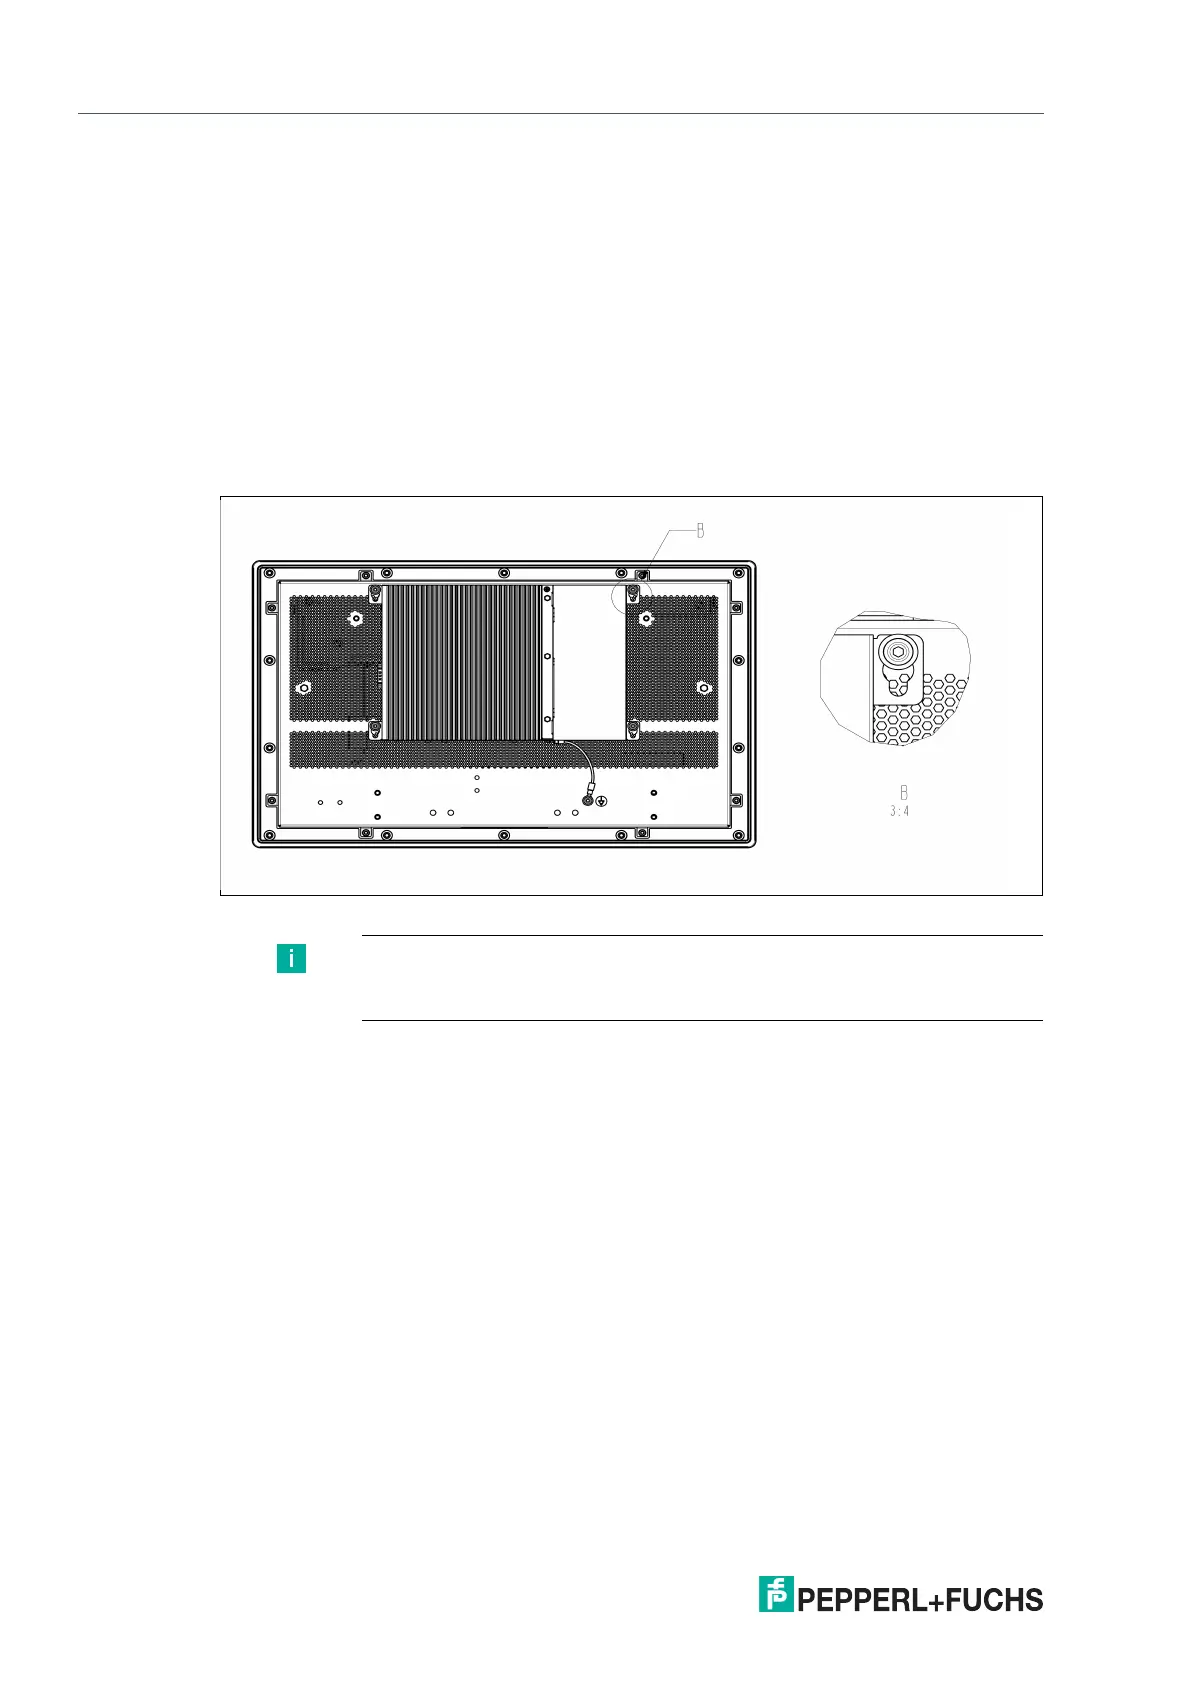
12.
Push the computing unit up to the top of key holes. Use a torque of 4 Nm for tightening the four
screws of the computer unit. (See graphic "Assembling")
Figure 7.7 Assembling
13.
Connect the USB, LVDS and LED inverter cable back to the computing unit.
Note
When mounting back the BPC3200-* or DMU3200-* to the DPU, push all the
way down - leave no clearance at the top of the screw bracket.
 Loading...