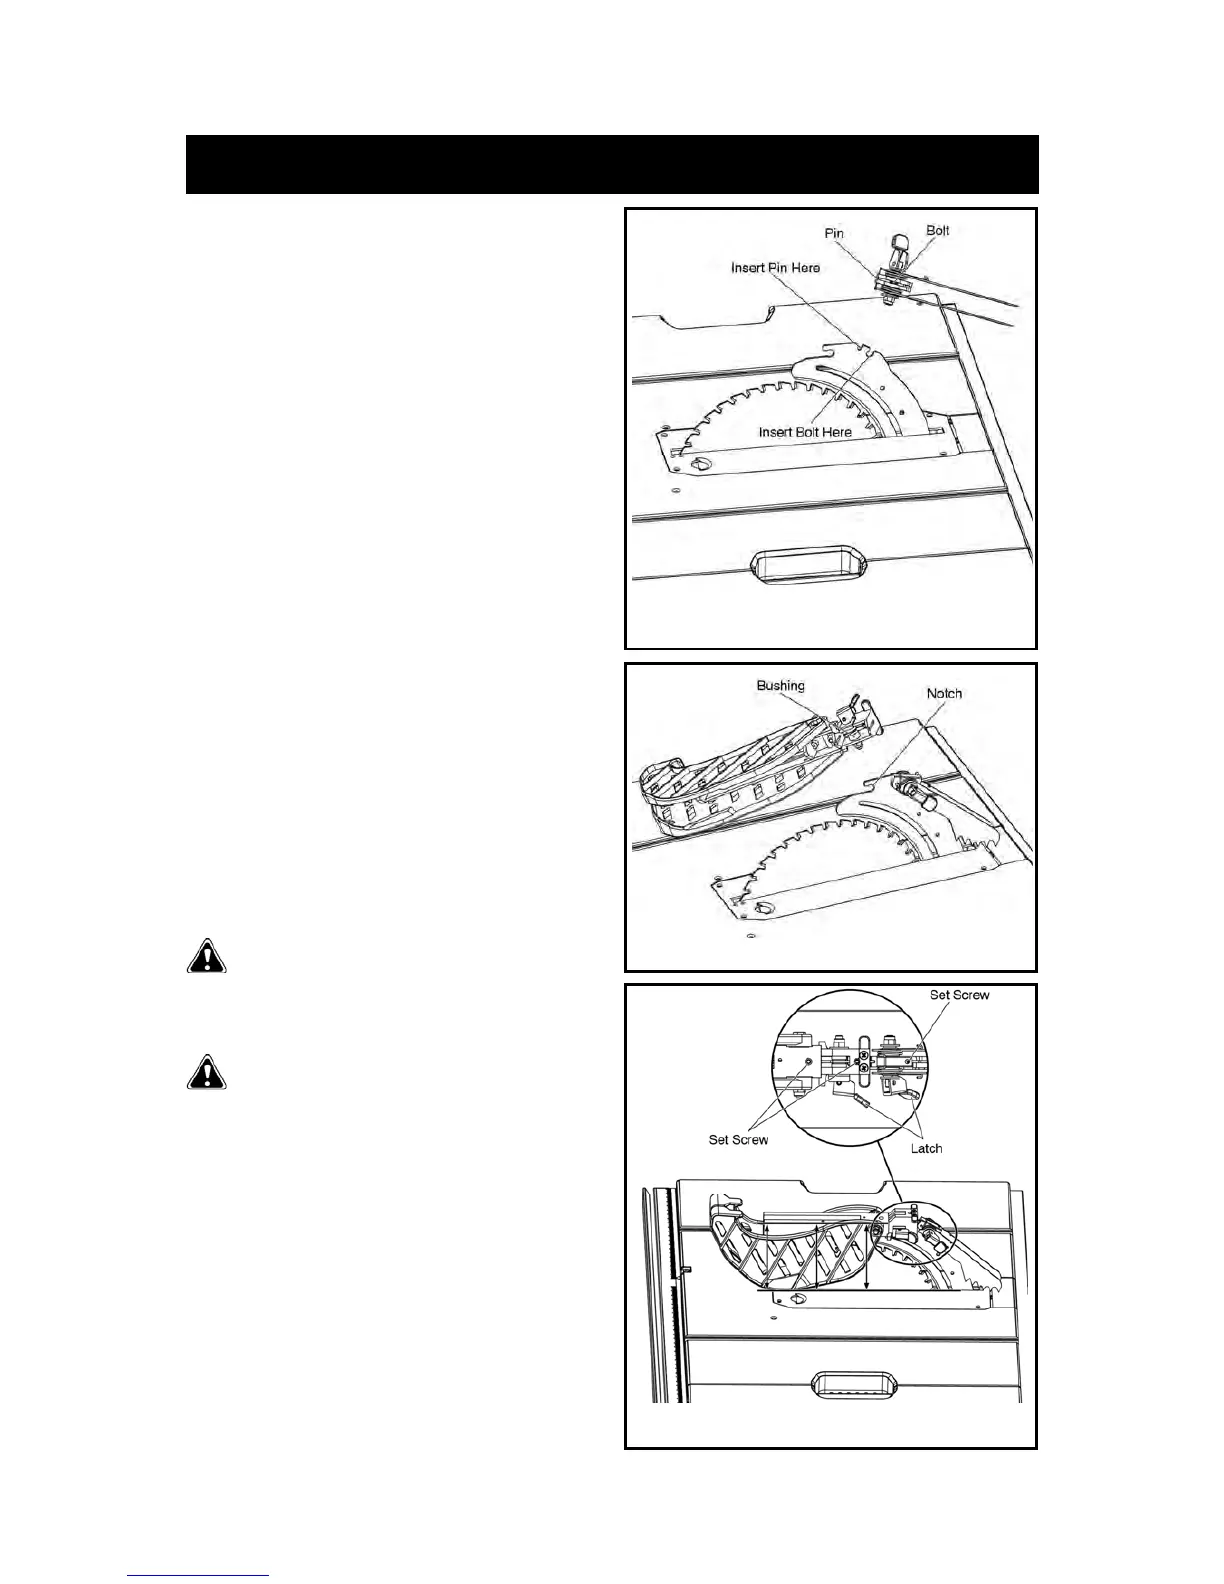
To install anti-kickback pawls:
• Unplug the saw.
• Place the anti-kickback pawls assembly onto riving knife at
notches indicated. The spring pin is placed in the front notch
and bolt is placed in the rear notch.
• Press anti-kickback pawls assembly completely down and
push latch down to secure in position.
To install the blade guard:
• Unplug the saw.
• Place the slot of blade guard body over the riving knife.
slot of bushing is placed in the notch indicated in Figures 22
and 24.
• The bushings have a beveled edge and must be located in
the center of the notch to lock properly.
• Pull guard fully back onto knife and push latch down to lock
guard into position.
NOTE: Blade guard body should be parallel to the table.
If not, adjust the set screws with 2 mm hex key (not supplied)
as necessary. (Refer to figure 25)
NOTE: The teeth of anti-kickback pawls should
touch table surface. Use set screw with 2 mm hex
wrench (not supplied) to adjust if needed. (Refer to
figure 25)
SSEMBLY
Figure 23 - Attach Kick-back Pawls Assembly
Figure 24 - Attach Blade Guard Assembly
Figure 25 - Blade Guard is Parallel to the Table
_ 22 _



 To Next Page