(Table 14, contd)
Alternator
belt
645 ± 44 N
(145 ± 10 lb)
512 ± 44 N
(115 ± 10. lb)
311 ± 44 N
(70 ± 10 lb)
Fan Belt
801 ± 44 N
(180 ± 10 lb)
645 ± 44 N
(145 ± 10 lb)
378 ± 44 N
(85 ± 10 lb)
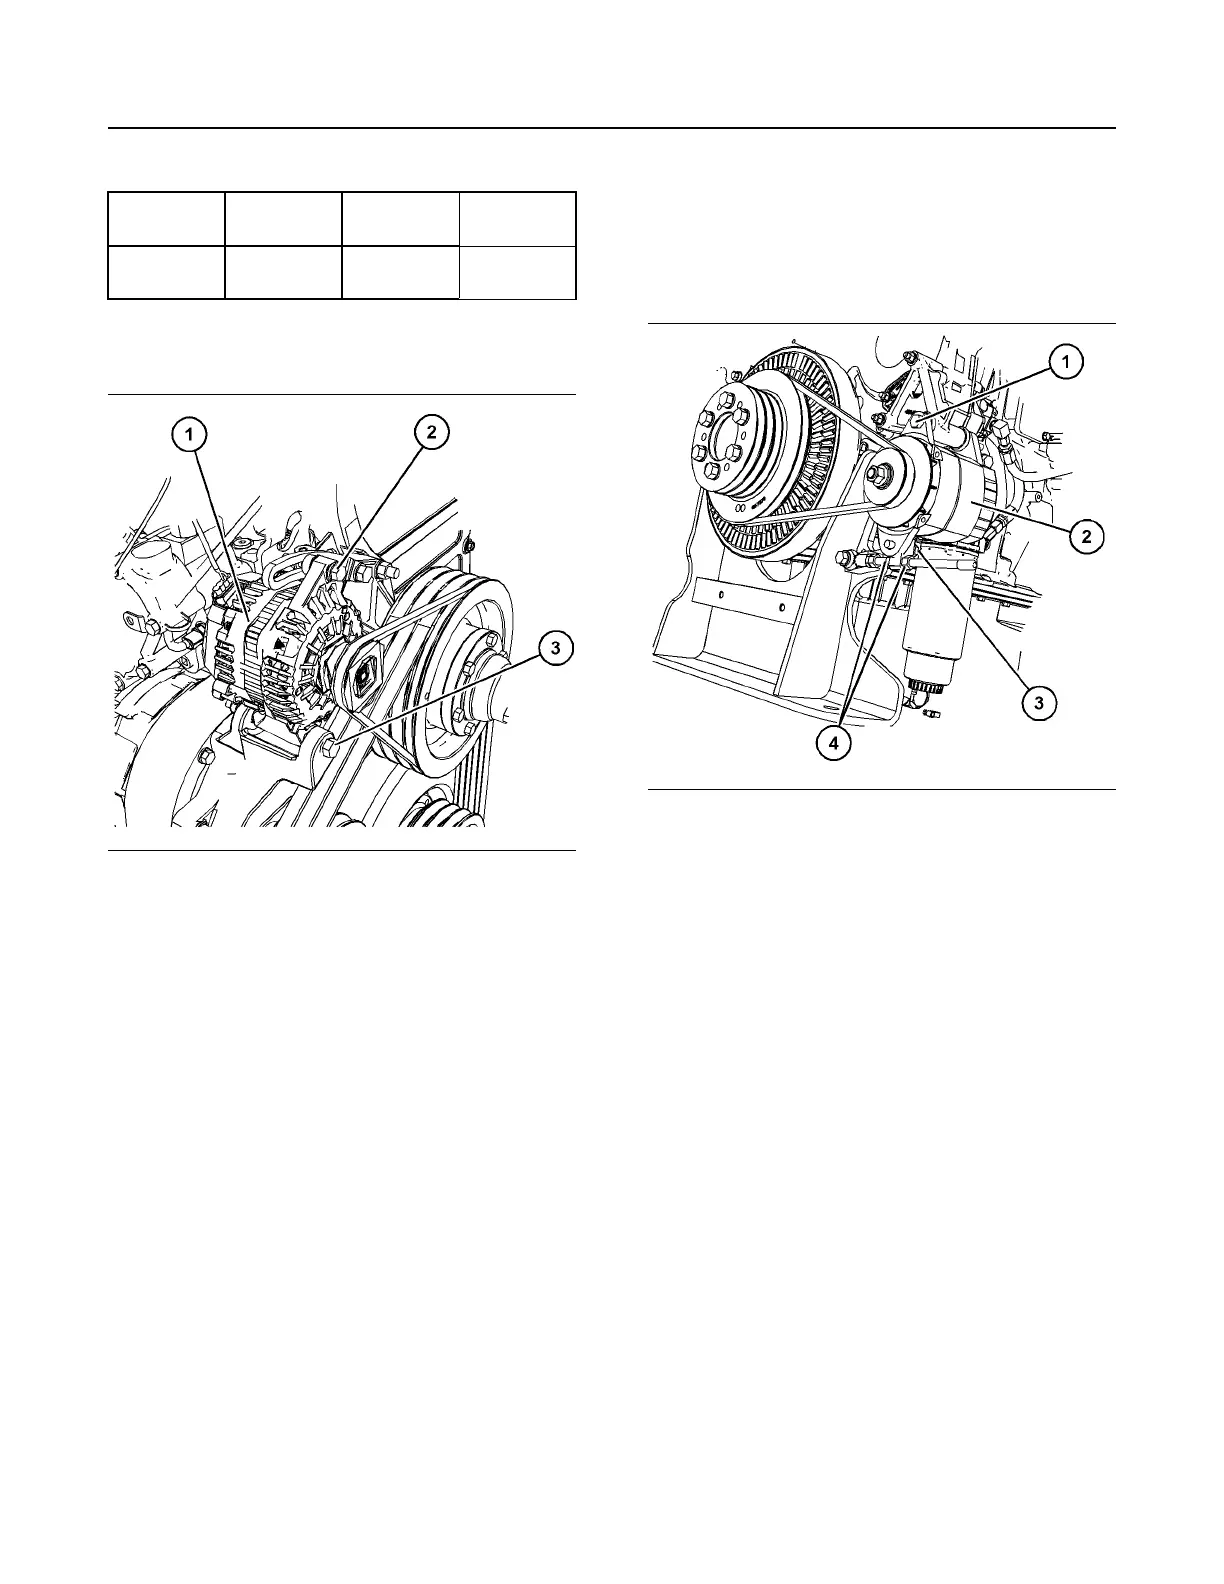
Alternator Belt Adjustment 2806C
Illustration 35 g06108813
Typical example
1. Remove guards, refer to the Original Equipment
Manufacture (OEM) for the correct procedure.
2. Loosen nut and bolt (2) and loosen nut and bolt
(3).
3. Adjust alternator (1) to obtain the correct tension
on the belt. Use a suitable belt tension tool to set
the belt tension.
4. Tighten nut and bolt (2) and tighten nut and bolt
(3).
5. Tighten nut and bolt (2) to a torque of 47 N·m
(34 lb ft). Tighten nut and bolt (3) to a torque of
70 N·m (51 lb ft).
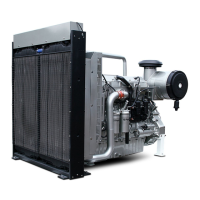
Alternator Belt Adjustment 2806D
Illustration 36 g06109400
2806D engine view
1. Remove the belt guard, refer to OEM for the
correct procedure.
2. Loosen nut and bolt (1) and loosen bolt (3).
3. Loosen one of the nuts (4). Adjusting nuts (4) will
move the alternator (2).
4. Adjust nuts (4) for the correct tension on the belt.
Use a suitable belt tension tool to set the belt
tension.
5. With the correct tension set, tighten nut and bolt
(1) and tighten bolt (3).
6. Tighten nut and bolt (1) to a torque of 105 N·m
(77 lb ft).
7. Tighten bolt (3) to a torque of 105 N·m (77 lb ft).
8. Tighten nuts (4) to a torque of 105 N·m (77 lb ft).
9. Reinstall the belt guard, refer to OEM for the
correct procedure.
SEBU9074-01
67
Maintenance Section
Belts - Inspect/Adjust/Replace