F5 Corpus
Repairs - Chassis
Removing drive gear cover
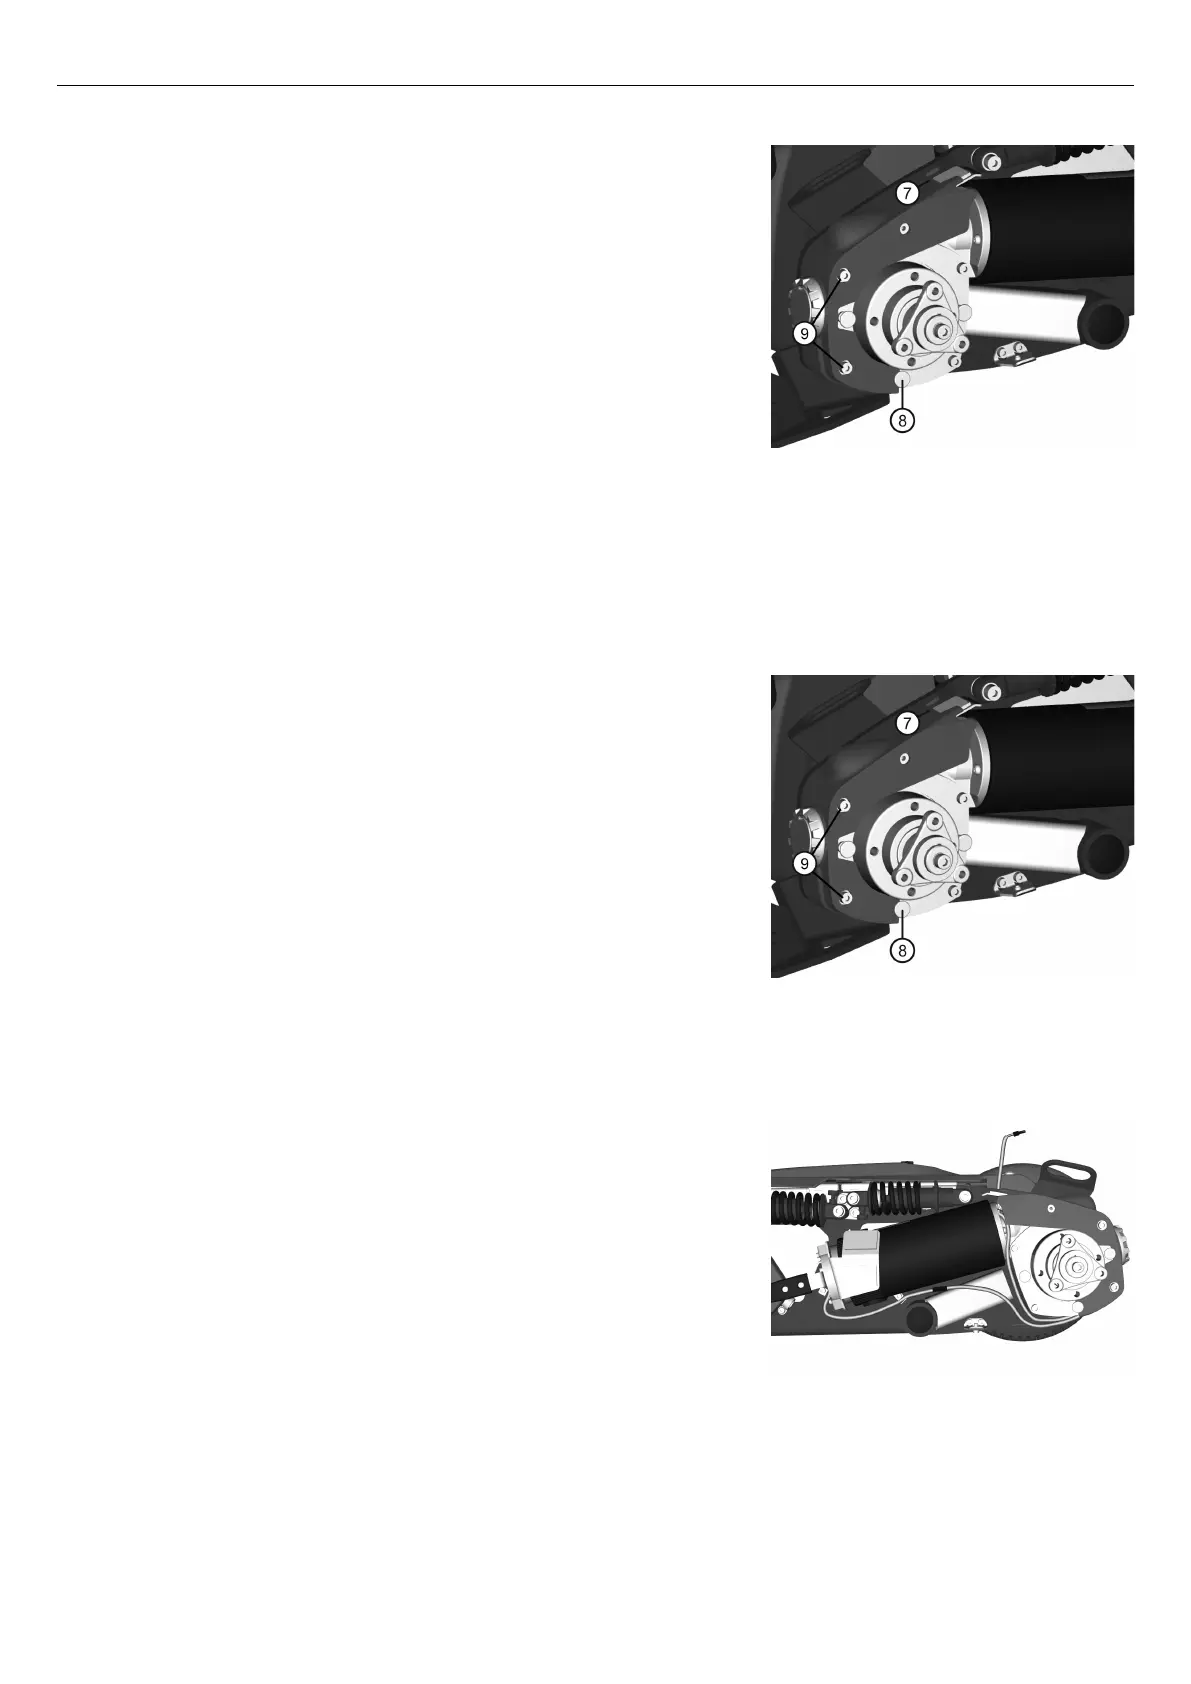
Figure 201. The drive gear cover is assembled with
one hook and loop fastener at the top (6) and a fixing
point at the bottom (7).
The drive gear cover is assembled with a hook and loop fastener at the
top. The front fender needs to be removed before removing the drive
gear cover. See
Removing front fender
, Page 73.
1. On wheelchair with VS-seat, raise the seat to standing position
making the support wheels go down towards the floor.
2. Carefully pull the upper edge of the drive gear cover upwards until
the hook and loop fastener (7) releases. Then move the cover
forward to release it from the fixing point (8) and simultaneously a
bit outwards to make the screw heads (9) go out of the recesses of
the drive gear cover.
On wheelchairs with indicators, disconnect the indicator by
dividing the connector on the cable.
4.2.1.5 Assembly of the drive package covers including
front fender
Mounting drive gear cover
Figure 202. The drive gear cover is assembled with
one hook and loop fastener at the top (7) and a fixing
point at the bottom (8).
The drive gear cover is assembled with one hook and loop fastener at
the top (7) and a fixing point at the bottom (8).
1. On wheelchair with VS-seat, raise the seat to standing position
making the support wheels go down towards the floor.
2. Position the cover on the drive gear making sure the fixing point
(8) is correct positioned in the groove of the cover and that the
screw heads (9) are positioned in the recesses of the cover.
Figure 203. On wheelchairs with lights and indicators,
connect the indicators cable to the connector marked
front lights and turn signal. Position the other cable
around the gear and through the slot on top of the
cover.
3. Position the cover and press it from above against the gear until the
hook and loop fastener attaches with a "Click".
4. On wheelchairs with lights and indicators, connect the indicators
cable to the connector marked front lights and turn signal. Position
the other cable around the gear and through the slot on top of the
cover.
74
 Loading...