Adjustment
12 - 12
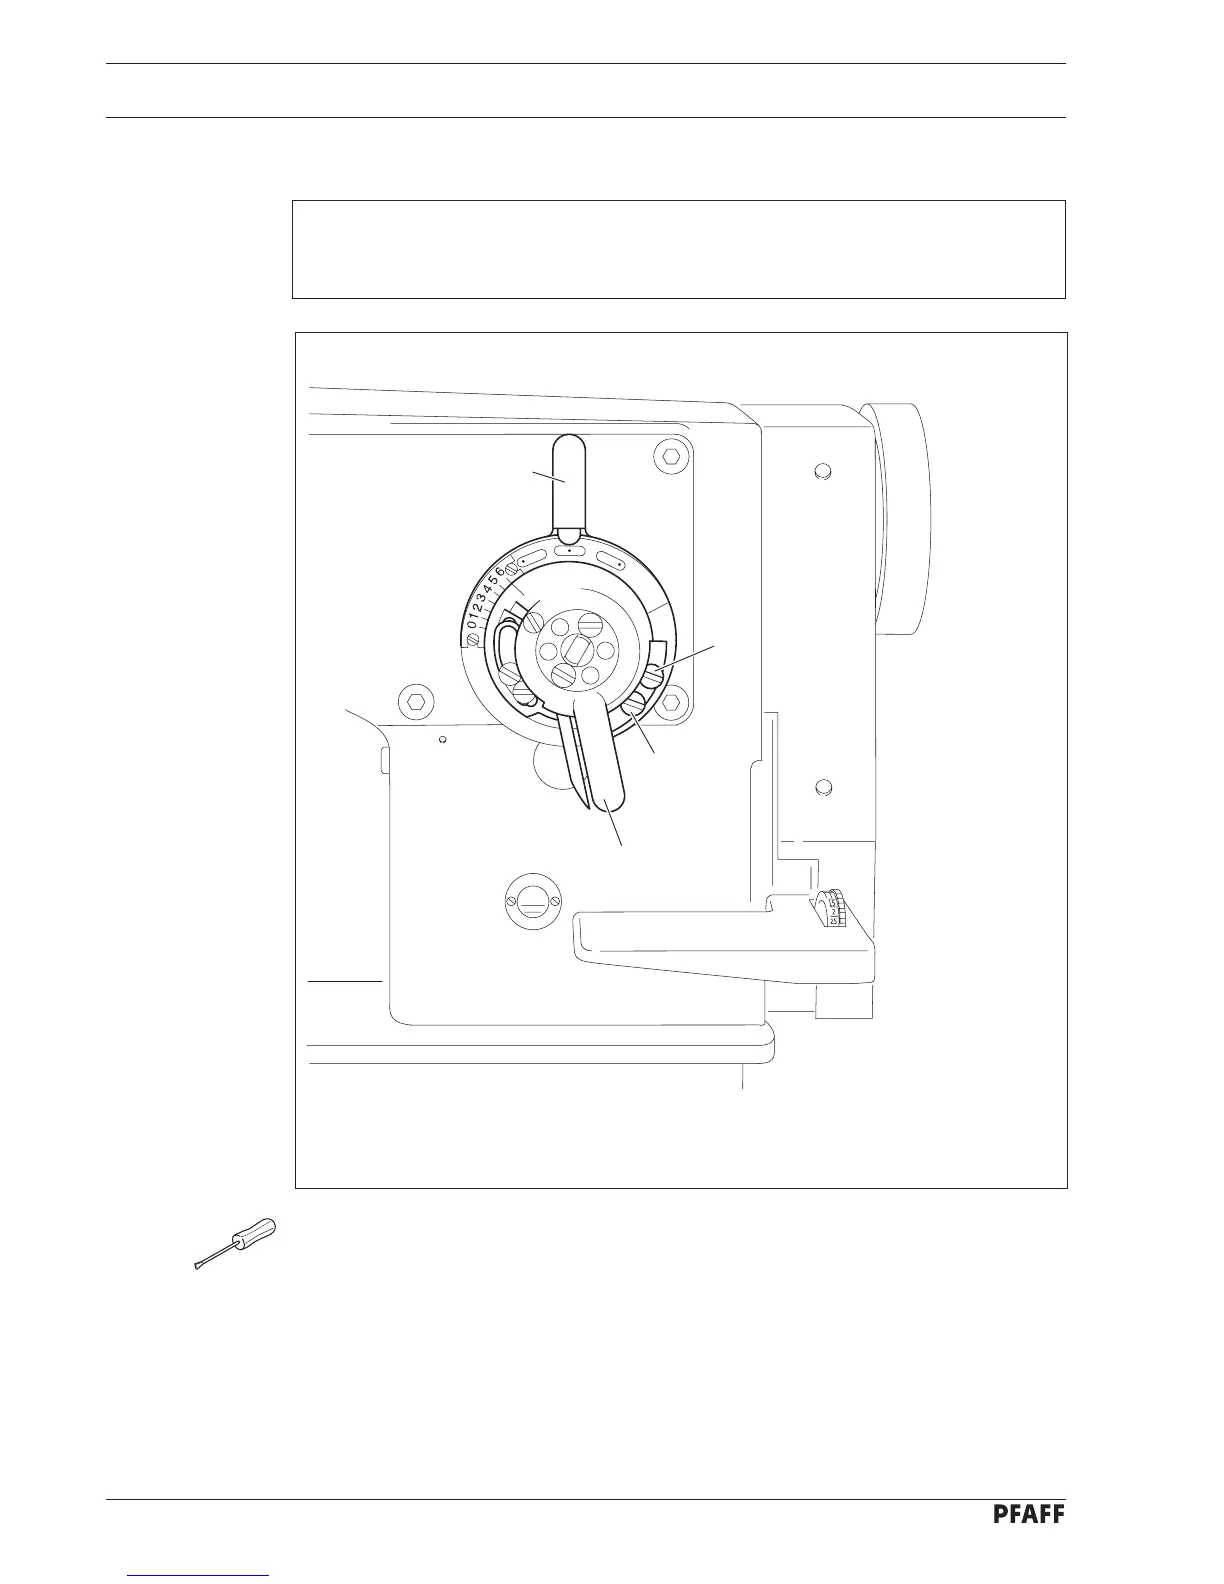
● Loosen screws 1 and 2.
● Set the needle position adjustment lever 3 to "middle" and the zigzag stitch adjustment
lever 4 at the largest zigzag stitch.
● Place a piece of paper underneath the presser foot and perforate it to the left and right
with the needle.
● Set the zigzag stitch adjustment lever 4 at "0" and move the needle position adjustment
lever 3 to the right/left until the needle is exactly over the perforations made in the last step.
● For the left needle-position bring screw 1 to a position where it touches and tighten it
and for the right needle-position do the same with screw 2.
12.05.10 Needle position adjustment lever
Requirement
The left and right throws of the needle must be the same size at the largest zigzag stitch
setting and at the left or right needle position.
Fig. 12 - 11
3
1
2
4
 Loading...