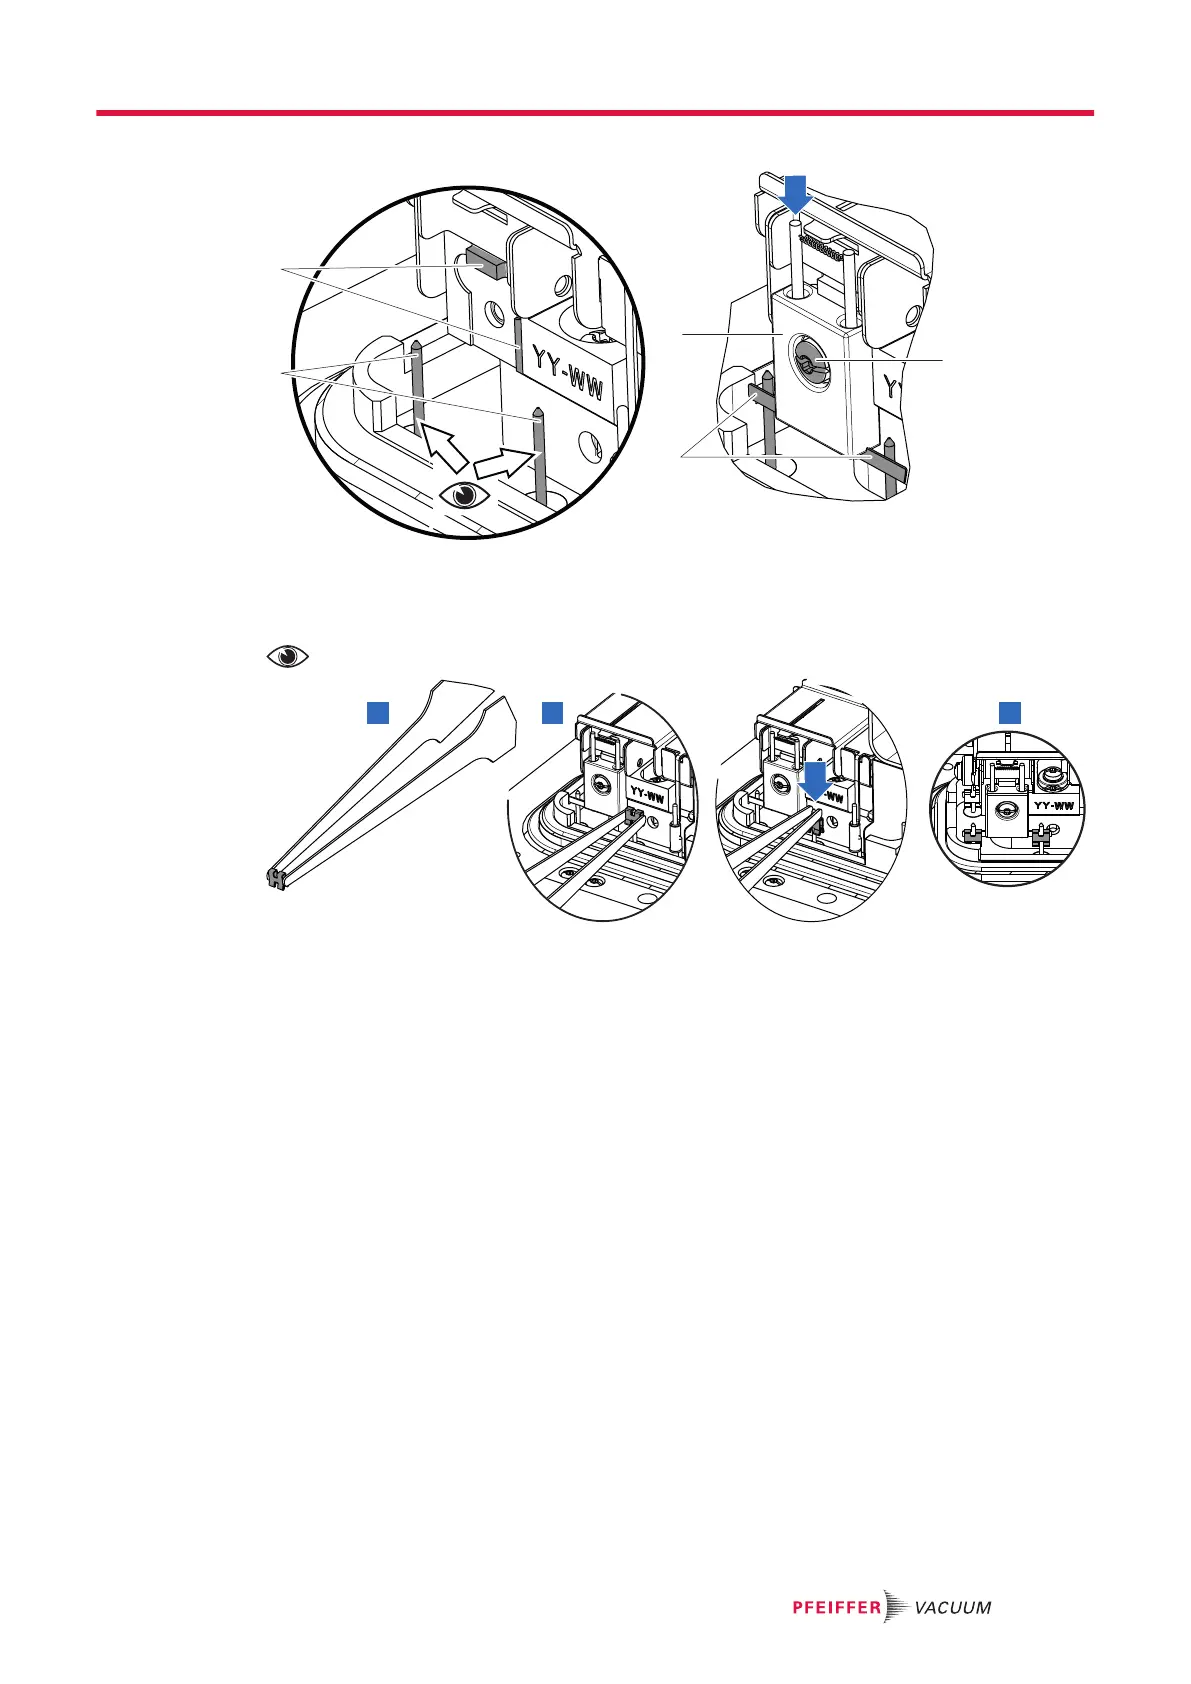
Reassembly
F1 Filament 1 3 Connectors
1 Fixing screw and washer 4 Centering stops
2 Filament strip
The connectors are perpendicular to the supporting surface and parallel to each other.
1. Place the new filament on its housing against both centering stops. Fix it with the screw and
washer provided with the filament.
2. Fit the fastening clips on the connectors on each side of the filament.
3. Reassemble the analyzer cell (see chapter “Disassembly/reassembly of the analyzer cell”).
4. Update the replaced filament maintenance counter from the menu (see chapter “Information” of
the operating instructions).
5.9 Pirani gauge replacement
Prerequisites
1. Put the detector on ‘Stand-by’ mode.
2. Make an air inlet by pressing on the [VENT] function key or on the corresponding pictograph on
the main screen.
3. Remove the blanking plate from the inlet port.
4. Remove the front cover (see chapter "Front cover disassembly/reassembly").
Service - Maintenance
21/36