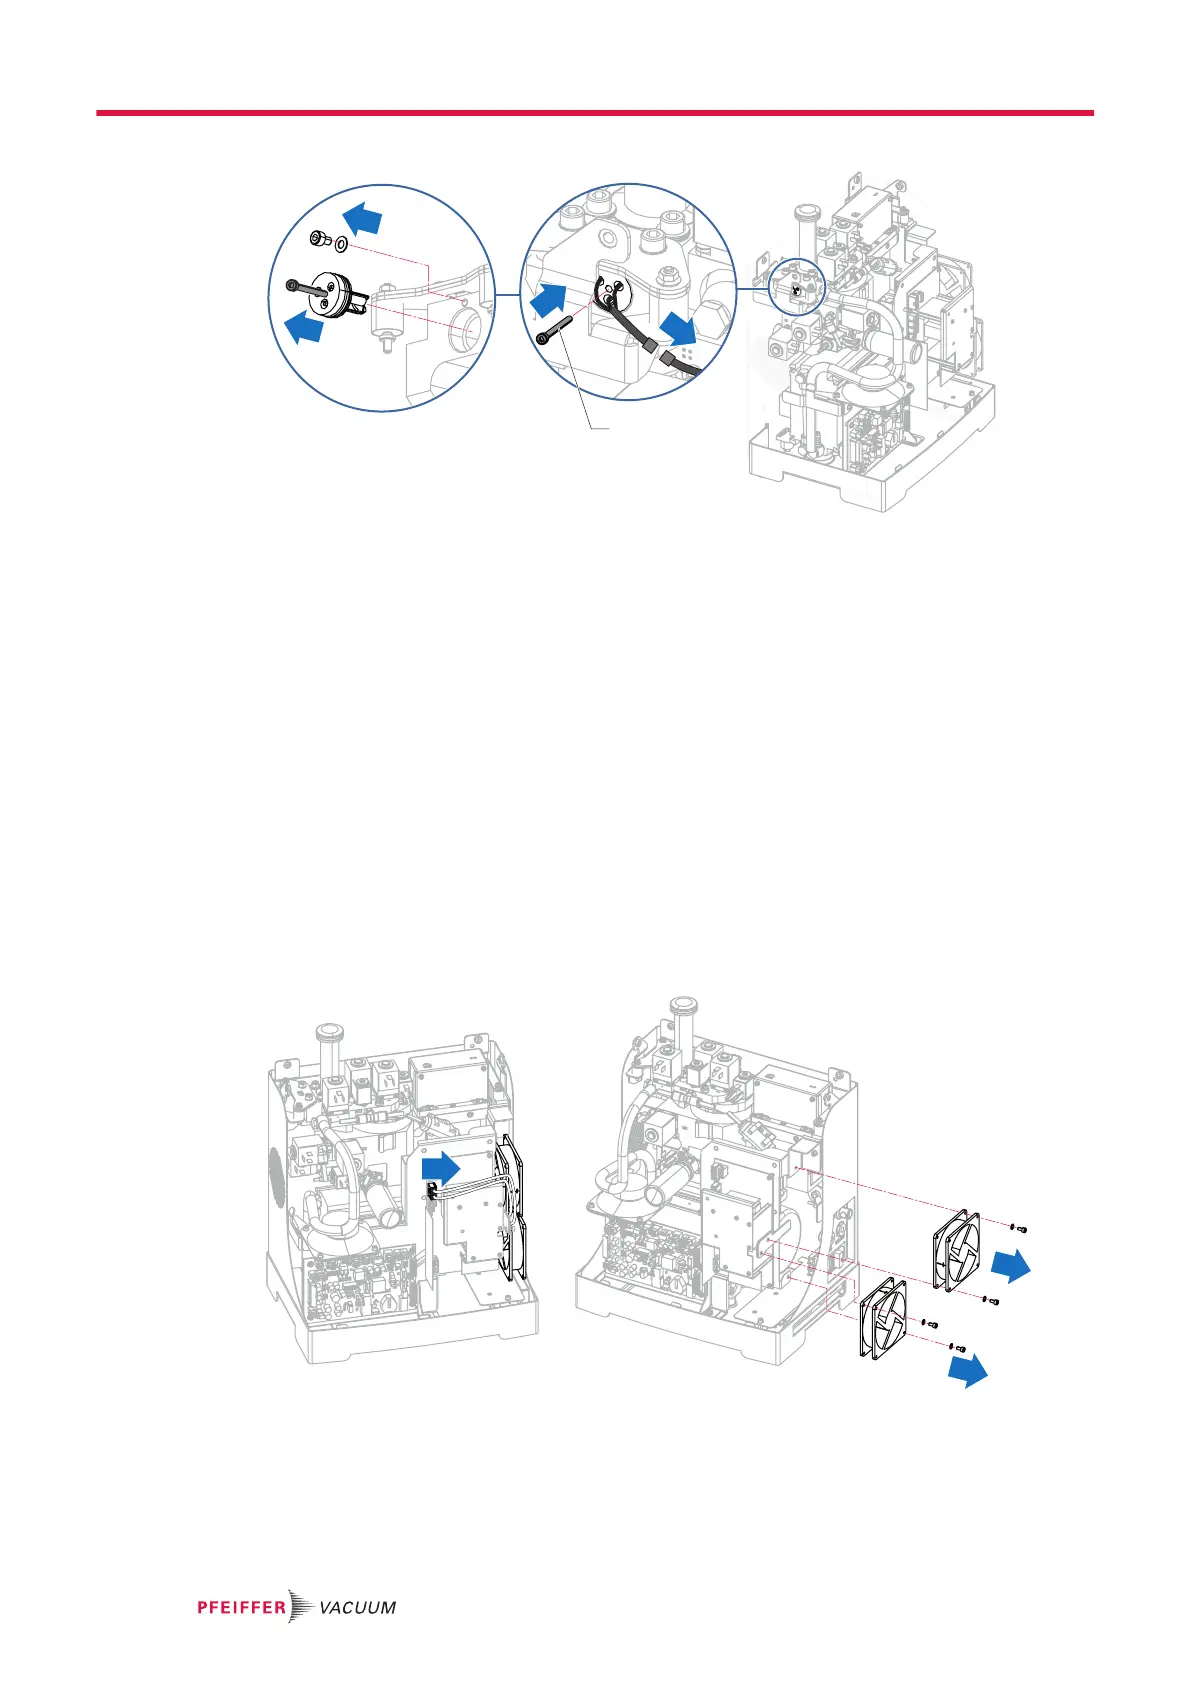
Pirani gauge disassembly
1 CHc screw (CHc screw in the maintenance kit supplied with the detector)
Pirani gauge reassembly
1. Follow the disassembly steps in reverse.
–
When inserting the new gauge, do not bring the gauge filaments into contact with the vacuum
block.
2. Make adjustments to the gauge (see chapter “Calibration of the internal Pirani gauge” of the oper-
ating Instructions).
Tightness test after Pirani gauge maintenance
1. Put the detector into cycle.
2. Spray a light flow of Helium 4 around the gauge.
–
leak rate measured < 3 · 10
-10
mbar·l/s (3 · 10
-11
Pa·m
3
/s).
5.10 Fan replacement
Prerequisite
►
Remove the cover (see chapter “Cover disassembly/reassembly”).
Fans disassembly
Service - Maintenance
22/36