EN
Segurança e harmonia
ININTERRUPTA
2. Installation and setup
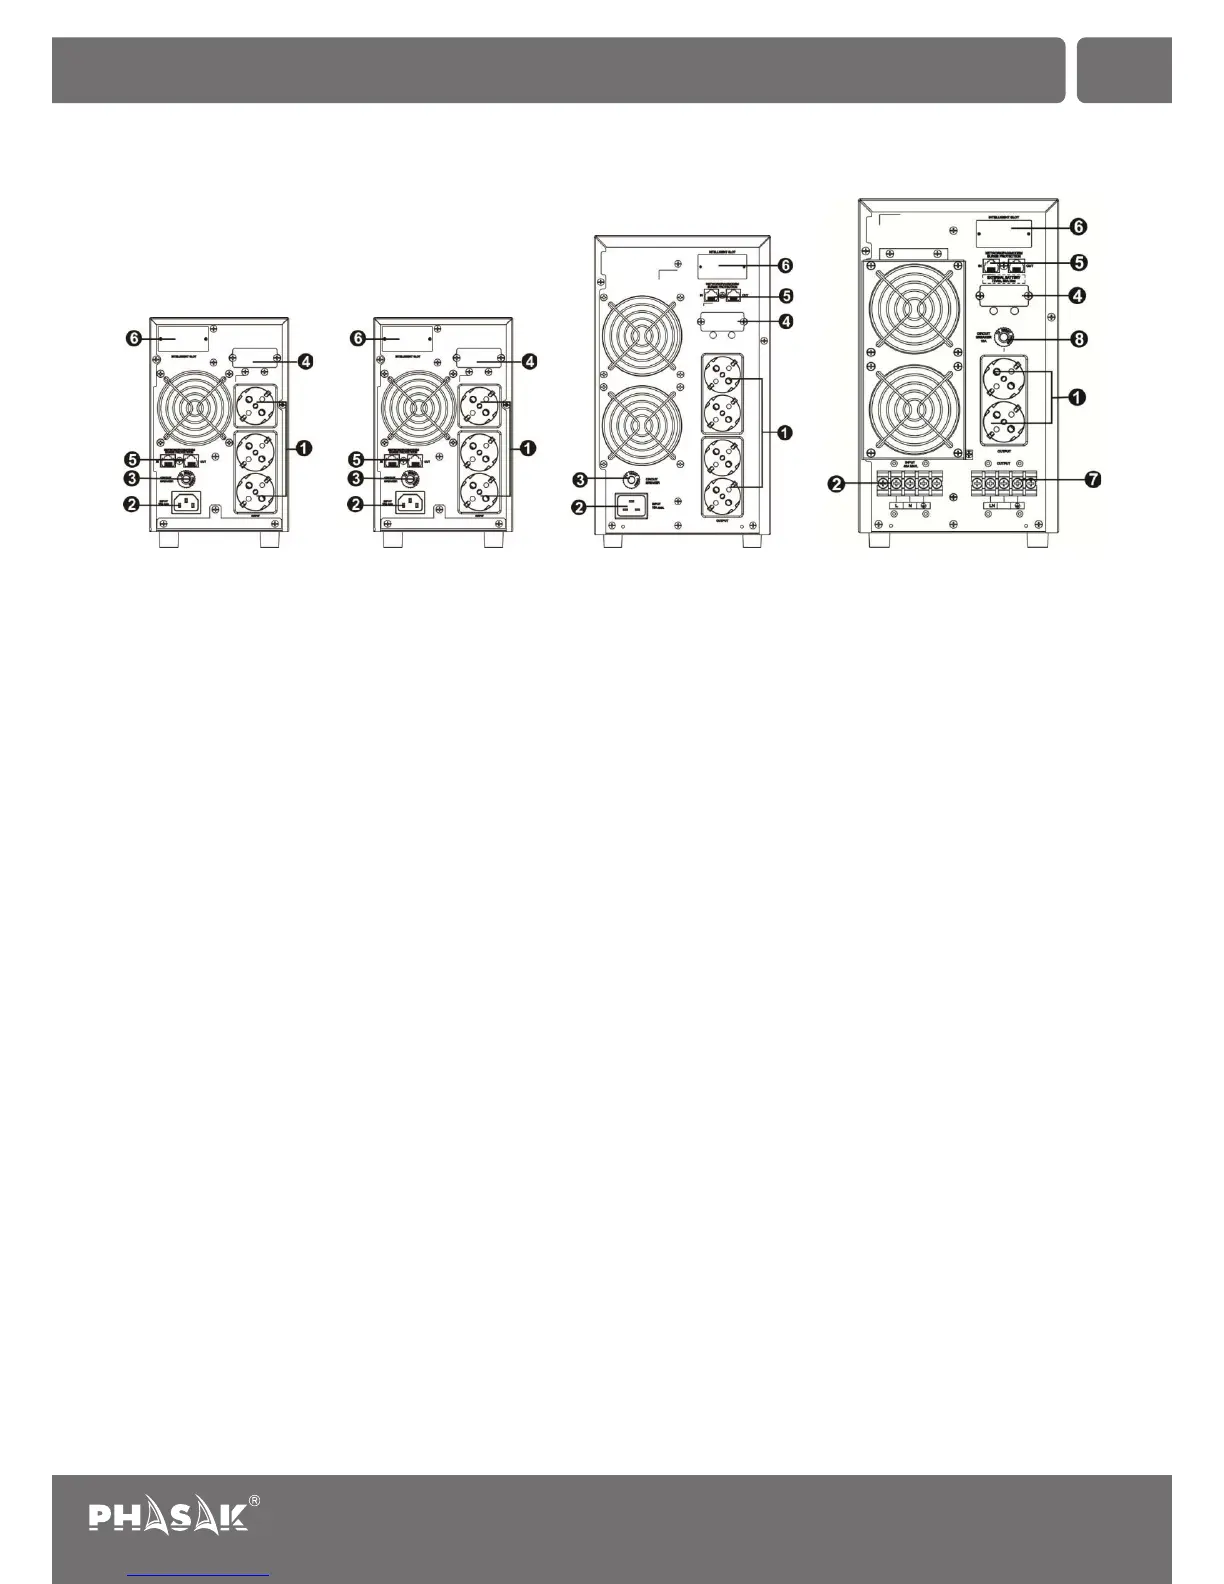
2.1. Rear panel view
1. Output receptacles | 2. AC input | 3. Input circuit breaker | 4. External battery connection (depends on the model)
5. Modem/Phone line/Network surge protection | 6. Intelligent slot with RS-232 port (optional USB or SNMP)
7. Output terminals | 8. Output circuit breaker
2.2. Setup the UPS
Step 1: UPS input connection
• Plug the UPS into a two-pole, three-wire, grounded receptacle only. Avoid using extension cords.
• For 208/220/230/240VAC models: The power cord is supplied in the UPS package.
Note: For Low voltage models: Check if the site wiring fault indicator lights up in LCD panel. It will be illuminated when
the UPS is plugged into an improperly wired utility power outlet (Refer to Troubleshooting section).
Step 2: UPS output connection
• For socket-type outputs, there two kinds of outputs: programmable outlets and general outlets. Please connect non-
critical devices to the programmable outlets and critical devices to the general outlets. During power failure, you may
extend the backup time to critical devices by setting shorter backup time for non-critical devices.
• For terminal-type input or outputs on the 6K UPS, please follow below steps for the wiring configuration:
a) Remove the small cover of the terminal block.
b) Suggest using AWG14 or 2.1mm2 power cords.
c) Upon completion of the wiring configuration, please check whether the wires are securely affixed.
d) Put the small cover back to the rear panel.
35
Uninterruptible Power Supply
PH 9210 | PH 9220 | PH 9230 | PH 9260
PH 9210 (1K) PH 9220 (2K) PH 9230 (3K)
PH 9260 (6K)