Mechanical Instructions
EN 15TPM7.1E LA 4.
2011-Aug-19
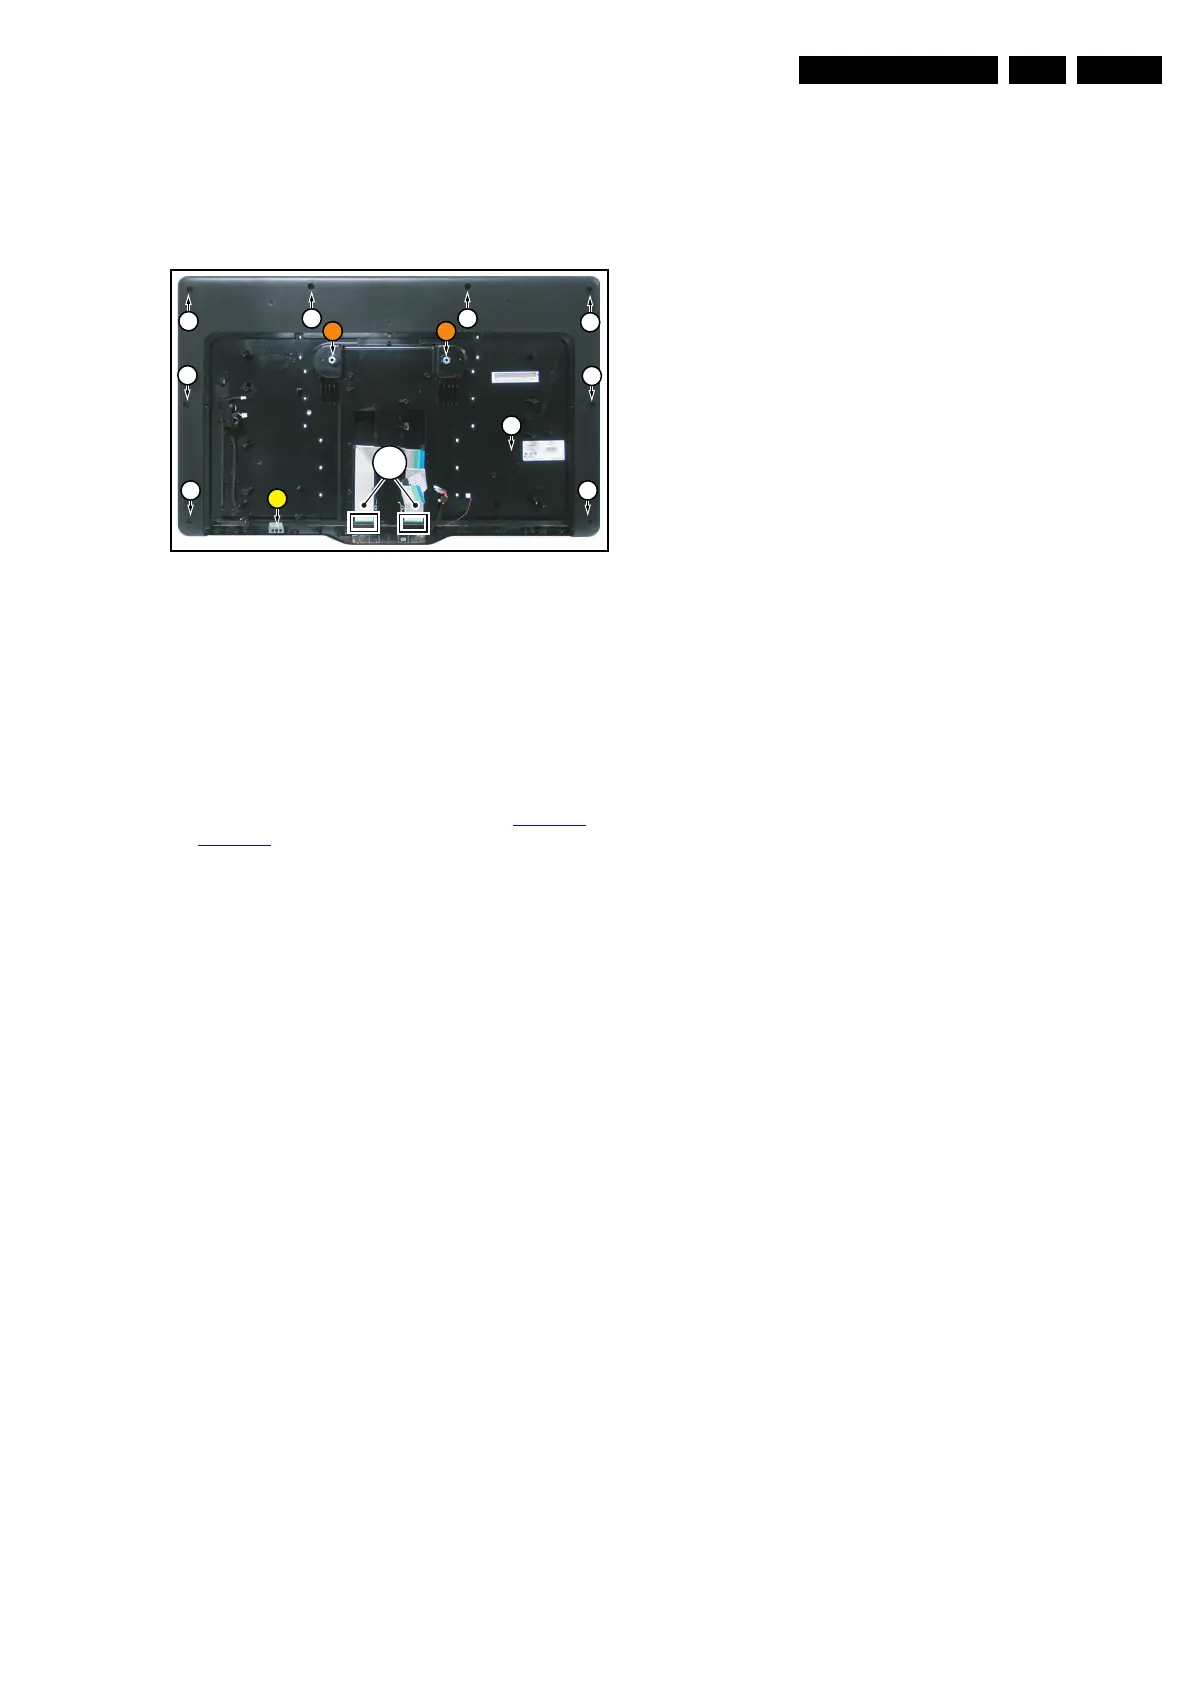
7. Remove the fixation screws [2] at the bottom left of the
panel that secure the LCD panel with the bezel. Remove
metal clip from its position. Be careful not to break the
clicks that secure the metal brackets.
8. Remove the other fixation screws [3] and [4].
9. Lift the LCD Panel from the bezel.
When defective, replace the whole unit.
Figure 4-12 LCD panel removal
4.4 Set Re-assembly
To re-assemble the whole set, execute all processes in reverse
order.
Notes:
• While re-assembling, make sure that all cables are placed
and connected in their original position. See Figure 4-1
to
Figure 4-4
.
• Pay special attention not to damage the EMC foams on the
SSB shields. Ensure that EMC foams are mounted
correctly.
19090_109_110418.eps
110418
3
1
2
3
3
3
3 3
3
3
3
4
4



 To Next Page