Mounting and Connecting Power 11
PL House Light MKII LED Luminaires
User’s Manual
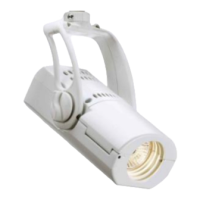
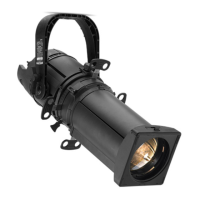
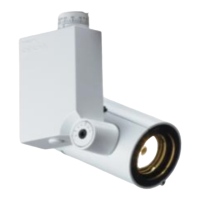
Step 6. As shown in Figure 8, adjust luminaire beam spread as desired by loosening the lens tube / zoom
adjustment knob and moving lens tube in or out. Once adjustment is complete, re-tighten lens tube / zoom
adjustment knob. Note, beam spread can be adjusted at anytime throughout the installation process and
after-installation as desired.
Figure 8: Lens Tube (Beam Spread Adjustment) Setting
CAUTION: If installation is performed prior to the ceiling being painted DO NOT install the trim ring / reflector
assembly. Properly mask the end of the fixture being exposed to paint to ensure that the lens and the interior of the
unit is protected from over spray and debris.
Step 7. To finish installation, fit trim ring/reflector assembly up and through hole where luminaire assembly is
installed. Firmly press trim ring/reflector assembly into place. Note, retaining clips on sides of trim
mounting ring assembly will "capture" the trim ring / reflector assembly.
Lens Tube / Zoom
Lens Tube
(Beam Spread
Adjustment Knob
Adjustment)
Table 1: Beam Spread Chart
Lens Tube
Marking
Beam Spread
(in Degrees)
145
534
10 35
Align desired tube
position with plate.