Phoenix Auto Equipment
-Address: 2711 East Craig Road Ste #E, North Las Vegas, NV, 89030 United States
- Website: https://www.phoenixautoequipment.com
- Phone: 7025802883
18 / 22
the rim. You may also use part RAA-006 on assist arm to help.
Repeat the operation for the lower lip of tire.
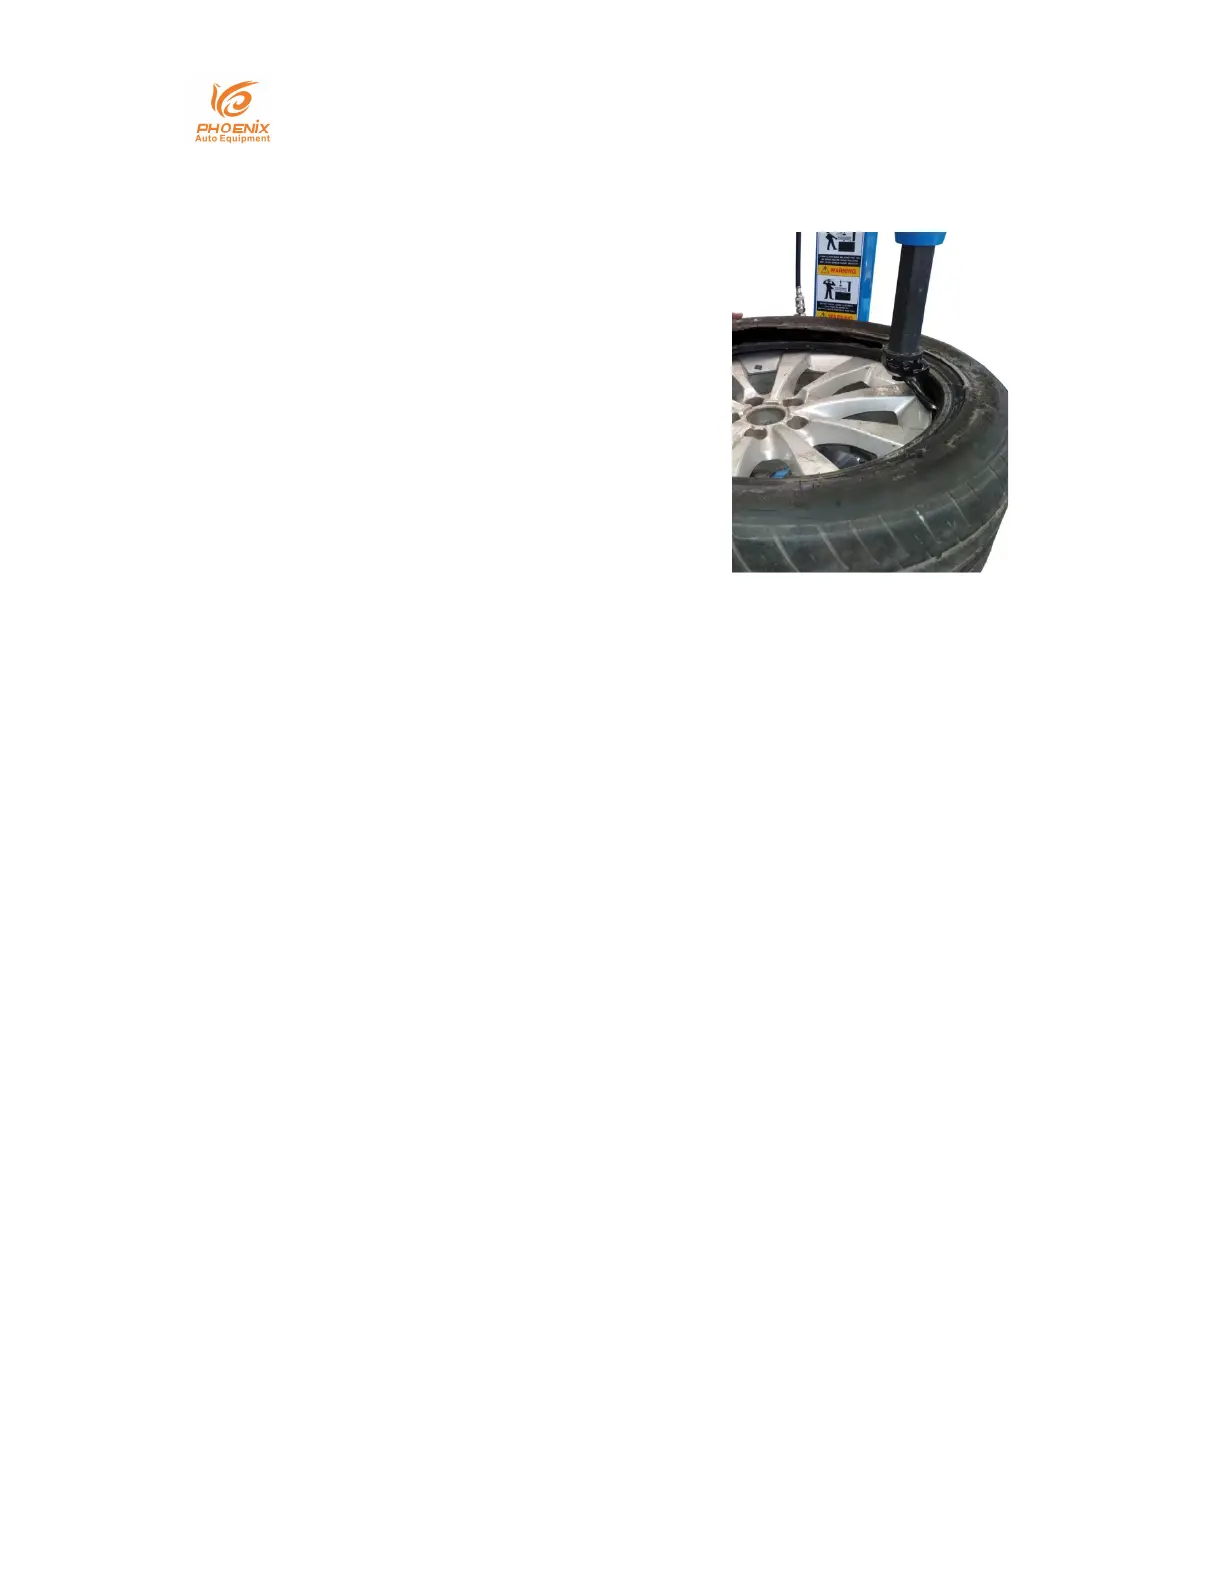
Insert the crowbar and mounting
head below the lower lip of tire.
See (Fig. 23)
Push the crowbar down toward the
wheel to lift the tire bead up, move
the mounting head in position. You
may also use part RAA-003 on assist
arm to help lift the tire.
Rotate the turntable in a clockwise
direction by pressing down on
reverser control pedal (4) until the tire is completely separated
from the wheel rim.
Unlock the locking handle for the hex bar and rise out of way.
Remove tire and rim from tire changer.
c. Mounting the Tire
Warning: Check the wheel and rim closely for any damage before mounting
the tire. Free from any light corrosion or rubber residue.
Do not attempt to service any corroded wheels
Match the diameter of the rim and tire. Never try to mount a tire
on a rim if you cannot identify the diameter of both.
Lock the rim on the turntable.
Lubricate the tire beads with the grease in order to avoid damage.
Move the tire so that the bead passes below the front section of
the mounting head and is brought up against the edge of the rear
section of the mounting head itself.
(Fig. 23)