12 SUMMIT
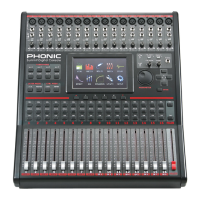
Saving, Loading and Deleting Presets/Scenes
In the Effect, Equalizer, Dynamic Processor and Scenes functions, the above bar will allow users to save, load, delete and reset the settings
for that particular function.
Preset: Users are able to load one of the factory presets. For a list of available presets for each function, please see the Preset Tables at
the end of this manual.
Save: Push the Save button to save the current settings of the function you’re currently using. If in the Utility > Scenes menu, users will
be saving the settings of all of the selected channels. Users can save their settings to the SUMMIT’s onboard memory. When the save
function is selected, users can select the keyboard icon to bring up the virtual keyboard and enter a name for their le. Naturally, ’OK’
should be selected to conrm.
Load: Select Load to load any of your previously saved settings or scenes (as the case may be).
Delete: Users can select Delete to delete any of their saved les from the SUMMIT’s memory.
Reset: Pushing reset will return all settings on the currently selected function to their default values.
Initialize: Selecting the intialize button (found in the Utility menu) allows users to reinitialize the Summit while still retaining all settings.
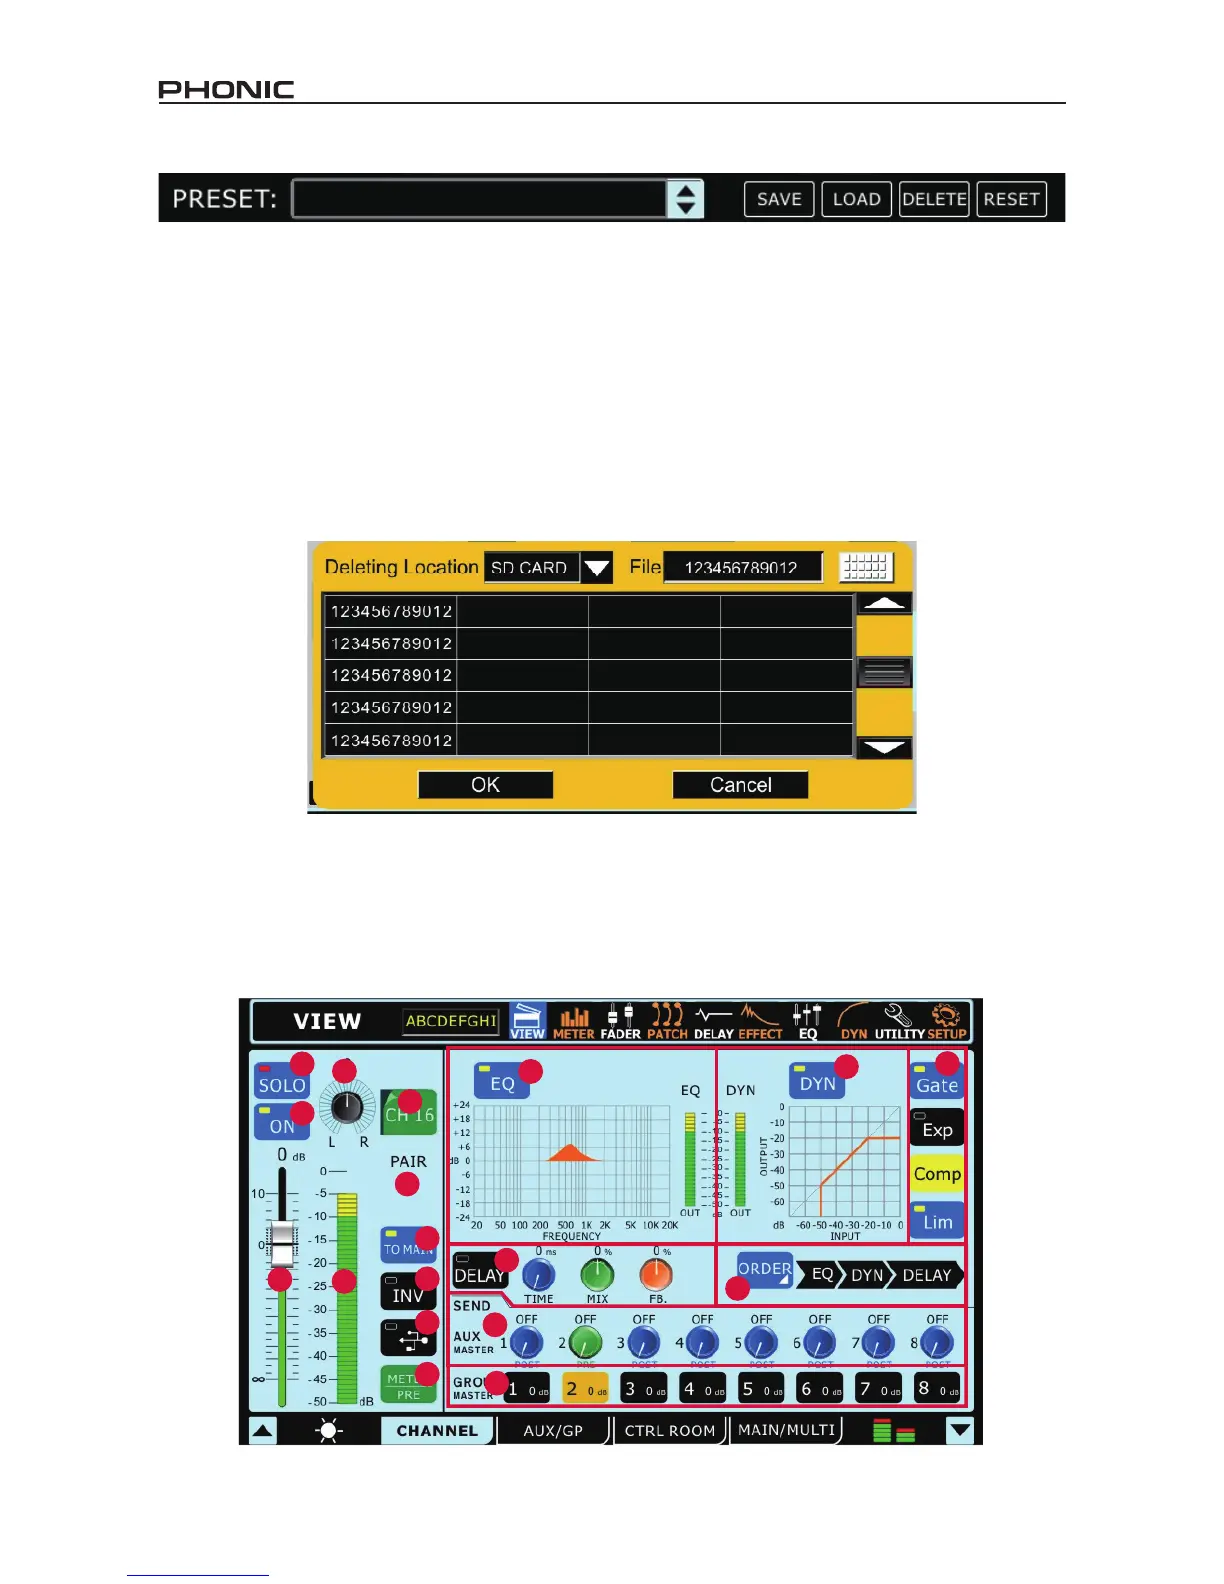
1. View
The view function will giver users an overview of channel properties, from the level and panning of signals, to dynamic processes, EQs
and other properties. When the View menu is activated, users can select the channel they wish to view/adjust the properties of using
either the channel select option (onscreen) or by simply pushing the appropriate SEL button on the channel/AUX/Group itself (on the face
of the SUMMIT itself). As with most functions, an activated button is indicated in blue. When an AUX send is set to pre-fader, however,
it will be highlighted in brown when active.
1.1 Channel Tab