CAUTION
IN THE REMOVAL OPERATIONS DESCRIBED ABOVE,
THE EXTRACTION OF 3 SCREWS (2), NECESSARY FOR
THE APPLICATION OF THE EXTRACTOR, AUTOMATICAL-
LY CAUSES THE FALL OF CORRESPONDING WASHERS
(8) IN THE CLUTCH ASSEMBLY. AS A RESULT OF THIS,
IT IS ABSOLUTELY NECESSARY, BEFORE REFITTING,
TO RECOVER, FROM INSIDE THE CLUTCH ASSEMBLY,
THE THREE WASHERS (8) AND CORRECTLY REPOSI-
TION THEM.
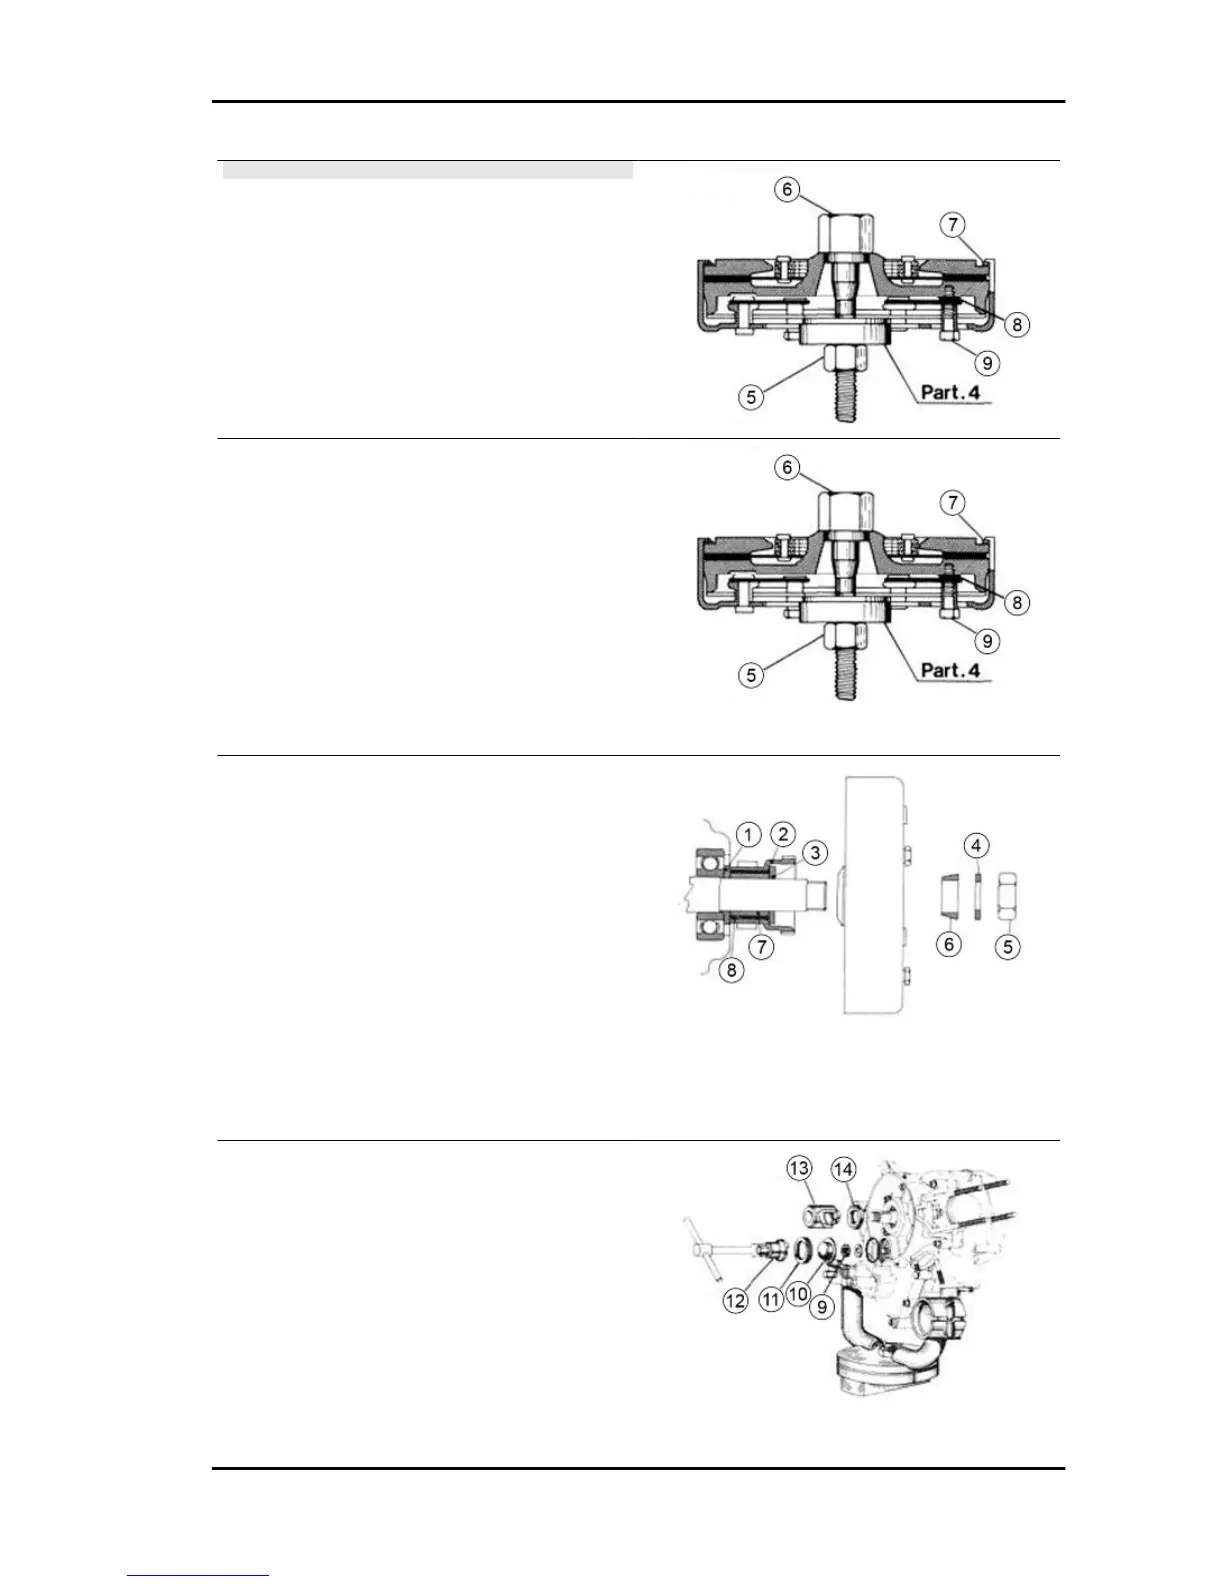
With the assembly fixed in the specific tool (provi-
ded with the new component 4) compress the
spring, by operating the nut (5), until making pos-
sible the extraction of the elastic retainer ring (7);
unscrew the three anchor bolts (9) of the plates,
and after removing the nut (5) of the tool, remove
the different components.
Specific tooling
T.0020322 Clutch removal and refitting tool
CLUTCH ASSEMBLY - FITTING
Apply the thrust washer (1), bushing (8), (7), en-
gine gear (2) and thrust washer (3) on the crank
shaft, then install the clutch assembly, making
sure that the crankshaft stick correctly engages on
the drive disc track.
With the specific key, hold the assembly firmly and,
after fitting the cone (6) and washer (4), lock the
nut (5) at 180 to 220 Nm (18 to 22 kgm).
Specific tooling
T.0031729 Clutch stop key
SEAL RING - MULTIPLE PIN NUT - CAP AND
RING
Hold the clutch assembly locked, leaving the spe-
cific key fitted and tighten the multi-gear nut (9),
install the gasket, the cap (10) and, with the help
of specific key (12), lock the ring nut (11).
Then fit the sealing ring (14) with the specific tool
(13).
APE TM Benzina Engine
EN - 83