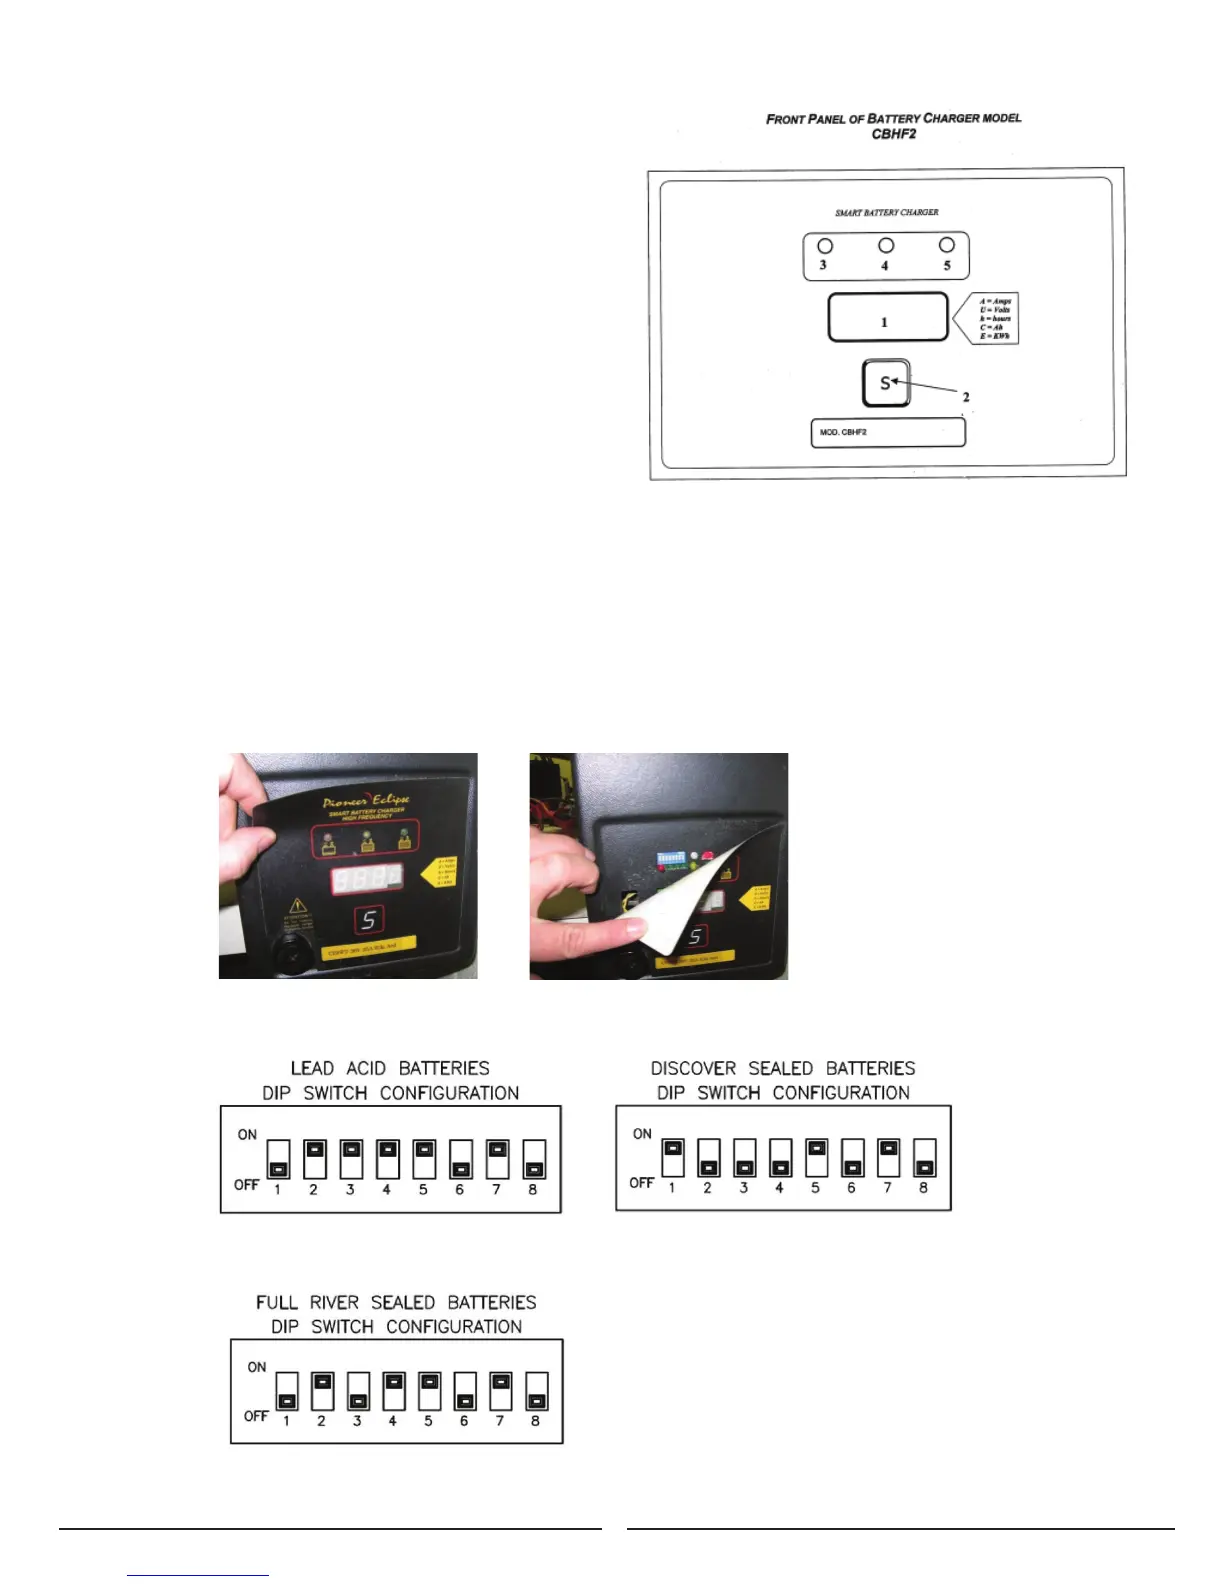
11
Battery Charger Controls:
1. Three-digit display + symbol (1), to view A=charging
current, U=battery voltage, h=charging time,
C=charging ampere-hours (AH), E=energy used
to charge (KWh)
2. Button for the Selection of the display mode (2): A, U,
h, C, E. After 10 seconds the display returns to
the display of charging current.
3. Red control indicator (3): when it is on, the charging
cycle has started.
4. Yellow control indicator (4): when it is on, the final
phase of the charging cycle has started.
5. Green control indicator (5): when it is on, the charging
cycle has finished.
Once the charge cycle is complete, the charger will remain
active in a trickle charge mode to maintain the charge on
the batteries until the charger is unplugged from the wall
socket.
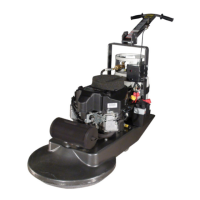
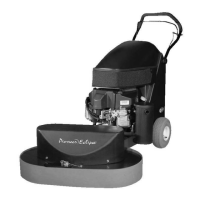
Charger Settings
The On-Board battery charger settings need to be set for your battery type before charging. Failure to properly set will
result in battery damage.
To determine your battery type, see battery label or contact your battery supplier.
To change charger settings:
1. Unplug the charger.
2. Peel back the corner of the display label.
3. Set the DIP switches, according to your battery pack, as shown below. If your battery pack type is not listed
please call Amano Pioneer Eclipse @ +1336-372-8080 for correct setting.