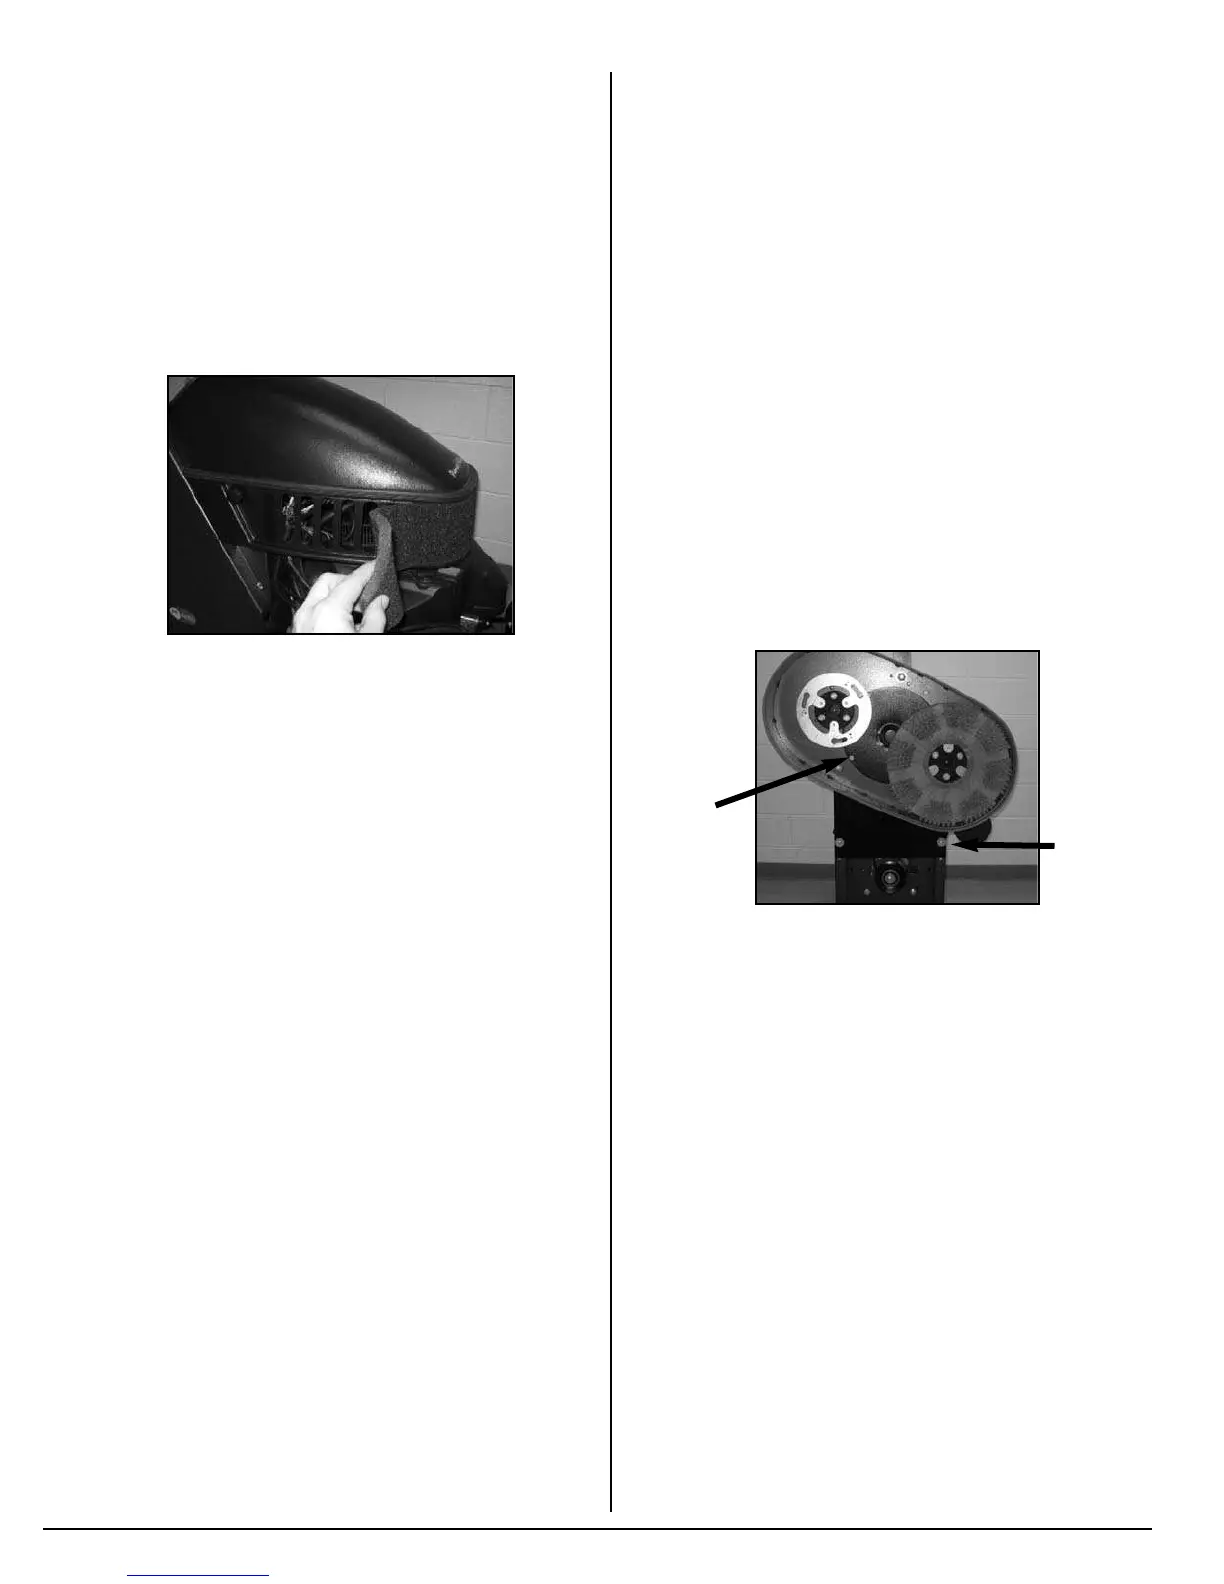
Engine Dust Filter
1. The engine dust filter should be cleaned each hour
and after each use by shaking out the dust and
then rinsing with mild detergent. The filter can
also be vacuumed with a wet-dry vacuum.
2. Squeeze out the excess water (do not wring).
3. Allow the filter to air dry.
Note: Failure to maintain a clean engine filter will cause
the engine to overheat. Also, it may cause the exhaust
emissions to elevate to harmful levels. If necessary,
replace with (APEC part number: MP373400).
Check and adjust valve clearance.
Re-torque heads:
Refer to Kawasaki’s FS481V service manual.
Clean and lap valve-seating surface:
Refer to Kawasaki’s FS481V service manual.
Head Bolt Maintenance
Refer to Kawasaki’s FS481V service manual.
Cooling Fin Maintenance
A. Remove blower housing and any other shrouds.
B. Clean the cooling fins as necessary using
compressed air or pressure washer.
C. Reinstall all housings and shrouds.
Inspect Brushes
1. Push machine to level surface.
2. Turn off LP cylinder and remove it.
3. Place the machine in the Rok-Bak position (See
Rok-Bak section.)
4. Inspect brushes for loose bolts, cracks, and brush
wear. It is recommended that brushes be replaced
when bristles are worn to 1/2” (1.3cm) length.
WARNING! A damaged brush rotating at a high rate of
speed may be an extreme hazard if it should come apart.
Belt Maintenance
1. Push machine to level surface.
2. Turn off LP cylinder and remove it.
3. Place the machine in the Rok-Bak position. (See
Rok-Bak section)
4. Rotate the brushes and inspect the belt.
5. If cracks or excessive wear is present, the belt
needs to be replaced.
6. To check for the proper tightness, squeeze the belt
together. The belt should depress between 1/4”
(0.6 cm) and 1/2” (1.3 cm).
To change belt:
APEC Part Number: MP402100
A. Push machine to a level surface.
B. Place the machine in the Rok-Bak position (See
Rok-Bak section).
C. Remove both brushes allowing access to the
pulley cover.
D. Expose the belt by removing the pulley cover (four
1/4” screws) and the rear splash plate (two 1/4”
screws).
E. Remove the belt by slipping it off the center
gearbox pulley. Once the belt is off of the larger
center pulley, go ahead and take the belt off of the
tensioner and clutch.
F. With the belt off, check the fasteners and
condition of all the drive components.
G. Install new belt and re-attach the rear splash plate
and pulley cover.
H. Check belt for correct operation and proper
tightness.
I. Return the machine to its operating position by
lowering it back to the floor. Return the handle to
the desired operating position.
18
Pulley
Cover
Splash
Plate