2120
"Er3" Error Code Fre hs one out Chec hopper for suffcent fuel or f there s n obstructon n the feed sstem Remove pellets
nd follow
Care and Maintenance
nstructons Chec Grll Probe Follow
Care and Maintenance
nstructons f drt Chec Burn Pot for sh buld-up or obstructons Follow
Care and Maintenance
nstructons for sh buld-up Chec fn Ensure t s worn properl nd r nte s not bloced
Follow
Care and Maintenance
nstructons f drt Chec uer motor to confrm operton, nd
ensure there s no bloce n the uer tube
"ErP" Error Code Unit Not Turned Off
Properly When Last
Connected To Power.
Safety feature prevents an automatic restart. Turn the Temperature Control Dial to the OFF position to
turn the unit off, wait two minutes, then turn the Temperature Control Dial to the SMOKE position to
turn the unit on again. If error code still displayed, contact Customer Care.
Power Outage While
Unit In Operation.
"noP" Error Code Bad Connection At
Connection Port
Disconnect meat probe from connection port on the Control Board, and reconnect. Ensure the meat
probe adapter is firmly connected. Check for signs of damage to the adapter end. If still failed, call
Customer Care for replacement part.
Meat Probe Damaged Check for signs of damage to the wires of the meat probe. If damaged, call Customer Care for
replacement part.
Faulty Control Board Control Board needs to be replaced. Contact Customer Care for a replacement part.
Grill Will Not Achieve
Or Maintain Stable
Temperature
Insufficient Air Flow
Through Burn Pot
Check Burn Pot for ash build-up or obstructions. Follow
Care and Maintenance
instructions for
ash build-up. Check fan. Ensure it is working properly and air intake is not blocked. Follow
Care and
Maintenance
instructions if dirty. Check auger motor to confirm operation, and ensure there is no
blockage in the auger tube. Once all the above steps have been done, start the grill, set temperature
to and wait for 10 minutes. Check that the flame produced is bright and vibrant.
Lack Of Fuel, Poor Fuel
Quality, Obstruction In
Feed System
Check hopper to check that fuel level is sufficient, and replenish if low. Should the quality of wood
pellets be poor, or the length of the pellets too long, this may cause an obstruction in the feed system.
Remove pellets and follow
Care and Maintenance
instructions.
Grill Probe Check status of Grill Probe. Follow
Care and Maintenance
instructions if dirty. Contact Customer Care
for a replacement part if damaged.
Grill Produces Excess
Or Discolored
Smoke
Grease Build-Up Follow
Care and Maintenance
instructions.
Wood Pellet Quality Remove moist wood pellets from hopper. Follow
Care and Maintenance
instructions to clean out.
Replace with dry wood pellets.
Burn Pot Is Blocked Clear Burn Pot for ash and other debris. Follow Hopper Priming Procedure.
Insufficient Air Intake
For Fan
Check fan. Ensure it is working properly and air intake is not blocked. Follow Care and Maintenance
instructions if dirty.
Frequent Flare-Ups Cooking Temperature Attempt cooking at a lower temperature. Grease does have a flash point. Keep the temperature under
176°C / 350°F when cooking highly greasy food.
Grease Build-Up On
Cooking Components
Follow
Care and Maintenance
instructions.
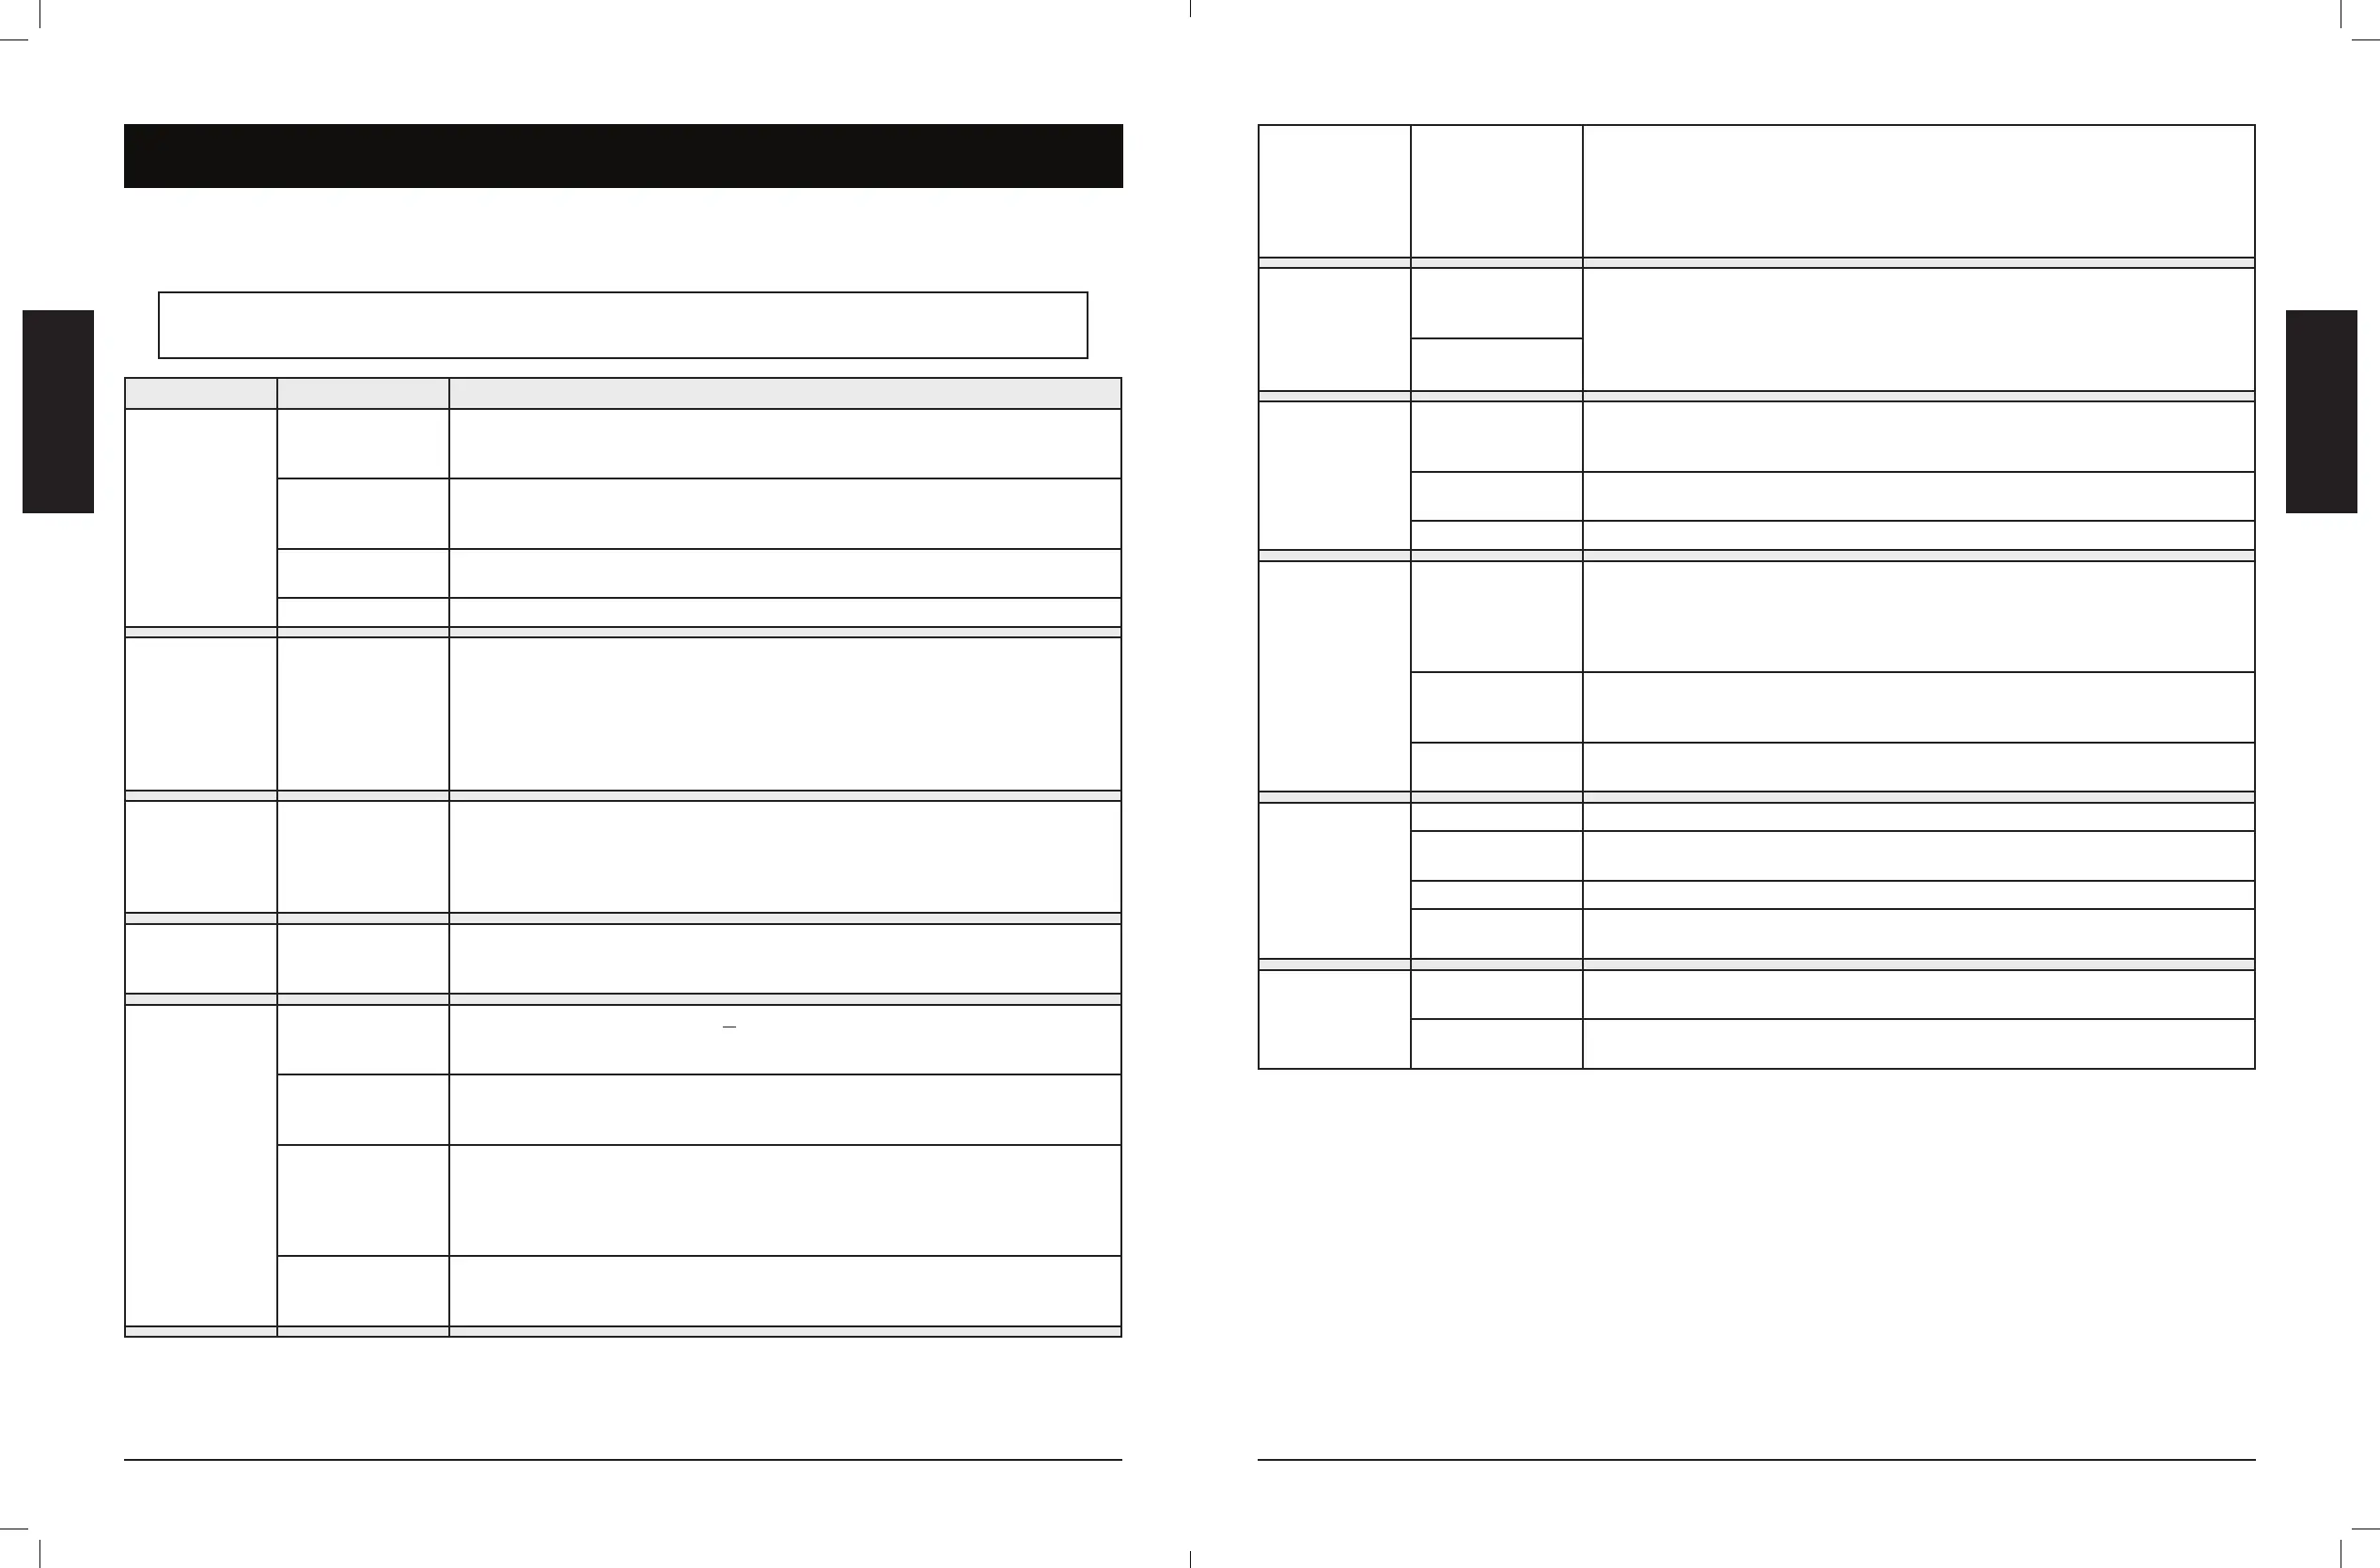
Proper cleaning, maintenance and the use of clean, dry, quality fuel will prevent common operational problems. When your Pit
Boss® grill is operating poorly, or on a less frequent basis, the following troubleshooting tips may be helpful. For FAQ, please visit
www.pitboss-grills.com
. You may also contact your local Pit Boss® authorized dealer or contact Customer Care for assistance.
WARNING: Always disconnect the electrical cord prior to opening the grill for any inspection, cleaning,
maintenance or service work. Ensure the grill is completely cooled to avoid injury.
PROBLEM CAUSE SOLUTION
No Lights On The
Control Board
Not Connected To Power
Source
Ensure unit is plugged into a working power source. Reset breaker. Ensure GFCI is a minimum 10 Amp
service (see
Electric Wire Diagram
for access to electric components) Ensure all wire connections are
firmly connected and dry.
Fuse Blown On The
Control Board
Remove hopper access panel (see
Electric Wire Diagram
for diagram), press in plastic tabs holding the
control board in place and carefully pull controller inside the hopper to release controller. Check the fuse
for a broken wire or if the wire has turned black. If yes, fuse needs to be manually replaced.
The GFCI Outlet Hs
Been Trpped
Ensure GFCI s mnmum 10 Amp servce
Faulty Control Board Control Board needs to be replaced. Contact Customer Care for a replacement part.
Flashing Temperature
On LCD Screen
Grill Temperature Is
Below 65°C /150°F
This is not an error that effects the unit; however, it is used to show that there is some risk that the
fire could go out. Check hopper for sufficient fuel or if there is an obstruction in the feed system.
Remove pellets and follow
Care and Maintenance
instructions. Check Grill Probe and follow
Care and
Maintenance
instructions if dirty. Check Burn Pot for ash build-up or obstructions, and follow
Care and
Maintenance
instructions for ash build-up. Check fan. Ensure it is working properly and air intake is not
blocked. Follow
Care and Maintenance
instructions if dirty. Check auger motor to confirm operation
(rotation), and ensure there is no blockage in the auger tube.
"ErH" Error Code The Unit Has
Overheated, Possibly
Due To Grease Fire Or
Excess Fuel.
Turn the Temperature Control Dial to the OFF position to turn the unit off and allow grill to cool.
Follow
Care and Maintenance
instructions. After maintenance, remove pellets, and confirm
positioning of all component parts. Once cooled, turn the Temperature Control Dial to the SMOKE
position to turn the unit on, then select desired temperature. If error code still displayed, contact
Customer Care.
"Er1" Error Code Grill Probe wire not
making connection.
Remove hopper access panel (see
Electric Wire Diagram
for diagram), and check for any damage
to the Grill Probe wires. Ensure Grill Probe molex connectors are firmly connected, and connected
correctly, to the Control Board.
"Er2" Error Code Auger Not Primed Before the unit is used for the first time or anytime the hopper is completely emptied out, the auger
must be primed to allow pellets to fill the auger tube. If not primed, the igniter will timeout before the
pellets reach the Burn Pot. Follow
Hopper Priming Procedure
.
Auger Motor Is Jammed Remove cooking components from the main barrel. Turn the Temperature Control Dial to the SMOKE
position to turn the unit on and inspect the auger feed system. Visually confirm that the auger is
dropping pellets into the Burn Pot. If not operating properly, call Customer Care for assistance.
Igniter Failure Remove cooking components from the main barrel. Turn the Temperature Control Dial to the SMOKE
position to turn the unit on, and inspect the igniter. Visually confirm that the igniter is working by
placing your hand above the Burn Pot and feeling for heat. Visually confirm that the igniter is protruding
approximately 13mm / 0.5 inches in the Burn Pot. If not operating properly, follow
Manual Start-up
Procedure
to continue use of grill; however, call Customer Care for assistance or a replacement part.
Insufficient Air Flow
Through Burn Pot
Check Burn Pot for ash build-up or obstructions. Follow Care and Maintenance instructions for ash build-
up. Check fan. Ensure it is working properly and air intake is not blocked. Follow
Care and Maintenance
instructions if dirty.
 Loading...