1312
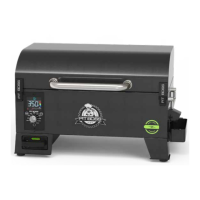
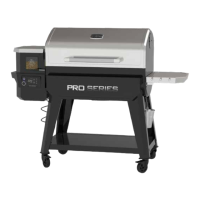
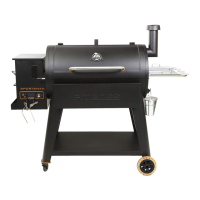
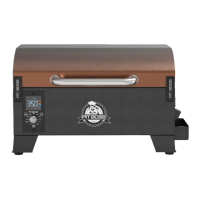
The LCD Screen is used as the information center for
your unit. The LCD screen will display the current grill
temperature (ACTUAL) and meat probe temperature (MP1).
See
Troubleshooting
for more information on error codes.
Flashing
Screen
Indicates the unit was just connected to
AC power. Screen flashes three times, then
turns off.
1 Indicates the meat probe temperature
when probe is connected.
Actual Indicates the current temperature of unit.
Set Indicates the desired temperature that has
been selected.
Motor Indicates the auger motor is turning and
feeding pellets to the Burn Pot.
Ignitor Indicates the igniter is on. When first
starting your unit, the igniter runs
continuously for the start-up cycle.
Fan Indicates the fan is running. If the grill is in
operation, the fan is on.
o Pellet Indicates the auger motor is no longer able
to feed pellets to the Burn Pot. Likely, the
hopper is empty and requires refilling.
Press and hold the Prime Button to activate an extra feed of
pellets to the Burn Pot. This can be used to add more fuel to
the fire just before opening the barrel lid, resulting in a quicker
heat recovery time. It can also be used to add more fuel while
smoking, to increase the intensity of clean smoke flavor.
Overfeeding the Burn Pot may damage to grill barrel paint.
The Temperature Switch Button is used to change the
temperature readout on the LCD Screen. Press the button
to switch to Fahrenheit (ºF) or to Celsius (ºC), as preferred.
Default is set to Fahrenheit.
The Temperature Control Dial allows you to set your desired
temperature. Rotate the knob marker to select from Smoke,
any of the eight temperature presets, or High. Once rotating
the dial, the SET Temperature on the LCD Screen will adjust.
The Off Setting on the Temperature Control Dial is the OFF
mode for the unit. The unit will not function on this setting.
The Smoke Setting on the Temperature Control Dial is the
lowest smoking mode for the unit. The grill operates at the
lowest temperature, without the fire going out.
The High Setting on the Temperature Control Dial is the
highest heat level for the unit. The grill operates at the
highest temperature. When the lid is open, the grill will run
at this speed to compensate for the loss of heat in the barrel.
The plug-in connection port on the front of the Control Board
is for a Meat Probe. When the meat probe is connected,
the temperature is displayed on the LCD Screen. When the
meat probe is not in use, disconnect the adapter from the
connection port.
These instructions should be followed the first time the grill is ignited, and each time the grill runs out of pellets in the hopper. The
auger must be primed to allow pellets to travel through the length of the auger, and fill the Burn Pot. If not primed, the igniter
will timeout before the pellets are ignited, and no fire will start. Follow these steps to prime the hopper:
1. Open the hopper lid. Make sure there are no foreign objects in the hopper or blocking the auger feed system at the bottom.
2. Remove all cooking components from the interior of the grill. Locate the Burn Pot in the bottom of the main barrel.
3. Plug the power cord into a power source. Turn the Temperature Control Dial to the position. Check the following
items:
• That you can hear the auger turning. Place your hand above the Burn Pot and feel for air movement. Do not place
your hand or fingers inside the Burn Pot. This can cause injury.
• After approximately a minute, you should smell the igniter burning and begin to feel the air getting warmer in the
Burn Pot. The igniter tip does not glow red, but gets extremely hot and will burn. Do not touch the igniter.
4. Once verified that all electric components are working correctly, turn the Temperature Control Dial to the OFF position
to turn the unit off.
5. Fill the hopper with all natural barbecue wood pellets.
6. Turn the Temperature Control Dial to the SMOKE position. Press and hold the Prime Button until you see pellets on the
inside of the grill from the auger tube. Once pellets begin to drop into the Burn Pot, release the Prime Button.
7. Turn the Temperature Control Dial to the OFF position to turn the unit off.
8. Re-install the cooking components into the main barrel. The grill is now ready to use.
Once your hopper has been primed and before cooking on your grill for the first time, it is important to complete a grill burn-off.
Start the grill and operate at any temperature over 176°C / 350°F (with the lid down) for 30 to 40 minutes to burn-off the grill
and rid it of any foreign matter.
FC
MP1
Actual
Set
IGNITOR
NO
PELLET
FC
Actual
MP1
IGNITOR
NO
PELLET
Set
PRIME
F/C
300
350
250
225 400
450
475
SMOKE
OFF
HIGH
200
FC
Actual
NO
Set
PRIME
F/C
300
350
250
225 400
450
475
SMOKE
OFF
HIGH
200
FC
Actual
MP1
IGNITOR
NO
PELLET
Set
PRIME
F/C
300
350
250
225 400
450
475
SMOKE
OFF
HIGH
200
FC
Actual
MP1
IGNITOR
NO
PELLET
Set
PRIME
F/C
300
350
250
225 400
450
475
SMOKE
OFF
HIGH
200
FC
Actual
MP1
IGNITOR
NO
PELLET
Set
PRIME
F/C
300
350
250
225 400
450
475
SMOKE
OFF
HIGH
200
FC
Actual
MP1
IGNITOR
NO
PELLET
Set
PRIME
F/C
300
350
250
225 400
450
475
SMOKE
OFF
HIGH
200
FC
Actual
MP1
IGNITOR
NO
PELLET
Set
PRIME
F/C
300
350
250
225 400
450
475
SMOKE
OFF
HIGH
200
 Loading...