76
IMPORTANT: It is advised to read each step entirely before starting assembly on instructions. Do not tighten screws
completely until all screws for that step have been installed.
1.
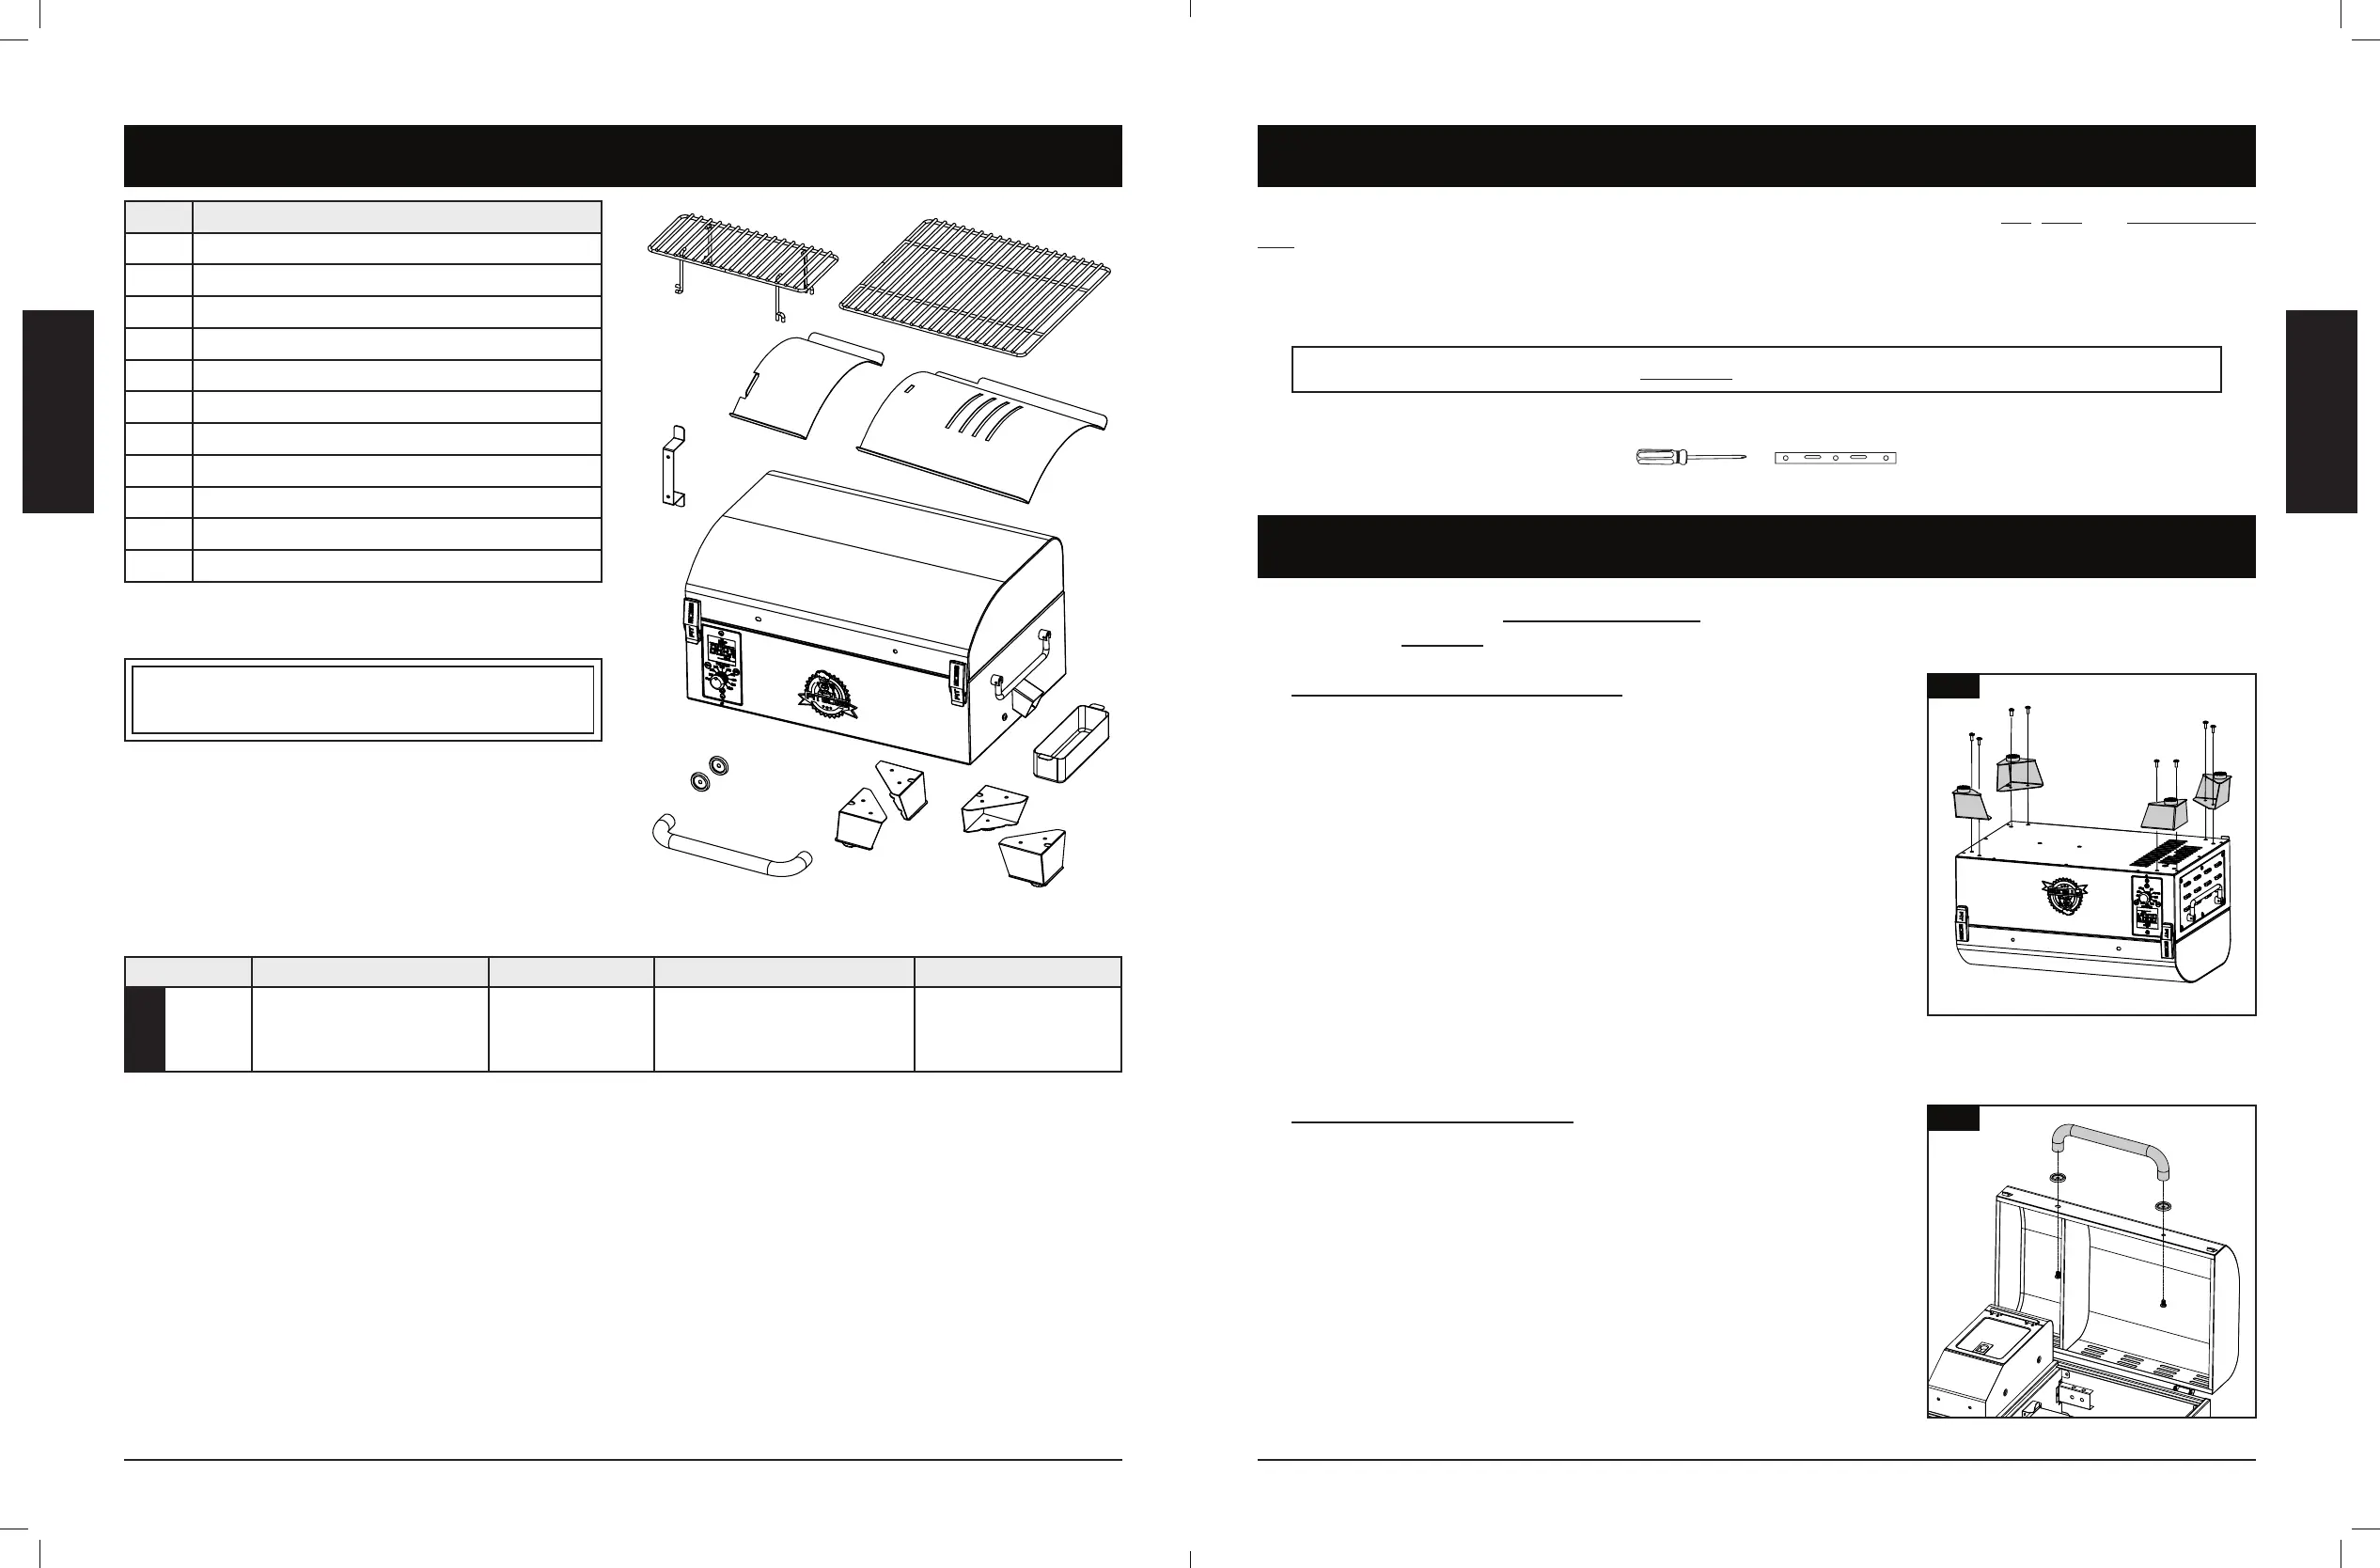
Parts Required:
1 x Main Barrel / Hopper Assembly (#6)
2 x Foot A (#9)
2 x Foot B (#10)
Installation:
• Place a piece of cardboard on the floor to prevent scratching the unit.
Flip the unit upside-down. Remove the eight pre-installed screws
from the bottom panel corners of the unit, two from each corner.
• Secure Foot A to the bottom panel corner (closest to the control
board) using two of the screws previously removed. Repeat same
installation on opposite corner with other Foot A.
• Secure each Foot B on the two remaining bottom panel corners, using
two screws in each.
2.
Parts Required:
2 x Lid Handle Bezel (#7)
1 x Lid Handle (#8)
Installation:
• Remove the pre-installed screws from the Lid Handle. From inside the
barrel lid, insert one screw so that it protrudes to the outside. Add a
bezel on the screw, then hand-tighten the screw (from the inside) into
the Lid Handle. Repeat same installation for other end of Lid Handle.
Parts are located throughout the shipping carton, including underneath the grill. Inspect the grill, parts, and hardware blister
pack after removing from the protective shipping carton. Discard all packaging materials from inside and outside of the grill
before assembly, then review and inspect all parts by referencing the parts list. If any part is missing or damaged, do not attempt
to assemble. Shipping damage is not covered under warranty. Contact your dealer or Pit Boss® Customer Care for parts.
www.pitboss-grills.com | USA: (480) 923-9630 | CANADA (TOLL FREE): 1-877-942-2246
IMPORTANT: To ease installation, using two people is helpful (but not necessary) when assembling this unit.
Tools required for assembly: screwdriver and level.
Tools not included.
Part# Description
1 Upper Cooking Grate (x1)
2 Cooking Grid (x1)
3 Flame Broiler™ Slider (x1)
4 Flame Broiler™ Main Plate (x1)
5 Power Cord Bracket (x1)
6 Main Barrel/ Hopper Assembly (x1)
7 Lid Handle Bezel (x2)
8 Lid Handle (x1)
9 Foot A (x2)
10 Foot B (x2)
11 Grease Cup (x1)
NOTE: Due to ongoing product development, parts are subject to change without notice. Contact
Customer Care if parts are missing when assembling the unit.
PB – ELECTRIC REQUIREMENTS
110-120 V, 60 Hz, 220 W, 3-PRONG GROUNDED PLUG
1
2
1
2
4
3
5
6
10
11
8
9
7
MODEL UNIT ASSEMBLED (WxDxH) UNIT WEIGHT COOKING AREA
150
631 474 360
/ 24.87 . 18.68 . 14.17 .
19.7 / 43.43
1,235.86 / 191.56
419.85 / 65.0
1,655.71 / 256.56
82260° / 180500°
9
9
10
6
7
7
8
10
 Loading...