13
9.
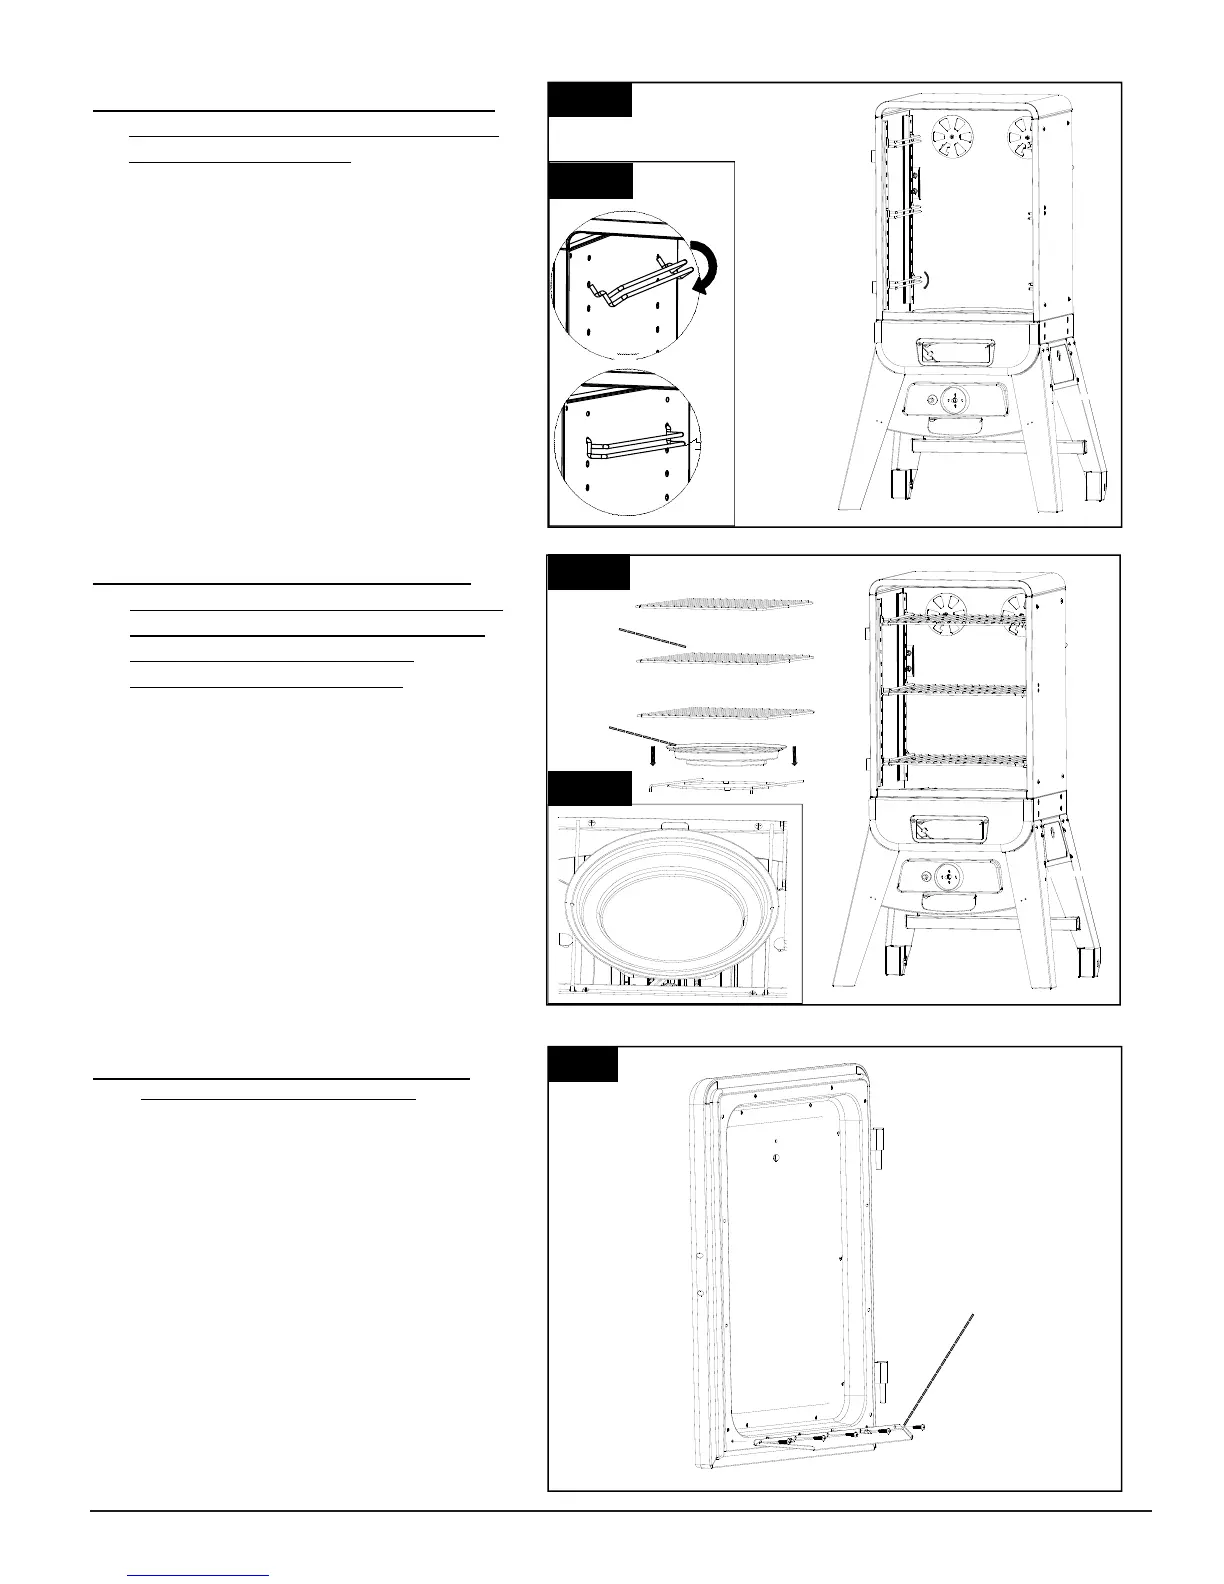
ASSEMBLING COOKING GRID
SUPPORT TO THE UPPER SMOKER
CABINET ASSEMBLY
Parts Required:
6 x Cooking Grid Support (#5)
1 x Upper Smoker Cabinet Assembly (#2)
Installation:
• Assemble three Cooking Grid Supports
(#5) in the holes in the left side of the
smoker. Repeat the procedure for the right
side making sure the Cooking Grid Support
(#2) on the left side and right side are at the
same height as Fig.9.1 & Fig. 9.2 shown, so
the Cooking Grids are level.
Fig.9.1
10.
PLACING WATER PAN AND WATER
PAN SUPPORT ONTO THE BOTTOM
AREA OF CABINET AND PLACING
COOKING GRIDS INTO THE
COOKING GRID SUPPORT
Parts Required:
3 x Cooking Grid (#4)
1 X Water pan Support (#16)
1 x Water Pan (#15)
Installation:
•Place Water Pan Support (#16) and
Water Pan (#15) onto the bottom area of
Cabinet and place three Cooking Grids
(#4) into the Cooking Grid Support as
Fig.10.1 & Fig.10.2 shown.
11
MOUNTING DOOR GREASE SHIELD
TO THE DOOR ASSEMBLY
Parts Required:
1 x Door Grease Shield (#26)
1 X Door Assembly (#10)
5 x #8-32 Self-tapping Screw (#F)
Installation:
• Attach the Door Grease Shield (#26) to the
Door Assembly (#10) using 5 x #8-32 Self-
tapping Screw (#F) as Fig.11 shown.
Fig.11
Fig.10.1
Fig.9.2
Fig.10.2
#4
-
-
-
-
-
-
-
-
#15
-
-
-
-
-
-
-
-
-------
#16
-
-
-
-
-
-
-
-
-
-
-
-
-
-
-
#26
 Loading...