EasyManua.ls Logo

Planet Audio P9759B User Manual

Planet Audio P9759B
25 pages
To Next Page IconTo Next Page
Page #1 background imageLoading...
Page #1 background image
TELEPHONE
888-990-1236 US Toll-free
805-751-4854 Customer Service
TECHNICAL SUPPORT
www.planetaudiousa.com/customer-support
www.planetaudiousa.com
USER’S MANUAL
USER’S MANUAL
P9759B
0817
The Bluetooth
®
word mark and logos are registered trademarks owned by Bluetooth SIG, Inc.
and any use of such marks by Planet Audio is under license. Other trademarks and trade
names are those of their respective owners.
BLUETOOTH
®
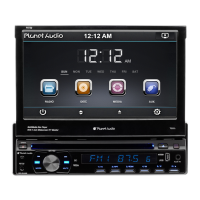
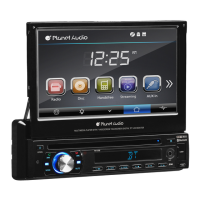
DVD/MP3/CD AM/FM RECEIVER
FEATURING MOTORIZED 7" (178
mm
) WIDESCREEN
TOUCHSCREEN DIGITAL TFT LCD MONITOR
P9759B
BLUETOOTH
®
DVD/MP3/CD AM/FM RECEIVER
FEATURING MOTORIZED 7" (178
mm
) WIDESCREEN
TOUCHSCREEN DIGITAL TFT LCD MONITOR

Other manuals for Planet Audio P9759B

Questions and Answers:

Planet Audio P9759B Specifications

General IconGeneral
MP3 playbackYes
Playback disc formatsCD audio, DVD-Audio, DVD-Video
Audio formats supportedMP3, MP4, WMA
Image formats supportedJPG
Video formats supportedAVI
Supported radio bandsAM, FM
Preset stations quantity30
DIN size1 DIN
Output power340 W
Product colorBlack
Ready for iPodNo
Disc types supportedCD, CD-R, CD-RW, DVD, DVD+R, DVD+RW, DVD-R, DVD-RW
Audio output channels4.0 channels
Maximum power per channel85 W
Display diagonal7 \
USB version2.0
USB ports quantity2
Bluetooth functionsAudiostreaming, Handsfree calling
Compatible memory cardsSD
Weight and Dimensions IconWeight and Dimensions
Dimensions (WxDxH)181 x 54 x 190 mm

Summary

Unit Installation

INSTALLATION (Figure 1)

Insert the unit into dash-board hole. If necessary, place the mount strap at the rear of the unit and fix it with provided washer as figure 2. Push the unit into the Half Sleeve until you hear a click sound Place Trim Ring over the unit and installation is completed as figure 3.

Speaker Connection

Correct connection

Connect the speakers according the following diagram, incorrect connections will damage the unit or your loudspeakers.

Incorrect connections

Incorrect connections will damage the unit or your loudspeakers.

Button Description

Open button

Press the button to open/close the screen. Press the button for short moment to turn on power,and long press it to turn off power. Press the button can adjustment the screen angle

Fast Forward Upward

In radio mode, press the button to select station upward

Fast Forward Backward

In radio mode, press the button to select station backward

MIC input

Bluetooth microphone input socket

Mode Button

When the unit is power on,Repeat press this button can switch to different function mode as follow picture.

Mute Button

Press the button will briefly to mute

Number Button 1

In radio mode,press this button to hear radio preset. In disc playback mode,press this button to turn on/off TFT LCD display.

Number Button 2

In radio mode,press this button to hear radio preset. In disc playback mode,press this button to repeat the current track indefinitely.

Number Button 3

In radio mode,press this button to hear radio preset. In disc playback mode,press this button to play frocks on the disc in random order.

Number Button 4

In radio mode,press this button to hear radio preset. In disc playback mode,press this button for to stop playback.

Number Button 5

In playback mode,press this button to adjust the angle of screen.

Number Button 6

In playback mode,press this button to adjust the angle of screen.

RELEASE Button

Press this button to release the panel.

AUX Input

Put the Aux plug into the Aux-In jack which was marked on front panel

USB Operation

insert a USB into this slot and the unit will automatically start reading and playback

Eject Button

When there is a disc in the unit,press the button to eject the disc.

Rotate Button

Press the button to increase or decrease volume level

Remote Control Operations

MODE button

Press it to select the mode: radio, disc, USB, SD, Bluetooth, Aux-In.

POWER button

Power on or power off.

UP button

Press it to move the cursor up.

BAND/RANDOM/CLEAR button

Controls radio bands, random playback, and clearing phone numbers.

ENTER button

Press it to confirm your selection.

LEFT button

Press it to move the cursor left.

DOWN button

Press it to move the cursor down.

EJECT button

Press it to eject the disc.

STEREO/MONO/* button

Switches radio sound between stereo and mono; makes a symbol in Bluetooth mode.

P.SCAN/REPEAT/# button

Controls repeat modes for DVD, SD, and USB playback.

SEEK- button

Skips to previous track/station; activates fast reverse search.

LOUD button

Press to select loudness on or off.

STOP/PBC button

Stops playback and can resume playback.

OSD button

Shows disc playing information in DVD mode.

PLAY/PAUSE button

Breaks and resumes playback for DVD, USB, and SD modes.

Mute/Bluetooth button

Mutes volume or enters Bluetooth mode (hands-free).

MENU/ROOT button

Shows main menu or enters title menu in DVD mode.

SUBTITLE button

Selects subtitle language if available on the disc.

RIGHT button

Press it to move cursor right.

SETUP button

Enters the setup menu or resumes playback in DVD mode.

Dial/ANGLE Button

Changes viewing angle in DVD mode or handles calls in Bluetooth mode.

HANG UP button

Rejects calls or hangs up during a call in Bluetooth mode.

VOLUME UP button

Press to increase volume level.

ZOOM button

Zooms the image in or out during DVD playback.

SELECT button

Enters EQ setting menu and navigates options.

SEEK+ buttons

Skips to next track/station; activates fast forward search.

VOLUME DOWN button

Press to decrease volume level.

AUDIO button

Press it to select the audio language in DVD mode.

NUMERIC KEY pad

Used for selecting bands, tracks, or inputting phone numbers in Bluetooth.

OPEN/TILT button

Press the button to open/close the screen.

Main Menu Navigation

Page 1 Navigation

Accesses the first page of the main menu screen.

Page 2 Navigation

Accesses the second page of the main menu screen.

Radio Operation

DVD Operation

DVD Player Controls

Provides controls for starting and operating the DVD player.

USB/SD Operation

Settings Operation

Setting Control

Your device has default system setting, you can customize the settings to suit your personal needs.

General Control

Customize settings like OSD Language, Wallpaper, Panel Adjust, Radio Area, Clock & Calendar, SWC, Key Beep, Standby Display, Version, Restore Default.

Time Setting

Tap time setting button to setup time.

SWC Programming

Tap SWC item to program SWC.

DVD Setup Menu

Subtitle Language Setting

Select the preferred language for the subtitles. If not, the first language recorded on the disc is displayed.

Audio Language Setting

Select the preferred language for the audio output. If not, the first language recorded on the disc is played.

DVD Menu Language Setting

Select the preferred language for the disc menu. If not, the first language recorded on the disc is displayed.

Sound Control

TV Type Settings

System Settings

Bluetooth Section Configuration

Configure Auto Connect and Auto Answer settings for Bluetooth.

Subwoofer Configuration

Connect the subwoofer to the unit using sub output.

Parking Video Display

Enable video display when the car is stopped and parking brake is working.

Back View Camera Setup

Connect and use the back view camera for observing the vehicle's rear.

Bluetooth Operation

Calling Button Function

Tap on calling button to enter call mode for making/receiving calls via Bluetooth.

(A2DP) Music Mode

Tap music button to listen music in Bluetooth mode using A2DP.

Aux-In Mode

Disc Handling and Care

Handling Discs

Guidelines for holding discs correctly to avoid damage.

Cleaning Discs

Instructions for cleaning discs using a soft cloth and recommended cleaning methods.

Storing Discs

Recommendations for storing discs vertically in a cool, dry place away from sunlight.

General Specification

Related product manuals