Page 22
TYING ADJUSTMENTS
CAUTION:
Before attempting any adjustment of this machine, the power switch should be in the “OFF”
position and the power cord disconnected.
SECTION III: Operation
STEP 2: ADJUST STOP GUIDES
1) Loosen screw [A] and move the stop guide [B] to the correct product diameter.
2) Tighten screw. This aligns and centers the product to be tied directly in from of the
twister shaft [C].
STEP 3: ADJUST RIBBON DRIVE MOTOR
1) Loosen the wingnut [D] and slide the entire ribbon drive assembly [E] to align with
required ribbon length as indicated from STEP 1.
1) Re-tighten the wingnut.
STEP 4: CHANGE RIBBON CHUTE
1) Remove screw and washer on scissor arm [F].
2) Lift out chute
3) Install new ribbon chute, tighten screw (be certain that the ribbon chute is centered to the
slot in the ribbon cutter anvil)
1) Re-thread ribbon through machine
STEP 5: TEST TYING MATERIAL
1) Re-connect power supply and turn the power switch on.
2) Insert desired material into left side of tying area and activate the tying cycle.
3) Find tune ribbon length if required, by slightly rotating the Tying Diameter Adjustment
Dial to achieve optimum ribbon length.
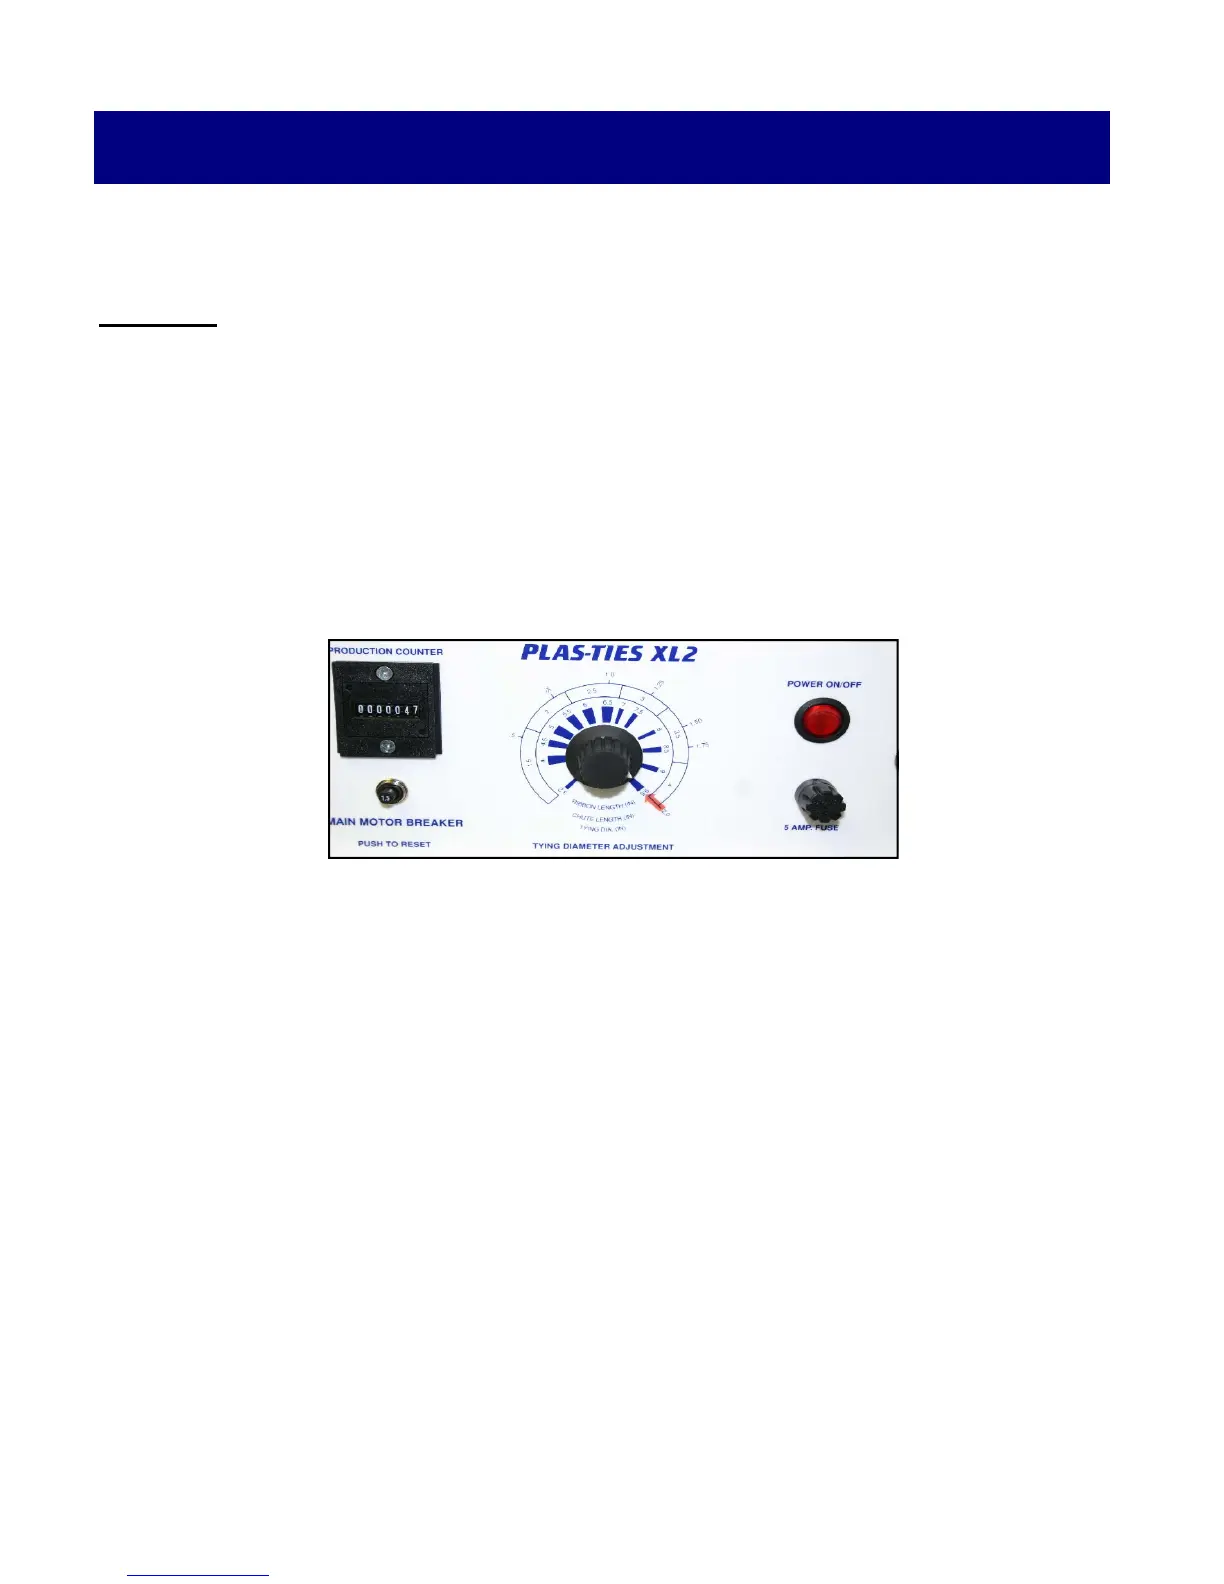
STEP 1: SET TYING DIAMETER DIAL
1) Rotate Tying Diameter Adjustment Dial to point arrow to the desired product diameter.
This diameter will then align with and indicate ribbon length and the required chute length.
Example: If the tying diameter is 2” then the chute length is 4” and the ribbon length is 9.5”