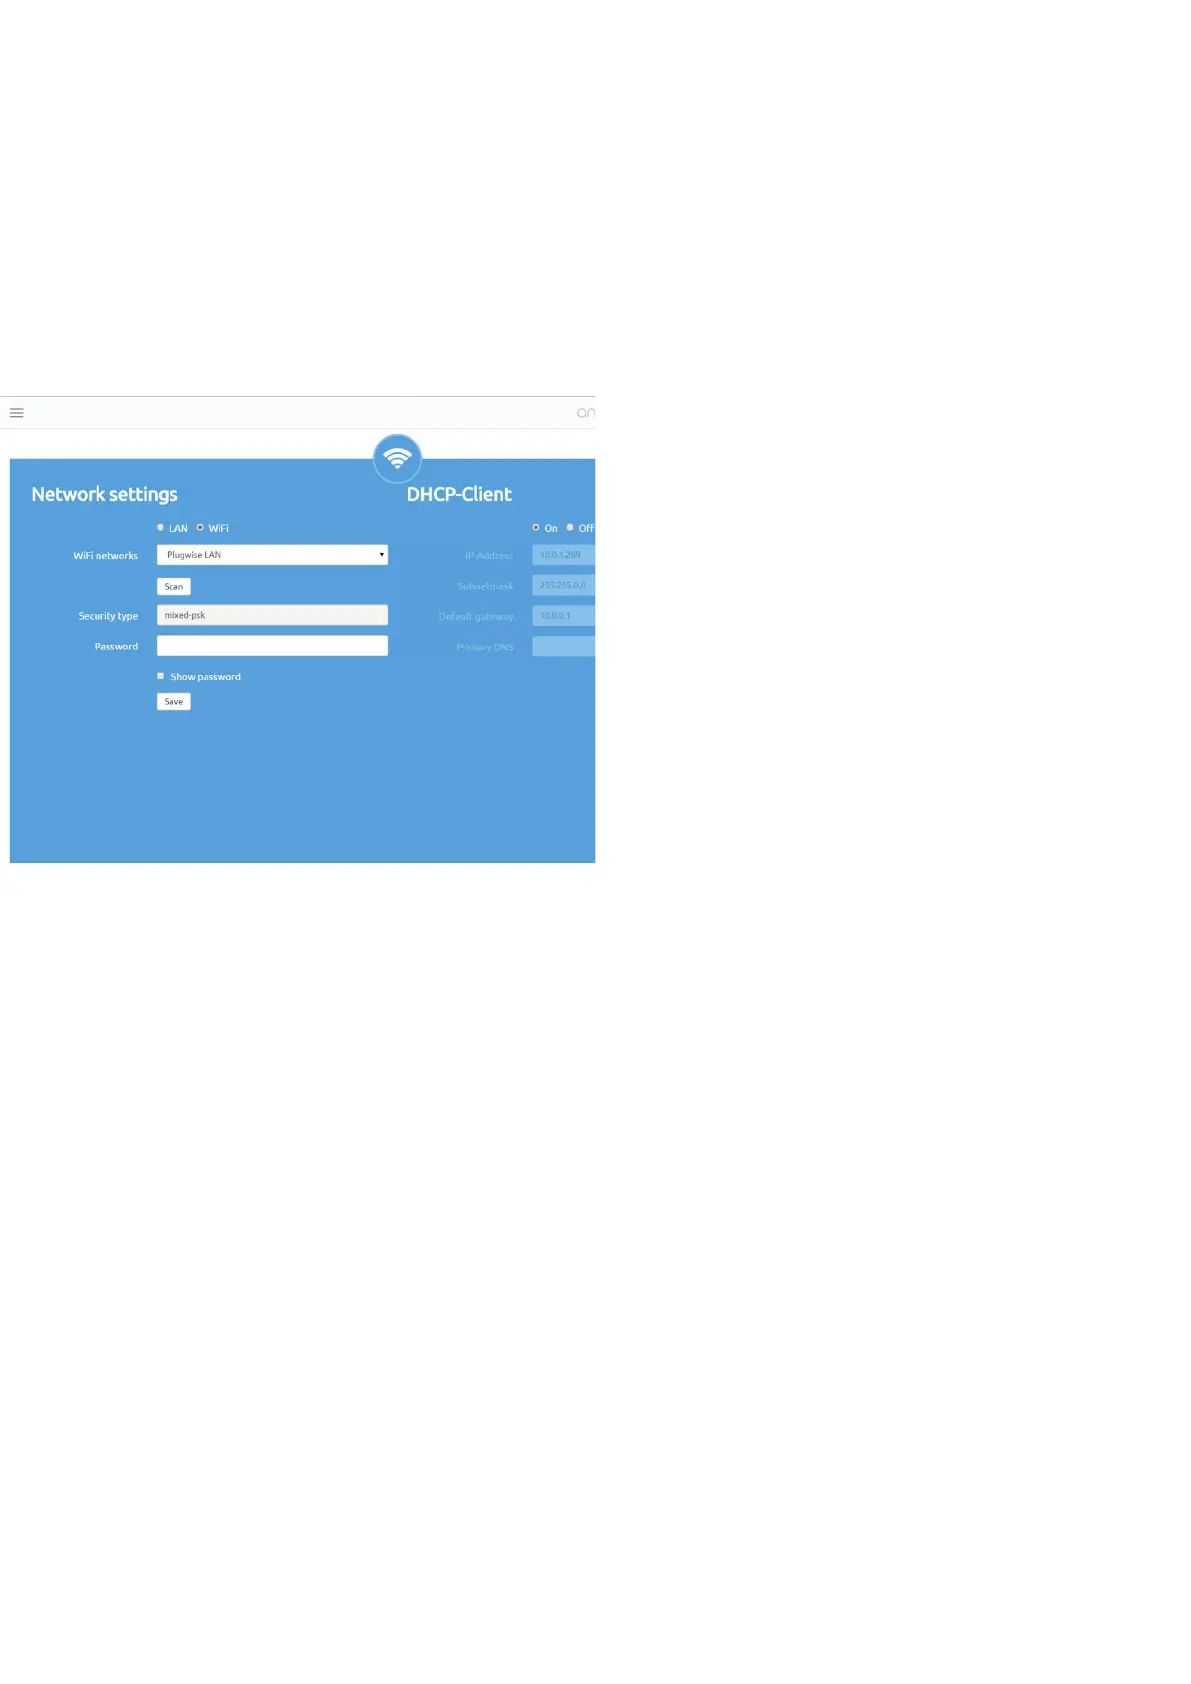
Network settings.
In ‘Network Settings’ you can connect the Smile to your own or to
another network.
First click on ‘Scan’ to nd your WiFi
network. If your WiFi network does
not appear on the list, re-click ‘Scan’. It
is possible that a WiFi network is not
detected right away.
The security type is the security type
which is set for the selected WiFi
network.
Enter the WiFi network’s password and
click on ‘Save’ to log the Smile in to the
new WiFi network.
When you wish to switch the Smile from a LAN connection to a WiFi
connection, make sure you rst disconnect the network cable (UTP
cable) from the Smile.
After saving the new WiFi settings, the connection between the
Smile and the internet browser will be lost. When the Smile and the
computer, tablet or smartphone are connected to the same network,
the Smile can once again be accessed via the internet browser.
It is possible that the Smile has been given a different IP address
depending on the settings used and the network router. The IP
address can be found under ‘Presets’.
ng tre?
Prs ack Sme r 5 sec unl
light “Stus” h ind 5 s and light “WLAN”
ar ink radly. (The netrk ses
d.) Wa 2 minus unl Sme h ed up, n
try again cnect Sme yr WiFi netrk.
16