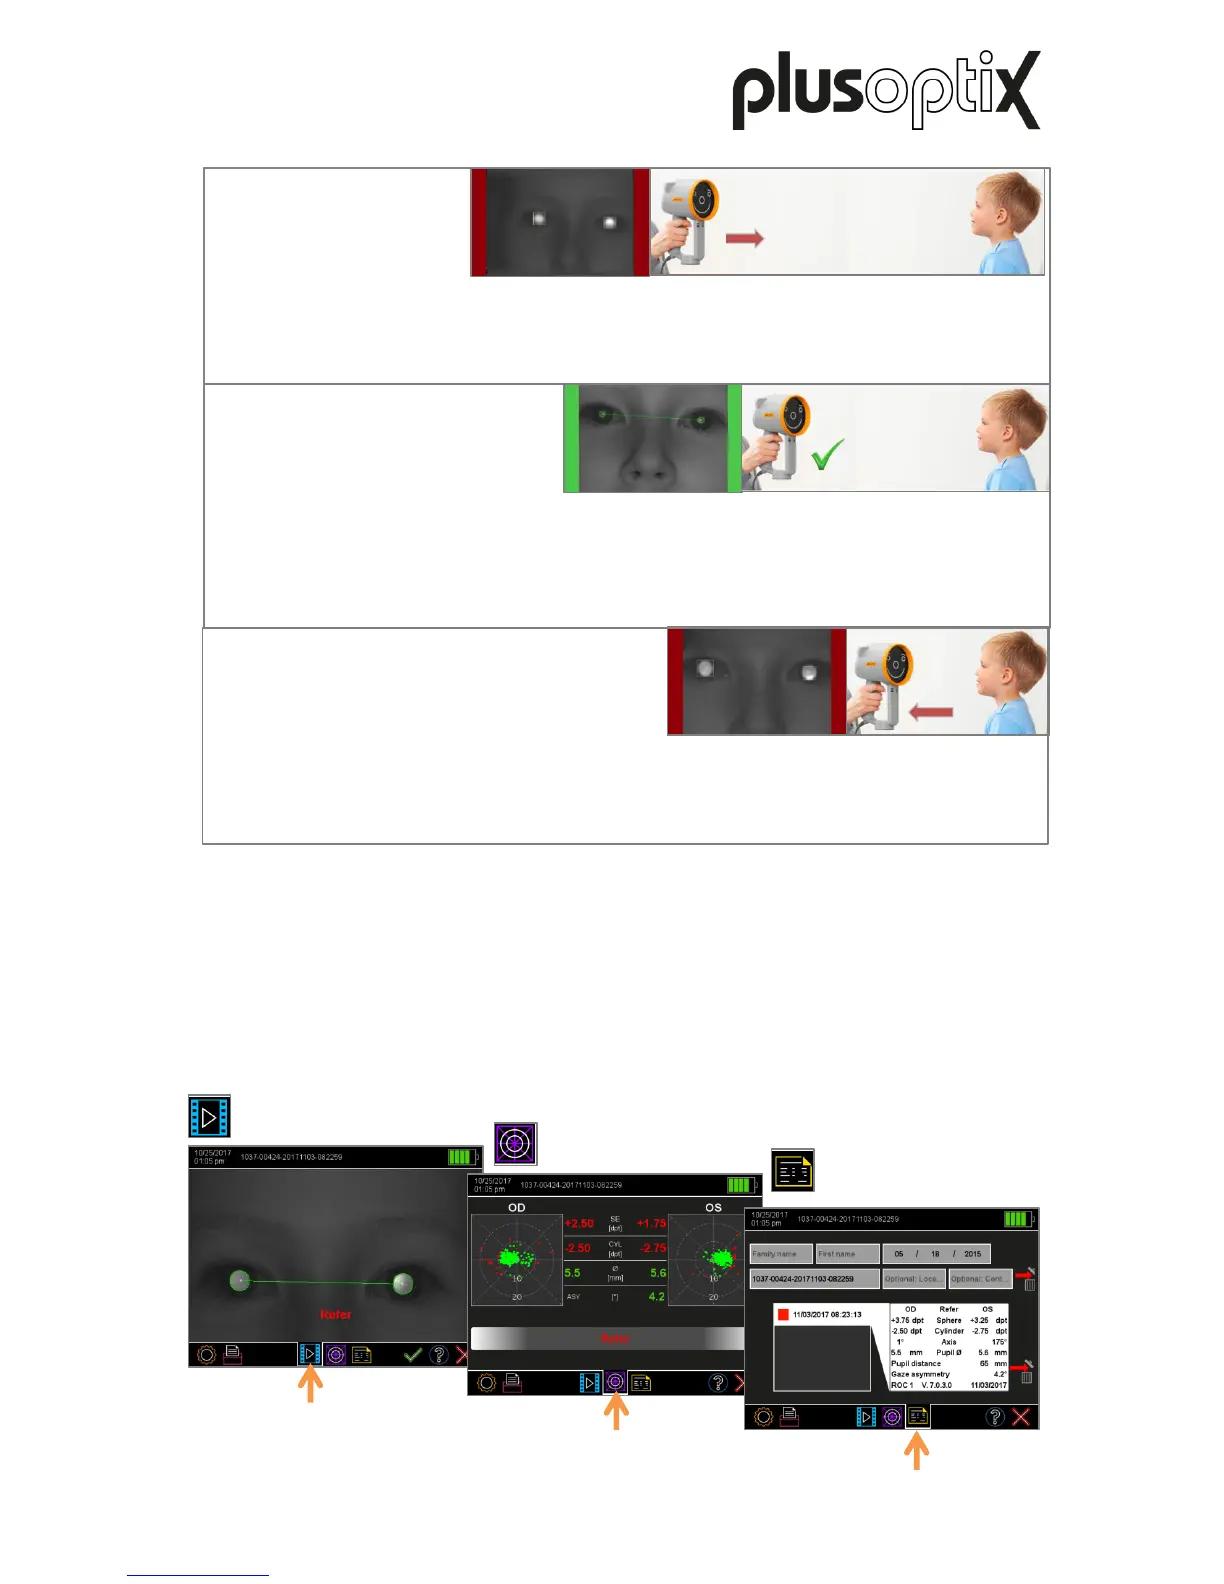
The image is blurry and two red bars will be displayed next to the camera image. As the
measuring distance is too great, you can see the head of the patient virtually in its entirety.
Move the “plusoptiX S16” towards the patient until the camera image can be seen in high-
definition on the screen and both pupils are encircled in green.
The image is blurry and two red bars will be displayed next to the camera image. As the
measuring distance is too small, the eyes can be seen on the screen. Move the “plusoptiX
S16” away from the patient until the camera image can be seen in high-definition on the
screen and both pupils are encircled in green.
The image can be seen in high-definition on the screen, the bars are green and both pupils
are encircled in green. As soon as both pupils are surrounded by a green circle, the line
between the pupils turns green and another warble sound can be heard. The
“plusoptiX S16” is now a metre away from the child and the measurement begins
automatically. A “ping” sound signalises the end of the measurement.
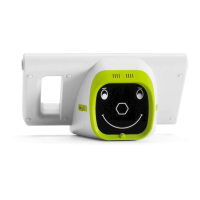
Results page
“camera image”
Results page
“measurement values”
Results page “database”
(only plusoptiX S16)
7.4 Checking and documenting the measurement results
As space on the screen is limited, the measurement results are spread across a total of three
results pages. After the measurement, you will first see the “camera image” results page. By
touching the appropriate symbol in the middle of the navigation bar, you can access each of
the three results pages. More information about checking and documenting the
measurement results can be found in short manual 3, 5 and 6 on our homepage
(www.plusoptix.com), under support.
Figure 12: Overview of the results pages
Figure 11: Detecting the correct measuring distance