12
IV. Troubleshooting
For best results, follow the troubleshooting
solutions in the order that they are listed below.
The numbers in parenthesis refer to the
Exploded Parts Diagram on pages 16-17.
A. Problems and Solutions
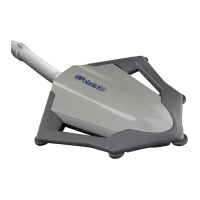
Problem: Polaris 140 gets stuck on steps or
other pool obstacles.
Solution: 1. Using the flow indicator (#24),
verify that the cleaner is receiving
the correct amount of water flow.
See page 7.
2. Holding the cleaner below the
water surface, verify that the
cleaner has a strong, steady pulse.
3. Reposition any eyeball fittings
installed on the return lines so
the flow will move the hose and
cleaner away from the obstacles.
4. Reposition the deflector ring (#25)
more closely to where the hose
contacts the obstacle, or add
another deflector ring if multiple
obstacles exist. See page 9.
5. Remove unnecessary pool hard-
ware, or install a Ladder Guard
(part #G-21).
6. Using the flow indicator, adjust the
water flow to the higher end of the
water flow range. See page 7.
7. Remove one hose section from the
middle of the hose.
8. Rotate the steering skirt (#15) to the
opposite side of the cleaner.
9.
Verify that the hose is assembled
properly and adjust the hose weight
(#23) position or add one additional
hose weight. See page 6.
Problem: Polaris 140 is sluggish, running
with less power than normal.
Solution: 1. Using the flow indicator (#24),
verify that the cleaner is receiving
the correct amount of water flow.
See page 7.
2. Verify that the pump basket
is clean.
3. Verify the filter pressure. If the
pressure is 5-10 psi above the
clean operating pressure (see
page 4), disconnect the Polaris
and backwash or clean the filter.
4. Turn the cleaner upside down to
check the ball valve seat (#11) for
any signs of wear. See page 11.
5. With the cleaner upside down,
check the ball valve chamber and
bypass intake for any visible
debris. See diagram page 11.
6. Remove the bypass intake to
verify that the bypass disk (#13)
has not been damaged or become
worn. See page 10.
7. Check the shoe (#17) for any signs
of wear. See page 10.
8. Remove the housings (#4, #5) and
pull out the ball valve stop pad (#9).
Verify that it is not worn or damaged.
9. With the housings removed, verify
the flotation (#14) is not damaged.
Problem: Polaris 140 has stopped operating.
Solution: 1. Using the flow indicator (#24),
verify that the cleaner is receiving
the correct amount of water flow.
See page 7.
2. Turn the cleaner upside down to
check the ball valve seat (#11) for
any signs of wear. See page 11.
3. With the cleaner upside down,
check the ball valve chamber and
bypass intake for signs of debris.
See diagram page 11.
4. Remove the bypass intake to
verify that the bypass disk (#13)
has not been damaged or become
worn. See page 10.
5. Check the shoe (#17) for any signs
of wear. See page 10.
6. Remove the housings (#4, #5)
and pull out the ball valve stop
pad (#9). Verify that it is not worn
or damaged.
 Loading...