Factory Restore a Ceiling Microphone
You can restore a microphone to its default settings. This process refreshes the device by deleting its
configurations except the current version of software.
Factory restoring the ceiling microphone requires the following tools:
● A small, thin block N45 magnet (for example, 76.2 mm [3 in.] × 12.7 mm [1/2 in.] × 3.18 mm [1/8
in.])
● Yardstick or adjustable floor-to-ceiling pole (so you don’t have to use a ladder)
● Duct tape
1. Tape the magnet to one end of the pole with one of the 3.18 mm (1/8 in.) edges facing up.
CAUTION: If you have a suspended ceiling, tape the magnet securely to avoid it coming loose
and sticking to a ceiling support grid.
2. Ensure that the microphone is powered on.
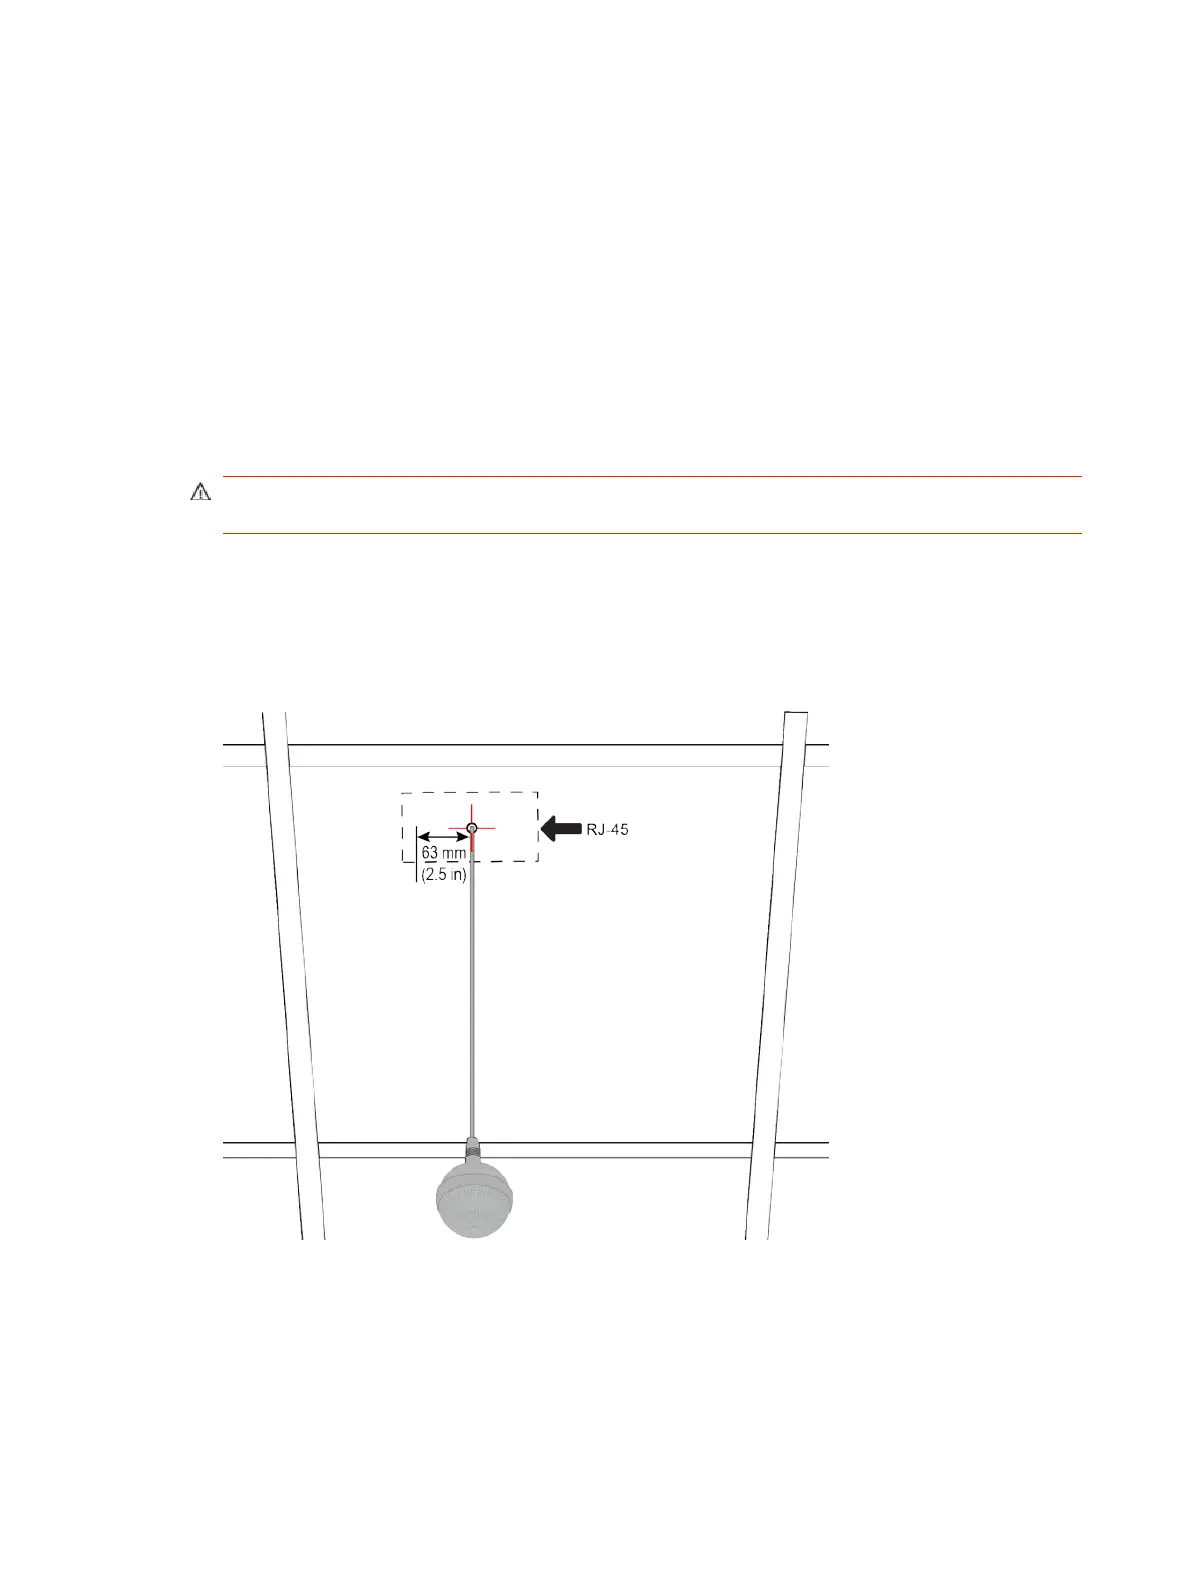
3. Locate the factory reset sensor.
Looking at the bottom edge of the microphone connector along a longer side of the electronics
enclosure, the sensor is approximately 63.5 mm (2.5 in.) towards the end opposite to the
enclosure’s RJ-45 connector.
If you can’t see the RJ-45 connector, look for the small black button on the microphone cable.
Facing that button at the 12 o’clock position, the sensor is located toward the 9 o’clock position.
116
Chapter 14System Maintenance