Model 72 -
12"/14';
Tilting Arbor Saw
OPERATING INSTRUCTIONS
MACHINE INSTALLATION ADJUSTMENTS AND MAINTENANCE
cont'd
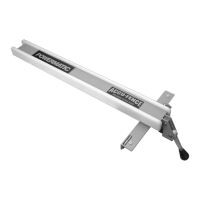
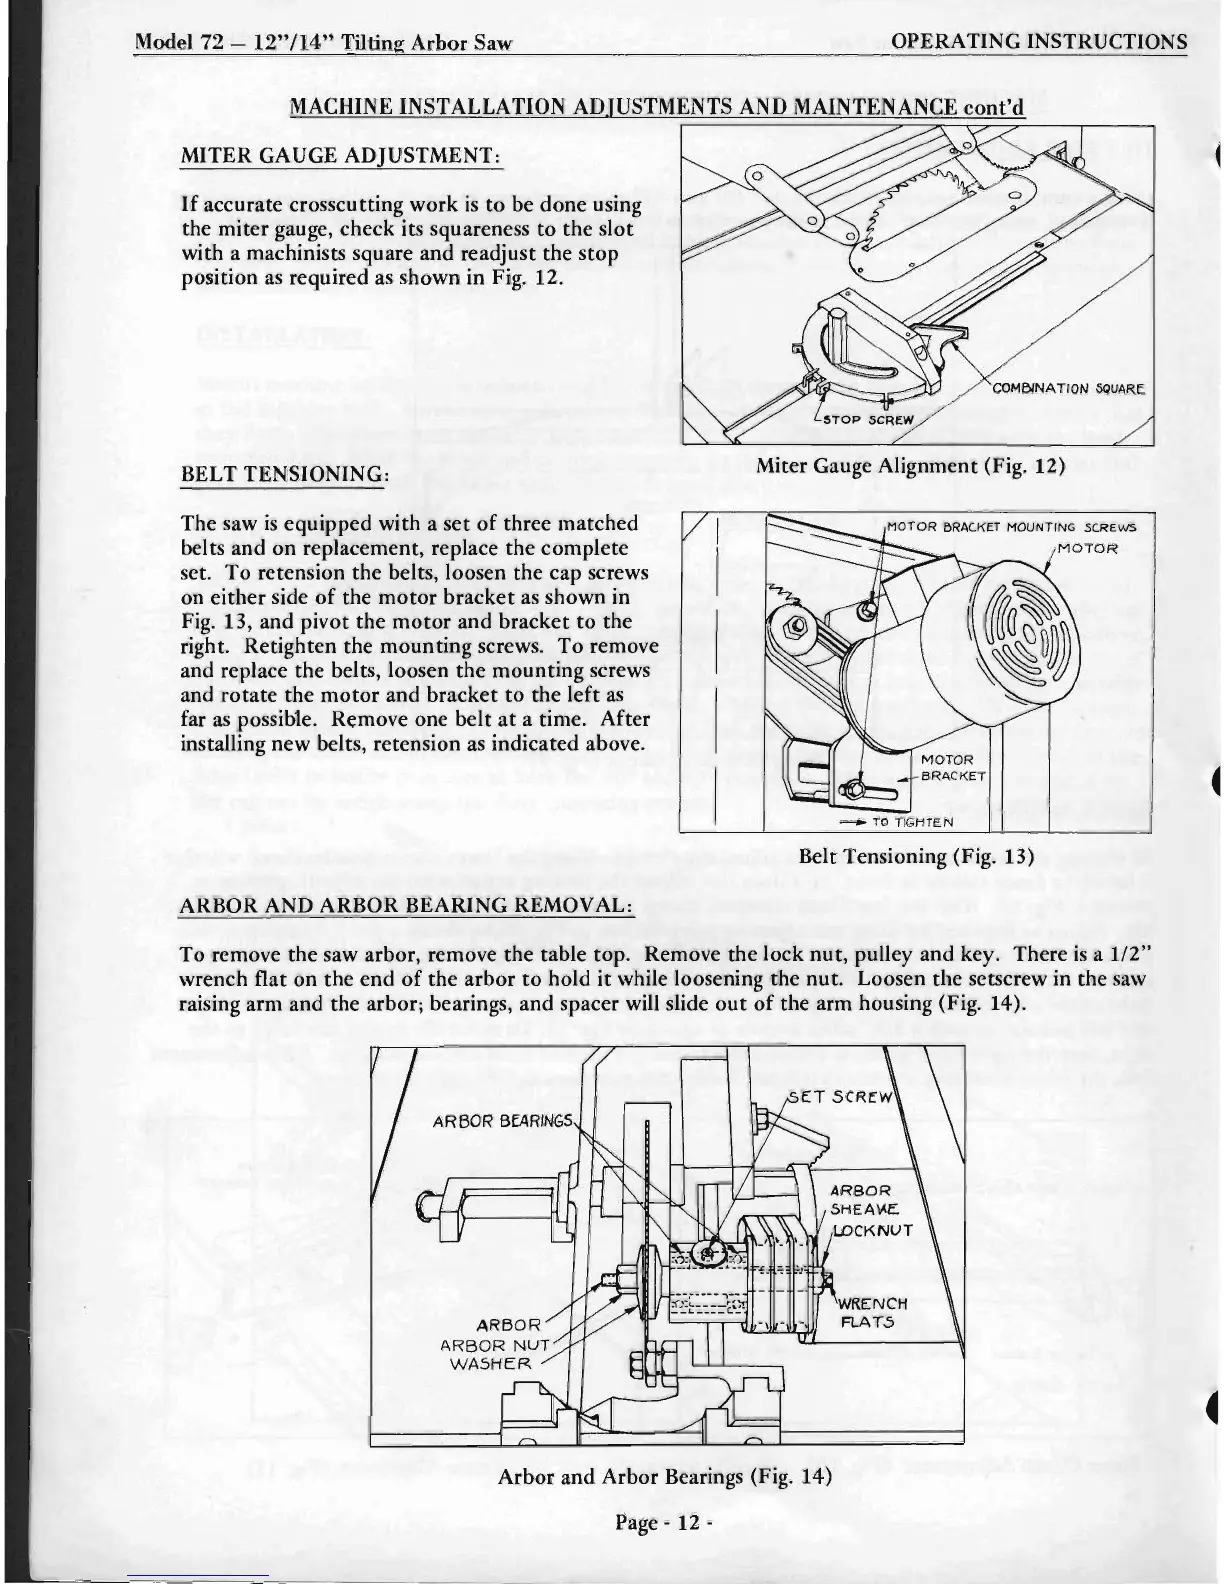
MITER GAUGE ADJUSTMENT:
If
accurate crosscutting work
is
to
be done using
the miter gauge, check its squareness
to
the slot
with a machinists square and readjust the stop
position as required as shown in Fig. 12.
BELT
TENSIONING:
The saw
is
equipped with a set
of
three matched
belts and on replacement, replace the complete
set.
To
retension the belts, loosen the cap screws
on either side
of
the
motor
bracket
as
shown in
Fig. 13, and pivot the
motor
and
bracket
to
the
right. Retighten the mounting screws.
To
remove
and replace the belts, loosen the mounting screws
and rotate the
motor
and bracket
to
the
left
as
far
as
possib1e. Remove one
belt
at
a time. After
installing new belts, retension
as
indicated above.
ARBOR AND ARBOR BEARING REMOVAL:
Miter Gauge Alignment (Fig. 12)
MOTOR
BRACKET MOUNTING SCREWS
MOTOR
-
TO
TIG
HTEN
Belt Tensioning (Fig. 13)
To remove the saw arbor, remove the table top. Remove the lock nut, pulley and key. There
is
a 112"
wrench flat on the
end
of
the arbor
to
hold
it
while loosening the nut. Loosen the setscrew in the saw
raising arm and the arbor; bearings, and spacer will slide
out
of
the arm housing (Fig. 14).
Arbor and Arbor Bearings (Fig. 14)
Page - 12 -
 Loading...