Model 72 - 12114" Tilting Arbpr Saw
OPERATING INSTRUCTIONS
MACHINE INSTALLATION ADJUSTMENTS AND MAINTENANCE
cont'd
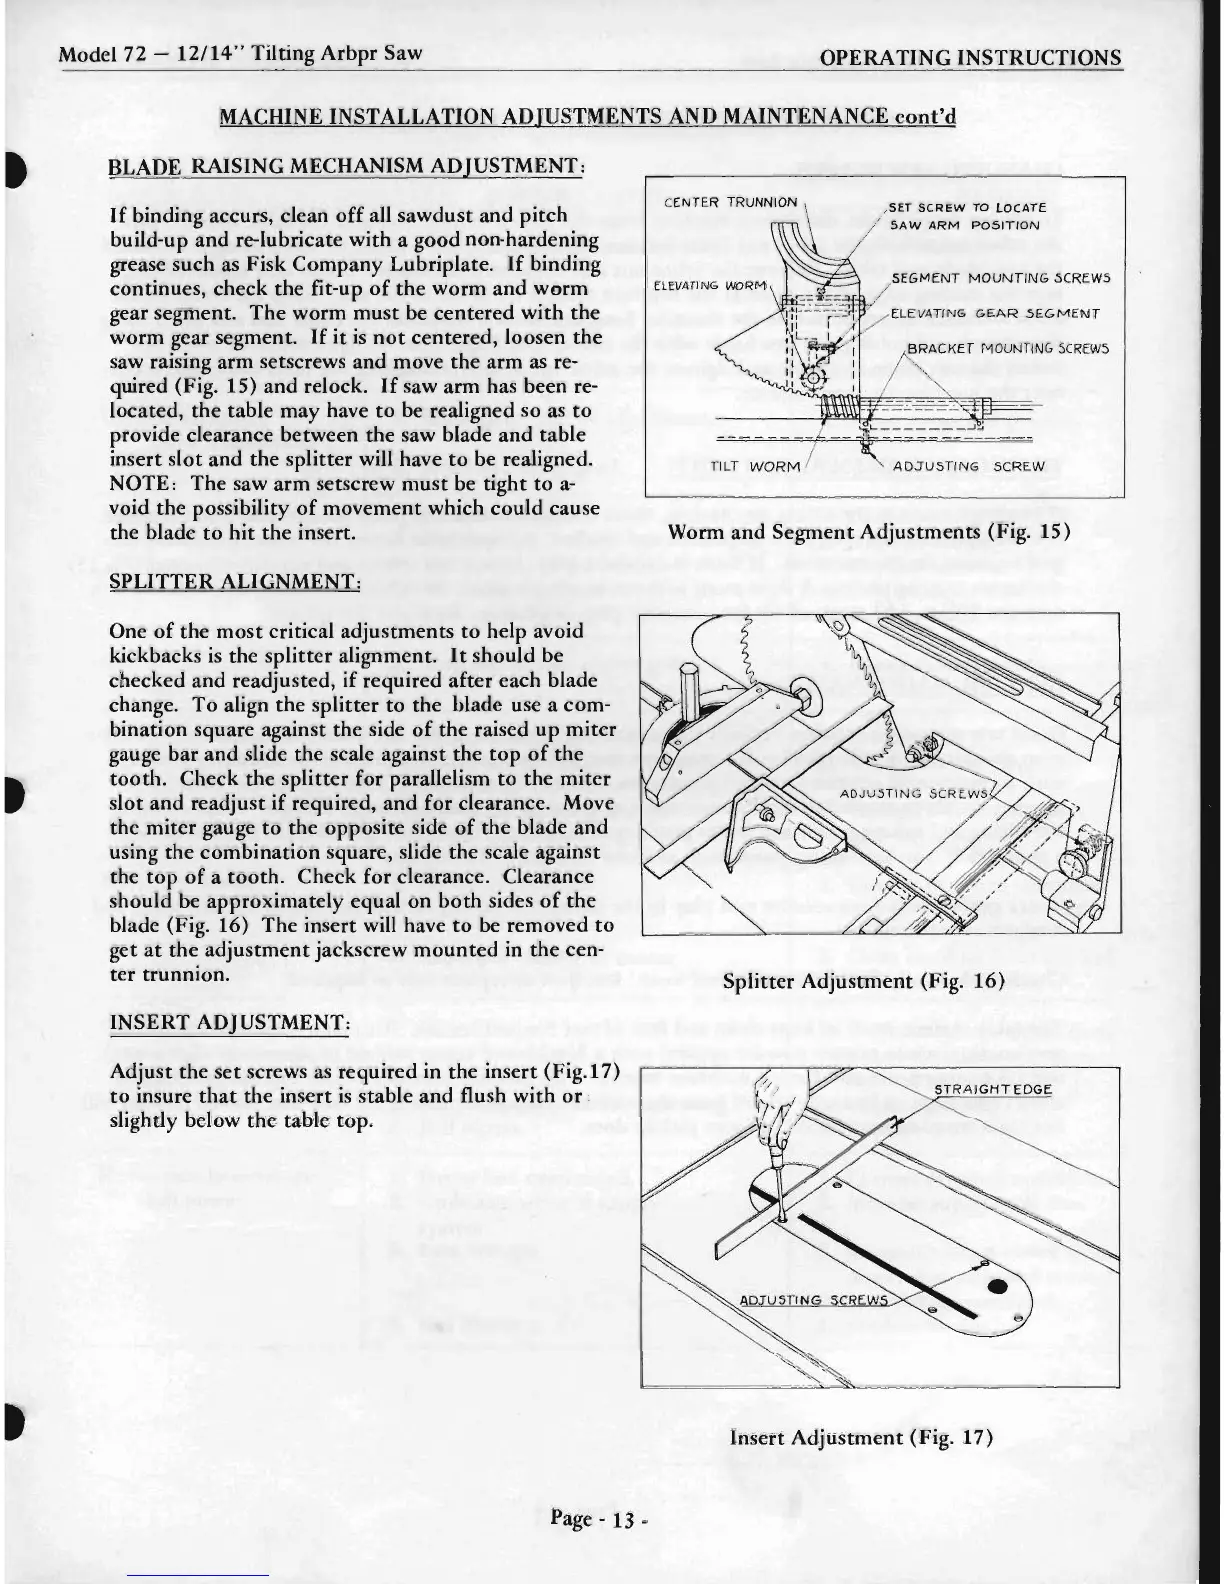
BLADE RAISING MECHANISM ADJUSTMENT:
If
binding accurs, clean
off
all sawdust and pitch
build-up and re-Iubricate with a good non·hardening
grease such
as
Fisk Company Lubriplate.
If
binding
continues, check the fit-up
of
the worm and worm
gear segment. The worm
must
be centered with the
worm gear segment.
If
it
is
not
centered, loosen the
saw raising arm setscrews and move
the
arm
as
re-
quired (Fig. 15) and relock.
If
saw arm has been re-
located, the table may have
to
be realigned so
as
to
provide clearance between the saw blade and table
insert slot and the splitter will have
to
be realigned.
NOTE: The saw arm setscrew
must
be tight
to
a-
void the possibility
of
movement which could cause
the blade
to
hit
the insert.
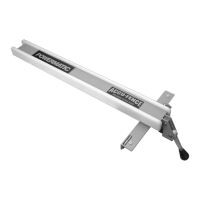
SPLITTER ALIGNMENT:
One
of
the
most
critical adjustments
to
help avoid
kickbacks
is
the splitter alignment.
It
should be
checked and readjusted,
if
required after each blade
change.
To
align the splitter
to
the blade use a com-
bination square against the side
of
the raised up miter
gauge bar
and
slide the scale against the
top
of
the
tooth. Check the splitter for parallelism
to
the miter
slot and readjust
if
required, and for clearance. Move
the miter gauge
to
the opposite side
of
the blade and
using the combination square, slide the scale against
the
top
of
a tooth. Check for clearance. Clearance
should be approximately equal on
both
sides
of
the
blade (Fig. 16) The insert will have
to
be removed
to
get
at
the adjustment jackscrew
mounted
in the cen-
ter trunnion.
INSERT ADJUSTMENT:
Adjust the set screws
as
required in the insert (Fig.17)
to
insure
that
the insert
is
stable and flush with
or
:
slightly below the table top.
Page -
13
-
elEVATING
WORM
SET
SCREW
TO
LOCATE
SAW
ARM
POSITION
SEGMENT
MOUNTING
.sCREWS
ELEVATING
GE:AR
,sE.GMENT
ADJUSTING
SCREW
Worm
and
Segment Adjustments (Fig. 15)
Splitter Adjustment (Fig. 16)
STR
A
IGHT
EDGE
Insert Adjustment (Fig. 17)
 Loading...