27
PM-833TV 4-13-21V1.indd Copyright © 2021 Quality Machine Tools, LLC
INSTALLING THE HEADSTOCK POWER FEED
The Precision Matthews Headstock Power Feed kit is specif-
ically engineered for the PM-833TV mill, Figure 1. Power re-
quired is 110V, 60 Hz.
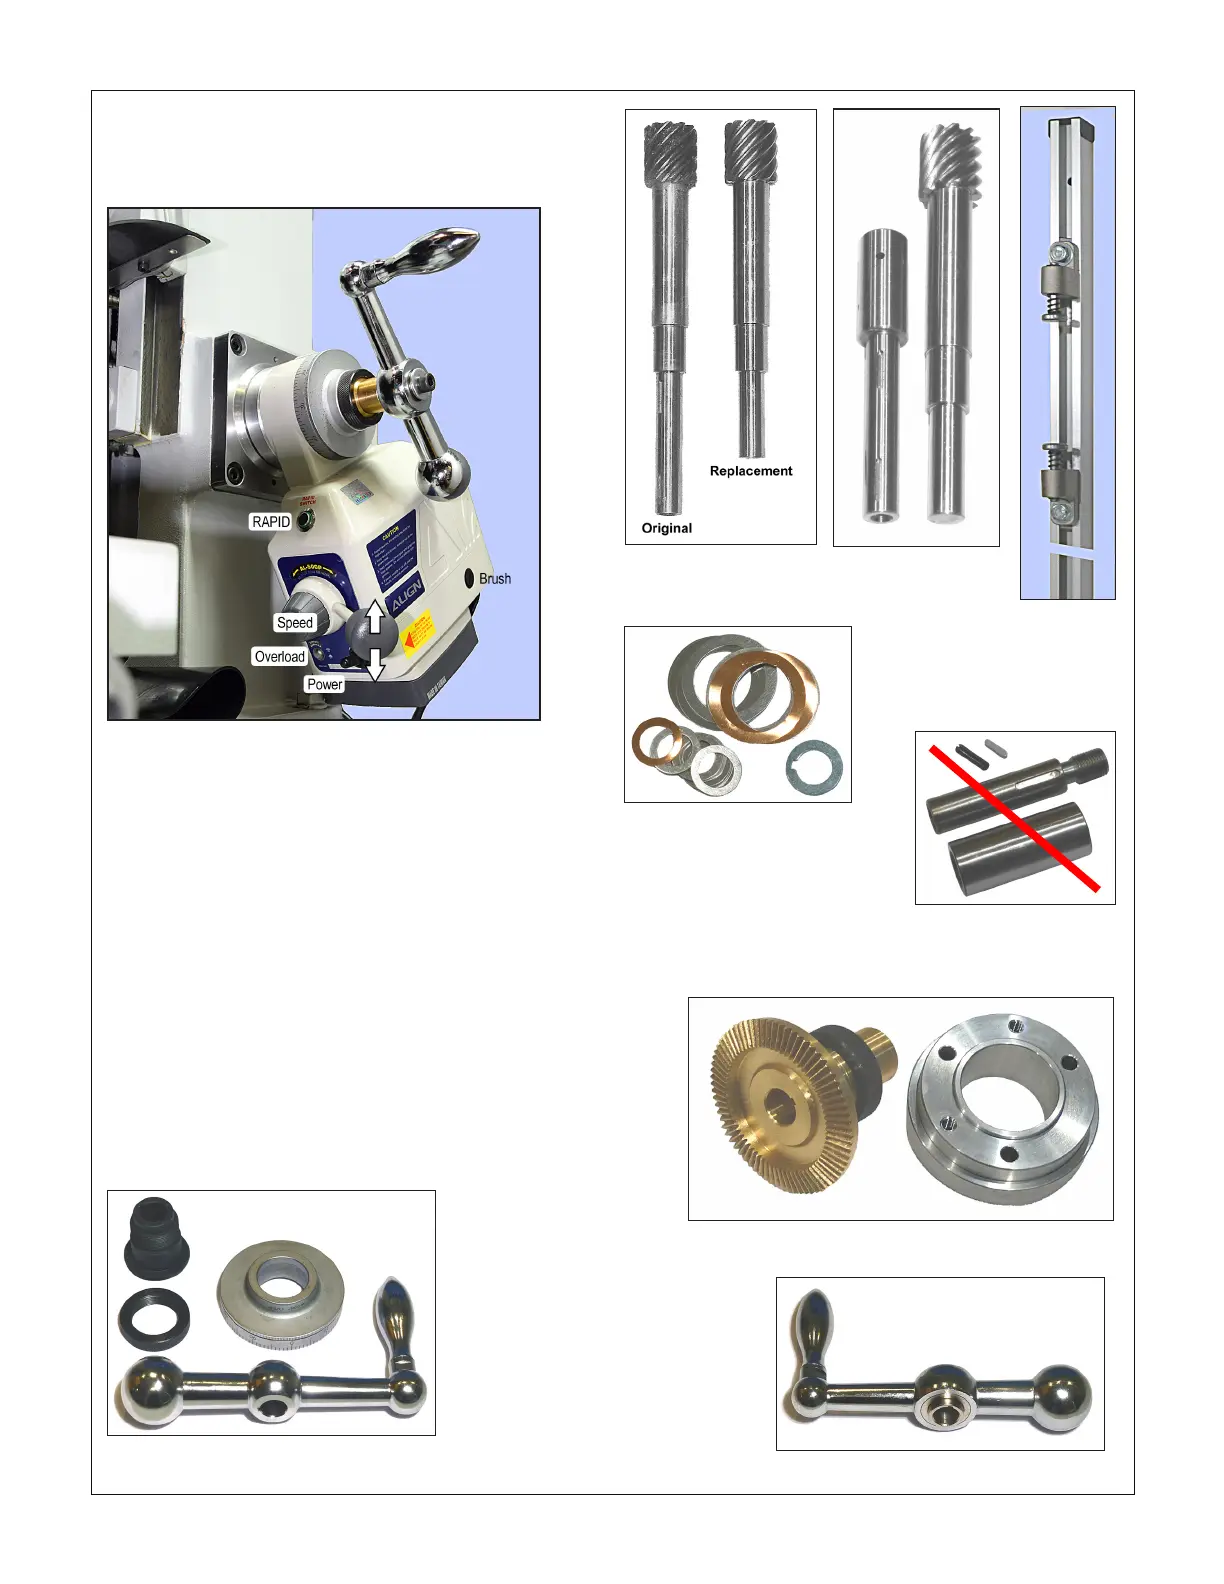
Figure 1 Headstock (Z-axis) Power Feed unit
Installation of the headstock power feed is straightforward,
calling for only a small number of standard shop tools. A drill
press (with vise) is highly desirable for the accurate drilling
of two holes for roll pins. Except for the motor unit itself, plus
roll pins and 3 x 15 mm keys, Figure 3 shows the main parts
included in the kit.
Instructions in the manufacturer's manual do not apply to the
PM-833TV. Use the manual only as a reference for parts and
electrical.
Replacement
gear shaft &
extender
Power feed
stop assembly
Shims
Two sets of large and small shims in
4 thicknesses: 0.008", 0.16", 0.024",
plus 0.004" copper. The keyed spac-
er washer is 0.075". Also included:
1/4-20 x 1" cap screws, quantity 2.
Surplus These parts, if
included in the kit, are not
needed in this installation
Brass bevel gear & replacement collar
Gear shafts compared
Suggested procedure
1. Remove the Z-axis crank handle, together with the dial,
black knurled ring, and threaded (black) bushing, Figure 2.
Only the dial is reused.
2. Remove the main ange, with gear shaft, Figure 6.
3. Using a soft mallet, tap the gear shaft clear of the main
ange.
Figure 3 Parts supplied in kit
Replacement crank
handle (freewheels
when released)
Figure 2 Removed hand crank components

 Loading...
