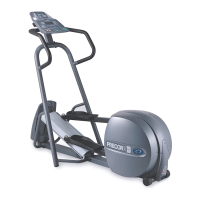
5.17i Elliptical Fitness Crosstrainer
Page 77
5. Remove the bolt that fastens the lower end of the lift motor to the frame. Note the location of
the mylar washers, they must be replaced in the same locations to minimize lift motor
operating noise.
6. Set the replacement lift motor in its mounting location and fasten it to the frame with the
hardware removed in step 5.
7. Replace the keeper with the screws removed in step 3.
8. Calibrate the lift motor per Procedure 5.3 steps 4-7. The lift motor must be calibrated to
ensure that it will track properly during normal use.
9. Raise the ramp and position it so that the ramp mounting holes align with the holes in the
plastic lift nut. If it is necessary to rotate the lift nut to align it with the ramp, do not rotate it
any more than is required for alignment. Slide both lift pins through the ramp mounting holes
and into the plastic lift nut. Fasten both lift pins with the retaining cli[ps removed in step 3
10. Set the on/off switch in the “on” position. Thoroughly test all lift related functions per Section
Four.
11. Set the on/off switch in the “off” position, replace the front cover.

 Loading...