Page 6
WATTS Premier Monitored (Top Mount) Faucet Installation
1
2
3
b
a
4
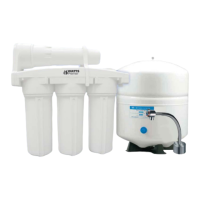
4. Feed the toggle bolt and tubes through the mounting hole in The
sink. Test t faucet placement.
6. Using a at head screwdriver torque the toggle bolt through the
spout hole to approximately 5lbs/in.
5
A 1.0” - 1.25” Mounting hole is required for faucet installation.
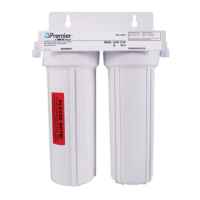
8. Pull the Battery Safety Tab out to activate faucet monitor.
Make sure that the clear drawer is rmly seated in the
faucet base. The monitor will ash briey once activated.
7. Insert spout into the faucet base until fully seated.
8
7
6
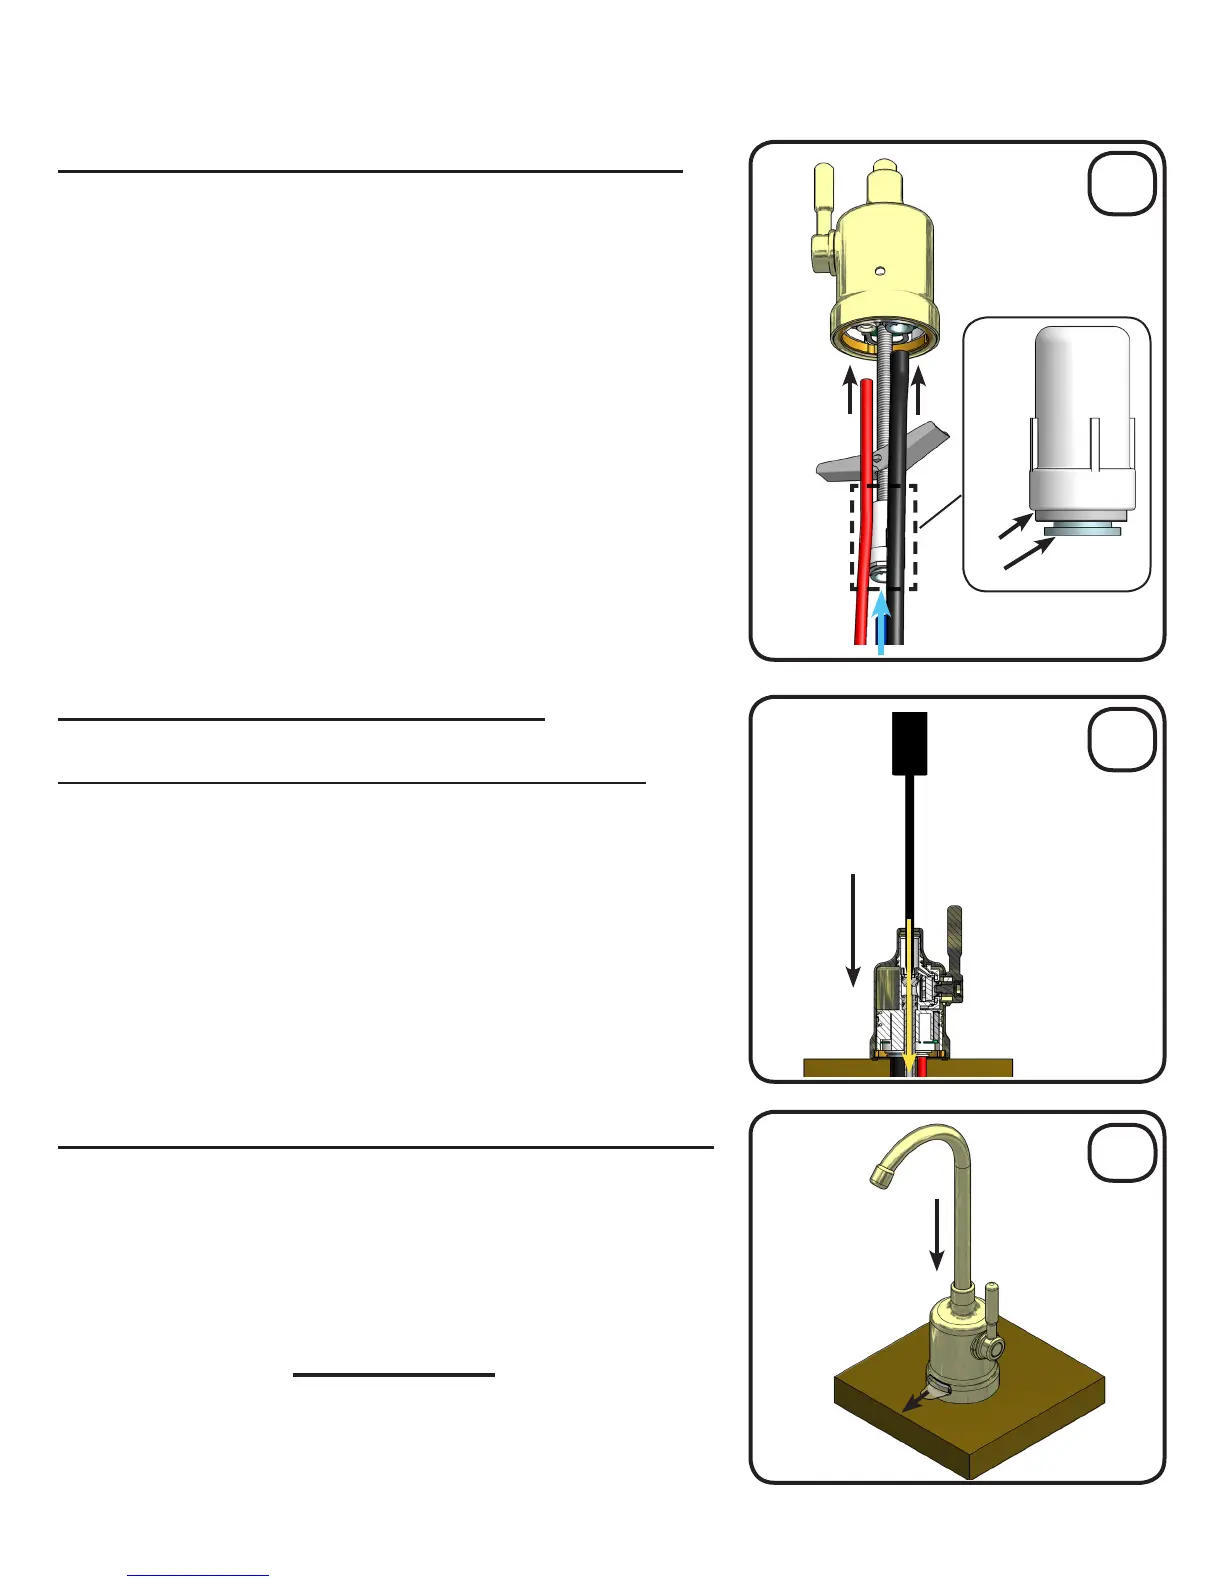
A) Connect tubes to the RO faucet (Figure A)
B) Mount the RO faucet (Figure B)
C) Pull Battery Tab and Install Spout (Figure C)
This RO faucet is equipped with quick connect ttings for easy tube
installation. To connect tubes, simply push them rmly into their
corresponding tting on the RO faucet until fully seated.
1. Connect 3/8” BLUE tube. (3/8” Fitting on Toggle Bolt)
To disconnect a tube, push in collet (Fig. b) squarely against face
of tting (Fig. a). With collet held in this position the tube can be
removed.
2. Connect 3/8” BLACK tube . (3/8” Fitting on base of faucet)
3. Connect 1/4” RED tube. (1/4” Fitting on base of faucet)
Approximately 3/4” of the tube should go into the tting.
A
B
C
5. Peel the white backing paper off the seal on the bottom of the
faucet base and press rmly over the mounting location.
“This product contains a button cell battery. If swallowed, it
could cause severe injury or death in just 2 hours.
Seek medical attention immediately.”
CAUTION!