11
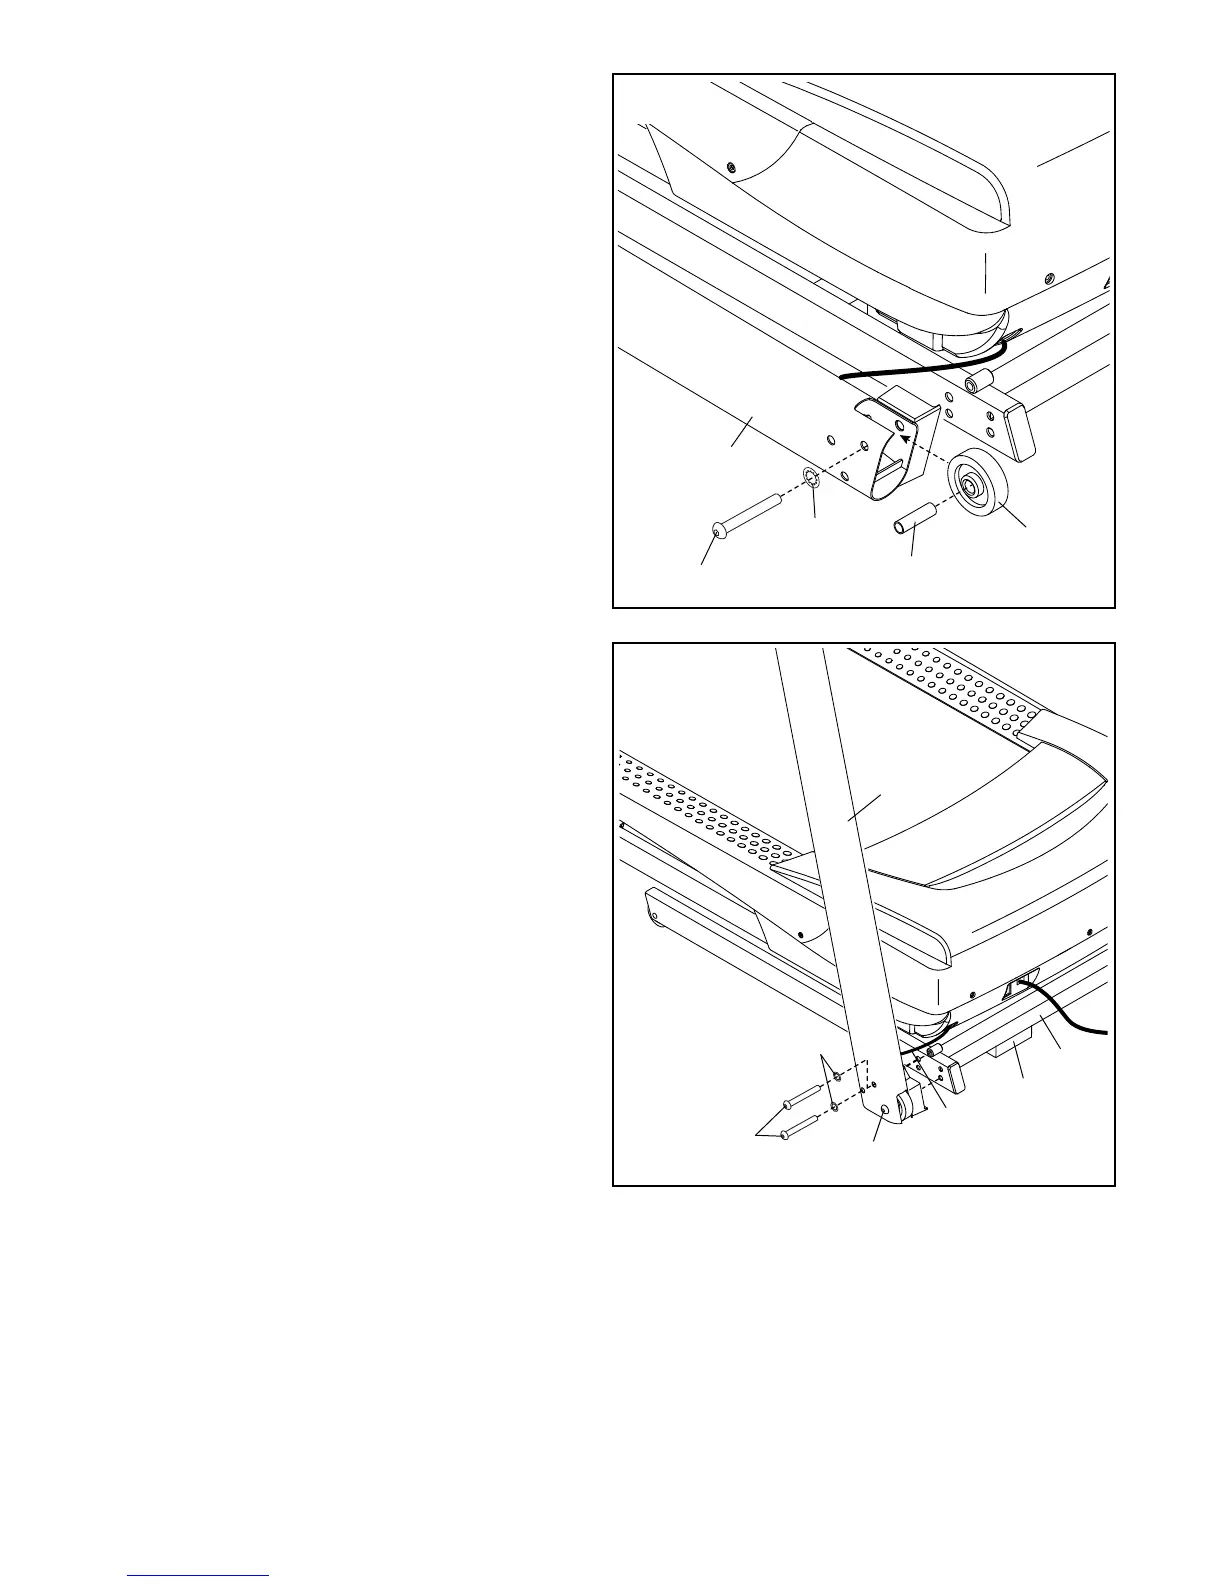
4. Insert a Wheel Spacer (63) into a Front Wheel
(62). Hold the Front Wheel inside the lower end
of the Right Upright (90), and insert a 3/8" x 4"
Screw (7) with a 3/8" Star Washer (13) into the
Right Upright and the Front Wheel.
Repeat this step on the other side of the
treadmill (not shown).
7
62
63
13
90
5. Place a piece of packing material (B) under
the right side of the Base (94). Hold the Right
Upright (90) against the Base. Make sure not
to pinch the Upright Wire (81).
Insert two 3/8" x 4" Screws (7) with two 3/8" Star
Washers (13) into the Right Upright (90), and
partially tighten the three Screws into the Base
(94); do not fully tighten the Screws yet.
Move the packing material (B) to the left side
of the Base (94) and attach the Left Upright
(not shown) in the same way. Note: There are
no wires on the left side.
Remove the packing material (B) from under-
neath the Base (94).
7
90
13
7
94
81
5
B
4

 Loading...