12
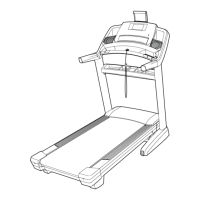
6. Remove and discard the four indicated screws
(C).
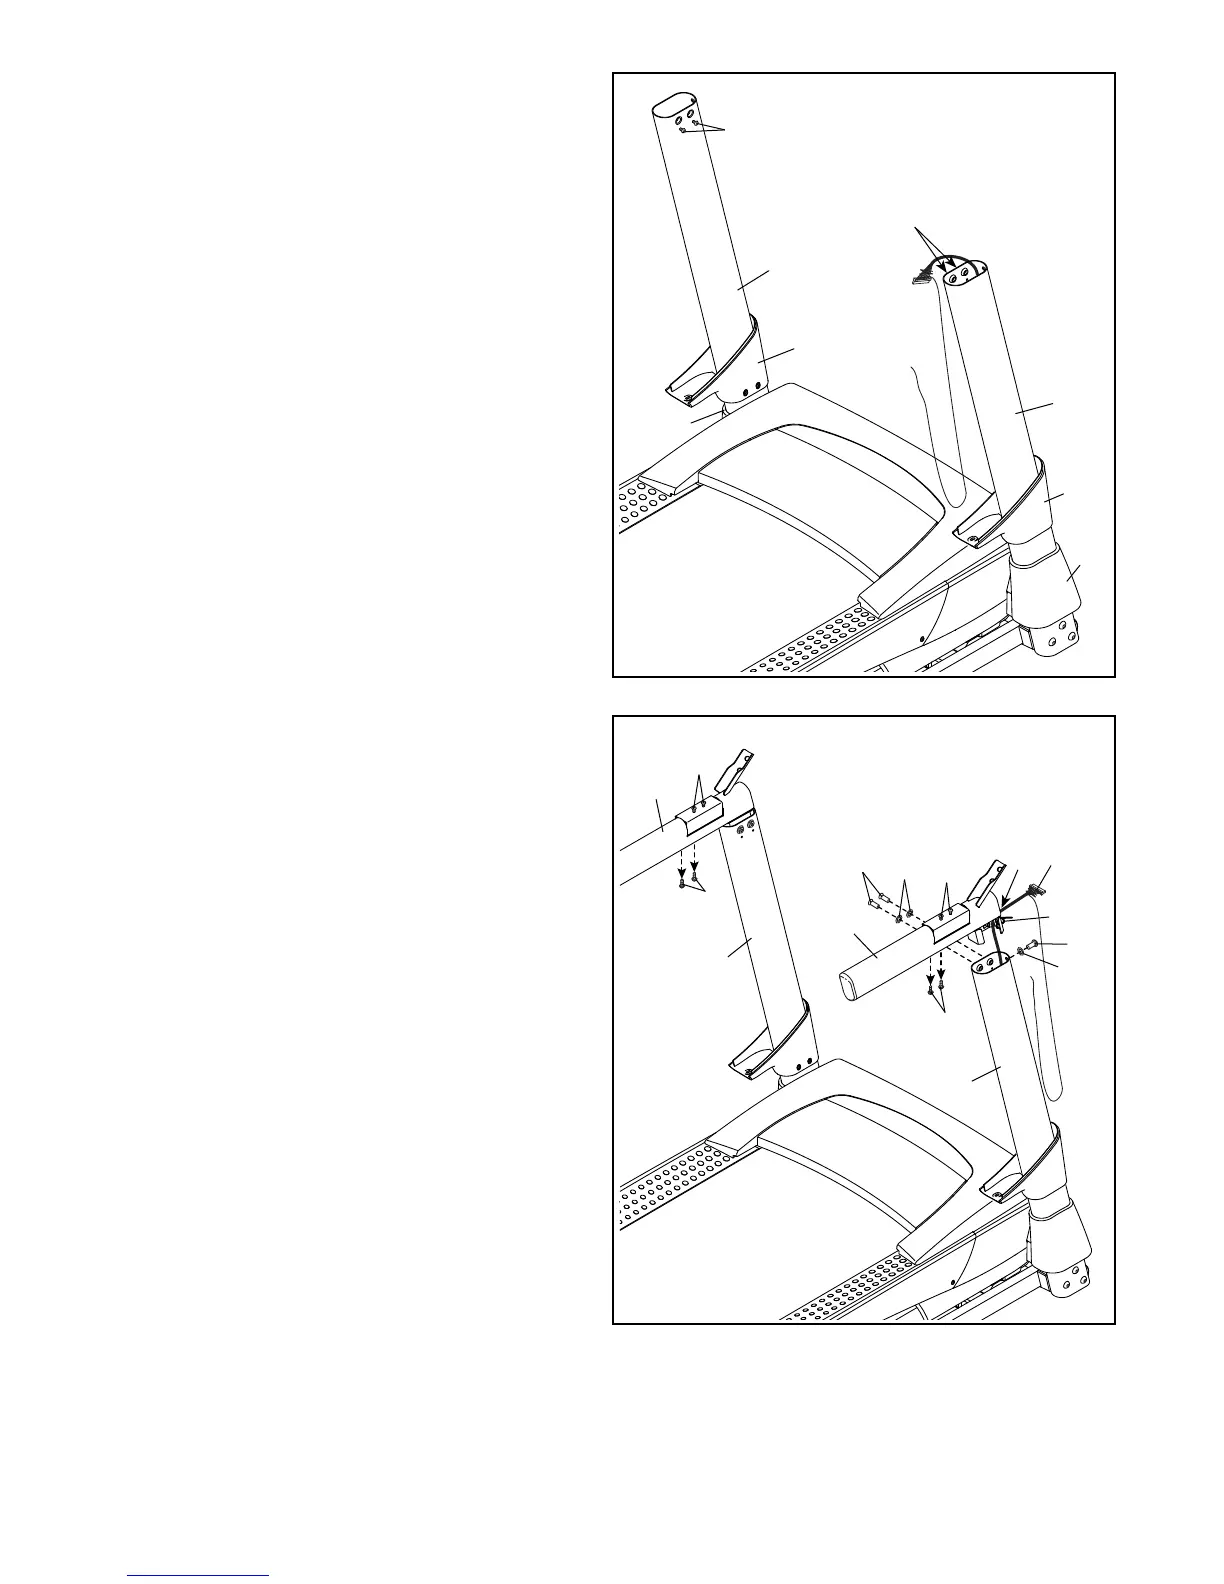
Identify the Left and Right Base Covers (82, 83).
Slide the Left Base Cover onto the Left Upright
(89), and slide the Right Base Cover onto the
Right Upright (90). Do not press the Base
Covers into place yet.
Slide the Left and Right Upright Covers (84, 85)
onto the Left and Right Uprights (89, 90).
6
82
90
83
89
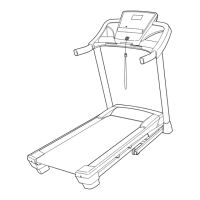
7. Remove and discard the eight indicated screws
(C).
If there is a tie securing the Cage Nut (92) in the
Right Handrail (87), remove the tie and make
sure that the Cage Nut is in place.
Hold the Right Handrail (87) near the Right
Upright (90). Route the Upright Wire (81) into the
bottom of the Right Handrail and out of the front.
Attach the Right Handrail (87) to the Right
Upright (90) with two 5/16" x 1" Screws (28), a
5/16" x 1 1/4" Screw (8), and three 5/16" Star
Washers (11). Do not fully tighten the Screws
yet.
Attach the Left Handrail (86) to the Left
Upright (89) in the same way. Note: There are
no wires on the left side.
7
11
87
11
C
C
86
90
28
8
89
81
92
Tie
84
85
C
C
C
C