EasyManua.ls Logo

Pro-Form 235 CSX - User Manual

Pro-Form 235 CSX
28 pages
Print Icon
To Next Page IconTo Next Page
Loading...
Model No. PFEX26820.0
Serial No.
Write the serial number in the space
above for reference.
CAUTION
Read all precautions and
instructions in this manual before
using this equipment. Keep this
manual for future reference.
USER’S MANUAL
proform.com
Serial
Number
Decal
To register your product and
activate your warranty today,
go to my.proform.com.
For service at any time, go to
support.proform.com.
Or call 1-888-533-1333
Mon.–Fri. 6 a.m.–6 p.m. MT
Sat. 8 a.m.–12 p.m. MT
Please do not contact the store.
ACTIVATE YOUR
WARRANTY
CUSTOMER CARE
Question and Answer IconNeed help?

Do you have a question about the Pro-Form 235 CSX and is the answer not in the manual?

Summary

IMPORTANT PRECAUTIONS

PROTECT YOUR FITNESS EQUIPMENT WITH AN EXTENDED SERVICE PLAN

PREVENTIVE MAINTENANCE SERVICE PLANS

Details preventive maintenance plans, features, and coverage options for fitness equipment.

STANDARD SERVICE PLANS

Outlines standard service plans, including coverage, pricing, and duration for fitness equipment.

BEFORE YOU BEGIN

PART IDENTIFICATION CHART

ASSEMBLY

HOW TO USE THE EXERCISE BIKE

HOW TO PLUG IN THE POWER ADAPTER

Instructions on connecting the power adapter to the exercise bike and a power outlet safely.

HOW TO ADJUST THE SEAT CARRIAGE

Guide on adjusting the seat position for optimal exercise posture and comfort.

HOW TO ADJUST THE PEDAL STRAPS

Steps to adjust the pedal straps for secure foot placement during workouts.

HOW TO LEVEL THE EXERCISE BIKE

Instructions on adjusting the leveling feet to ensure the bike is stable on uneven surfaces.

HOW TO USE THE CONSOLE

HOW TO USE THE MANUAL MODE

HOW TO USE AN ONBOARD WORKOUT

HOW TO CONNECT YOUR TABLET TO THE CONSOLE

HOW TO CONNECT YOUR HEART RATE MONITOR TO THE CONSOLE

HOW TO CHANGE CONSOLE SETTINGS

THE OPTIONAL CHEST HEART RATE MONITOR

FCC INFORMATION

MAINTENANCE AND TROUBLESHOOTING

HOW TO ADJUST THE REED SWITCH

Instructions for adjusting the reed switch to correct console feedback issues.

HOW TO ADJUST THE DRIVE BELT

EXERCISE GUIDELINES

EXERCISE INTENSITY

Guidance on determining and maintaining proper exercise intensity for fat burning and aerobic fitness.

HOW TO MEASURE YOUR HEART RATE

Instructions for accurately measuring your heart rate during exercise.

WORKOUT GUIDELINES

Recommendations for warming up, training zone duration, cooling down, and breathing.

EXERCISE FREQUENCY

Advice on the recommended frequency of workouts for maintaining fitness levels.

SUGGESTED STRETCHES

PART LIST

EXPLODED DRAWING

ORDERING REPLACEMENT PARTS

LIMITED WARRANTY

Overview

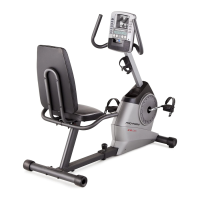
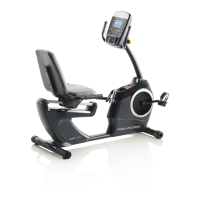
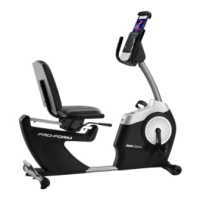
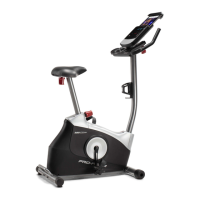
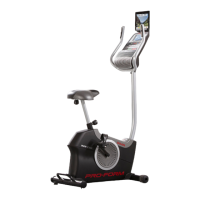
The Pro-Form 235 CSX is an exercise bike designed for home use, offering a range of features to enhance cardiovascular fitness, endurance, and body toning. It is manufactured by ICON Health & Fitness, Inc. and has a model number of PFEX26820.0.

Function Description:

The Pro-Form 235 CSX exercise bike provides a stationary cycling experience, allowing users to engage in cardiovascular workouts. It features adjustable resistance levels, which can be changed manually or automatically during onboard workouts. The console provides continuous feedback on various workout metrics, including time, distance, calories burned, speed (RPM), and heart rate. The bike supports Bluetooth connectivity, enabling users to connect a tablet for use with the iFit app to record and track workout information, or to connect a compatible Bluetooth Smart heart rate monitor for continuous heart rate monitoring.

Important Technical Specifications:

  • User Weight Capacity: The exercise bike should not be used by persons weighing more than 275 lbs. (125 kg).
  • Dimensions: Length: 4 ft. 8 in. (142 cm), Width: 2 ft. (61 cm).
  • Power: The console requires a power adapter (Model No. PFEX26820.0 R1120A, Key No. 7) for operation. It is crucial to use only a manufacturer-supplied regulated power adapter to avoid damaging the console. If the bike has been exposed to cold temperatures, it should be allowed to warm to room temperature before plugging in the power adapter to prevent damage to electronic components.
  • Connectivity: Bluetooth Smart for tablets (iFit app) and heart rate monitors. Other Bluetooth connections are not supported.
  • Display Units: The console can display speed and distance in either standard (miles, mph) or metric (kilometers, km/h) units, selectable via the St/M button.
  • Frame Warranty: Five (5) years from the date of purchase.
  • Parts and Labor Warranty: Ninety (90) days from the date of purchase.

Usage Features:

  • Console Activation: The console must be activated by pressing any button to turn it on, then going to iFit.com/activate on a smart phone, tablet, or computer to register the product and enable its exclusive features.
  • Manual Mode: Users can start pedaling or press any button to turn on the console and enter manual mode. Resistance can be adjusted using the numbered Resistance buttons or the increase/decrease buttons. The display shows workout information such as time, distance, calories, speed, RPM, and resistance level. A matrix display represents a 1/4 mile (400 m) track, showing progress.
  • Onboard Workouts: The console offers pre-programmed calorie, time, and interval workouts. These workouts automatically adjust pedal resistance and provide target pedaling speeds. Users can override resistance settings manually if needed. The console will prompt users to increase or decrease pedaling speed if they are "TOO SLO" or "TOO FAST" relative to the target speed.
  • Heart Rate Monitoring: The console is compatible with all Bluetooth Smart heart rate monitors. To connect, press the iFit Sync button; the console pairing number will appear, and the LED will flash red twice upon connection. Heart rate will be displayed when detected.
  • Tablet Connectivity: The iFit app can be downloaded on iOS or Android tablets. After enabling Bluetooth on the tablet, users can connect it to the console by pressing the iFit Sync button and following the app's instructions. A solid blue LED on the console indicates a successful connection. This allows for recording and tracking workout data.
  • Adjustable Seat: The seat carriage can be adjusted to the desired position by pushing down on the seat handle, sliding the seat, and then pulling up to lock it. Proper seat position ensures a slight bend in the knees when pedals are in the most forward position.
  • Adjustable Pedal Straps: The pedal straps can be adjusted by pulling their ends off the tabs, setting them to the desired position, and then pressing them back onto the tabs.
  • Leveling Feet: The exercise bike has leveling feet beneath the rear stabilizer to eliminate rocking during use.
  • Demo Mode: The console has a demo mode for store displays. If activated (DON), the console will not turn off or reset. To turn off demo mode, select DOFF in the settings.
  • Auto Shut-off: If pedals do not move for several seconds, the console pauses (time flashes). If pedals do not move and no buttons are pressed for several minutes, the console turns off and resets.

Maintenance Features:

  • Regular Inspection: All parts should be inspected and properly tightened each time the exercise bike is used. Worn parts should be replaced immediately.
  • Cleaning: The exercise bike can be cleaned with a damp cloth and a small amount of mild soap. It is important to keep liquids away from the console and to keep the console out of direct sunlight to prevent damage.
  • Reed Switch Adjustment: If the console does not display correct feedback, the reed switch may need adjustment. This involves unplugging the power adapter, removing the rear and front upright covers (by releasing tabs and removing M4 x 12mm Screws), locating the Reed Switch (35) and Magnet (39), loosening the M4 x 12mm Flange Screws (36), sliding the Reed Switch slightly closer to or away from the Magnet, and then retightening the screws. The power adapter is then plugged back in, and the Crank (40) is turned to check for correct feedback.
  • Drive Belt Adjustment: If the pedals slip, the drive belt may need adjustment. This requires unplugging the power adapter, removing the right pedal (29), right lock ring (23), and right shield (22). All screws from the left and right shields must be removed, noting their sizes. The Adjustment Screw (47) is then loosened, and the Idler Screw (45) is tightened until the Drive Belt (59) is taut. Finally, the Adjustment Screw (47) is tightened, and all removed parts are reattached.
  • Troubleshooting: If the console does not turn on, ensure the power adapter is fully plugged in. If a replacement power adapter is needed, contact customer care.
  • Warranty Service: For warranty service, users should call the telephone number on the front cover of the manual and be prepared to provide the model number and serial number of the product.

Pro-Form 235 CSX Specifications

General IconGeneral
BrandPro-Form
Model235 CSX
CategoryExercise Bike
LanguageEnglish

Related product manuals