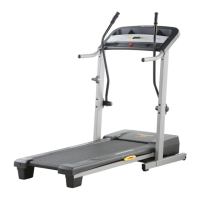
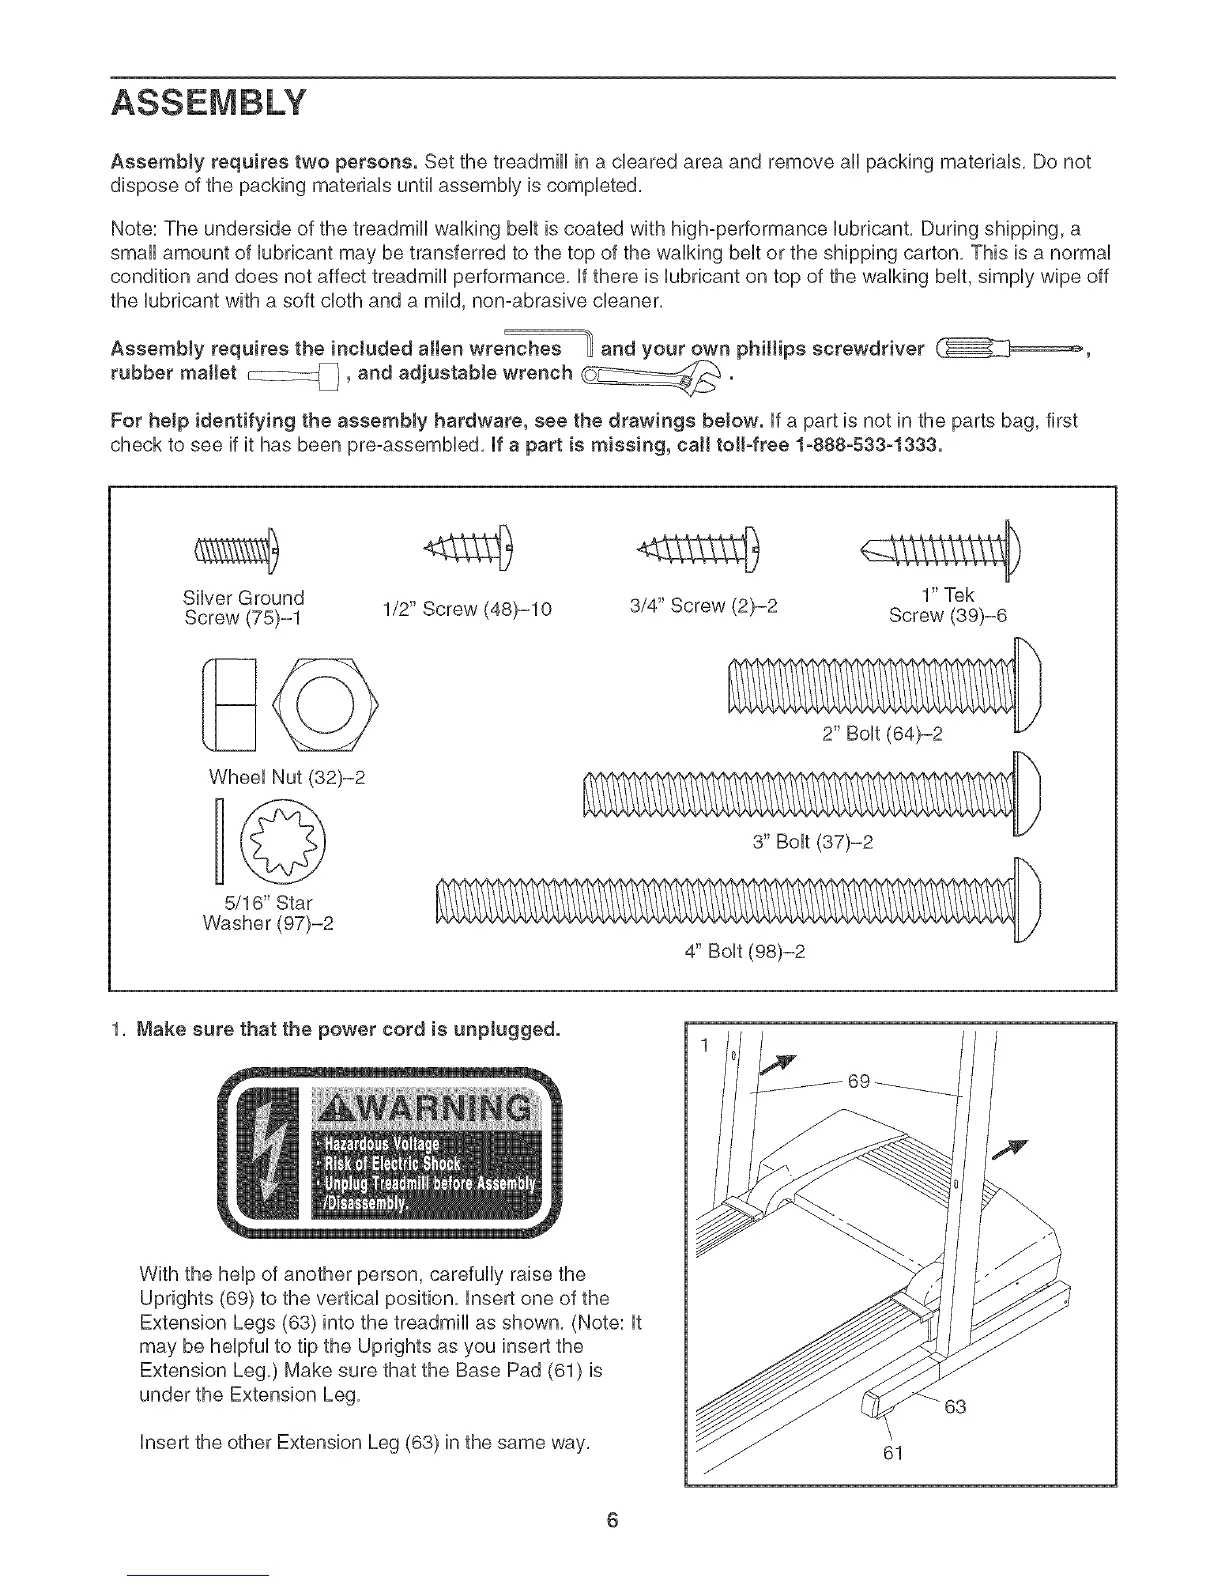
Assemblyrequirestwopersons.SetthetreadmHUinaclearedareaandremoveaHpackingmateriaUs,Donot
disposeofthepackingmateriaUsuntilassemMyiscompbted,
Note:Theundersideofthetreadmillwalkingbeltiscoatedwithhighoperformancelubricant,Duringshipping,a
smallamountoflubricantmaybetransferredtothetopofthewalkingbeltortheshippingcarton,Thisisa normal
conditionanddoesnotaffecttreadmillperformance,ifthereislubricantontopofthewalkingbelt,simplywipeoff
thelubricantwithasoftclothanda mild,nonoabrasivecleaner,
E
Assembly requires the included allen wrenches _ and your own phillips screwdriver
rubber mallet cZ_TL_x(_, and adjustable wrench _ .
For help identifying the assernbJy hardware, see the drawings below, if a part is not in the parts bag, first
check to see if it has been pre-assembled, If a part is missing, call toll-free 1-888-533-1333.
Silver Ground 1" Tek
Screw (75)-1 1/2" Screw (48)-10 3/4" Screw (2)-2 Screw (39)-6
Wheel Nut (32)-2
H©
5/16" Star
Washer (97)-2
2" Bolt (64)-2
3" Bolt (37)-2
4" Bolt (98)-2
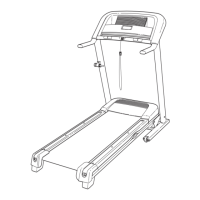
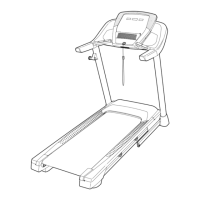
1. Make sure that the power cord is unpJugged.
With the help of another person, carefully raise the
Uprights (69) to the vertical position, insert one of the
Extension Legs (63) into the treadmill as shown, (Note: it
may be helpful to tip the Uprights as you insert the
Extension Leg,) Make sure that the Base Pad (61) is
under the Extension Leg,
insert the other Extension Leg (63) in the same way,
61
63