1
1
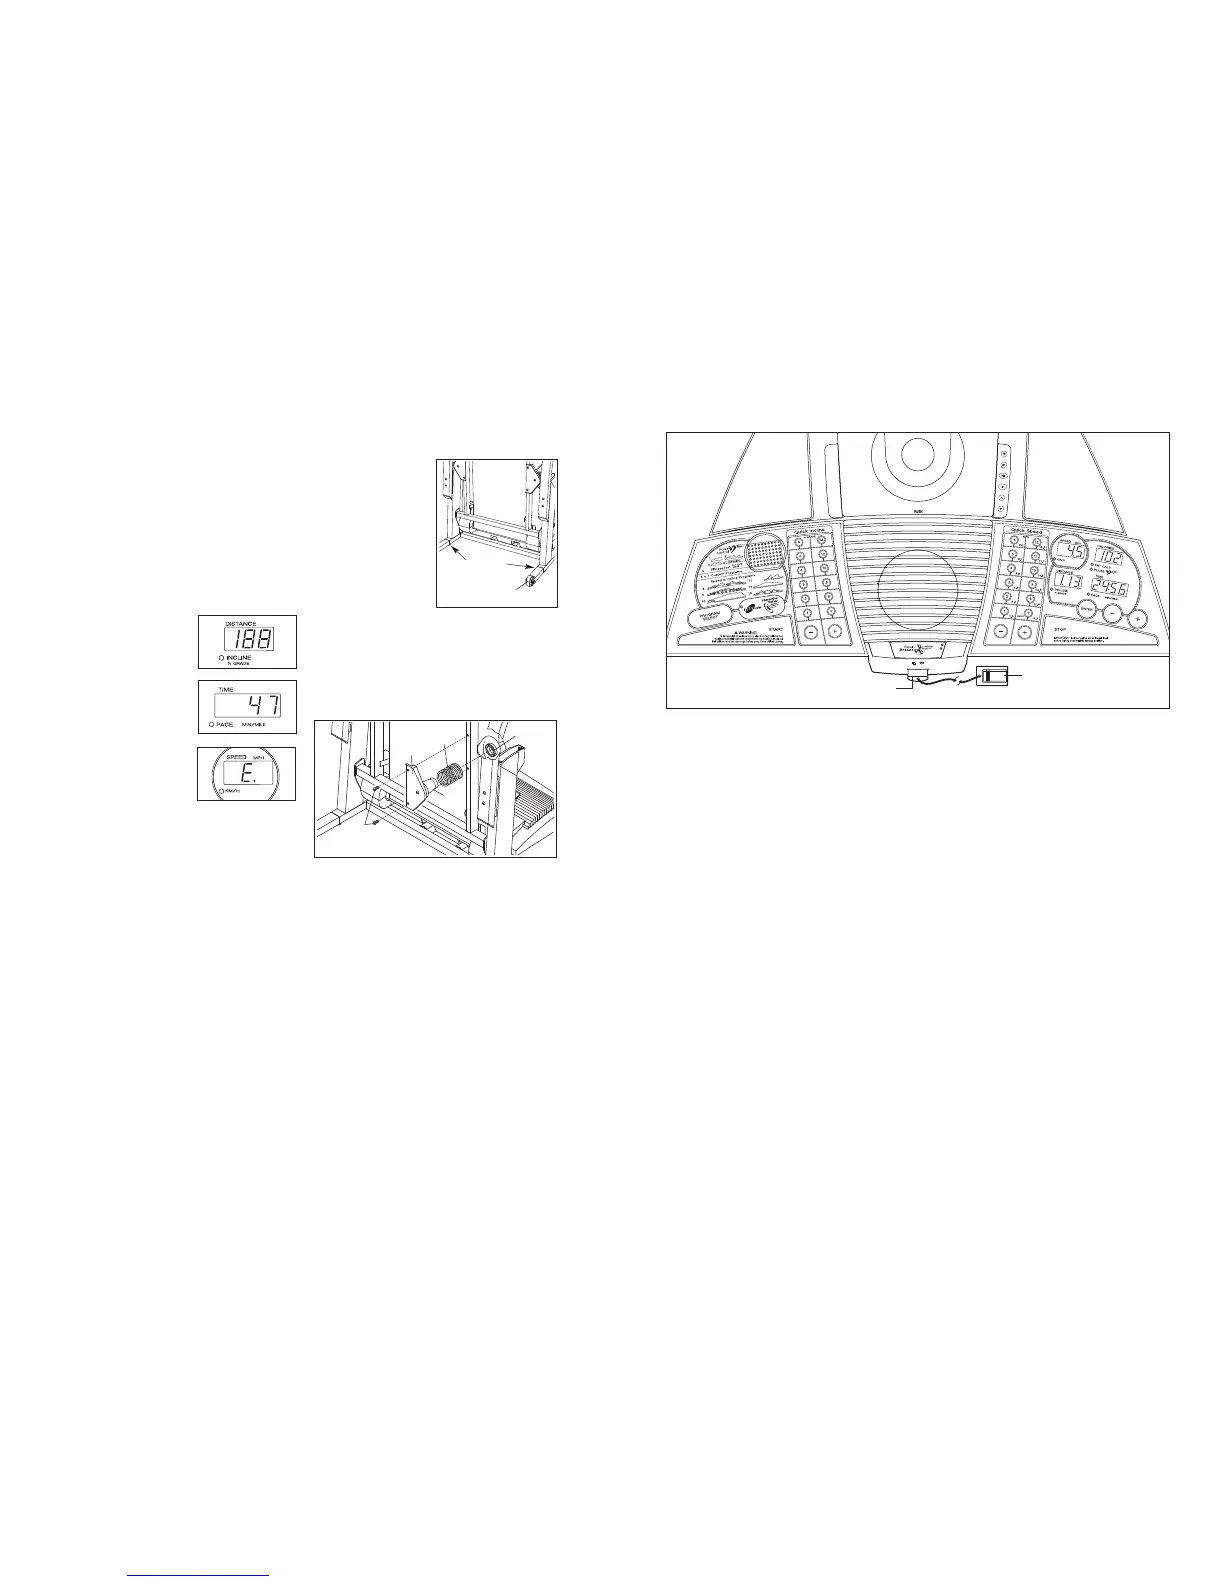
THE INFORMATION MODE/DEMO MODE
The console features an information mode that keeps
track of the total number of hours that the treadmill has
been operated and the total number of miles that the
walking belt has moved. The information mode also al-
lows you to switch the console from miles per hour to
kilometres per hour. In addition, the information mode
allows you to turn on and turn off the demo mode.
To select the information mode, hold down the Stop
button whilst inserting the key into the console. When
the information mode is selected, the following informa-
tion will be shown:
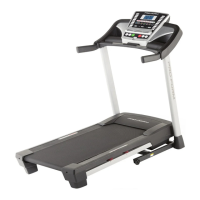
The Distance/Incline display
will show the total number of
miles (or kilometres) that the
walking belt has moved.
The Time/Pace display will
show the total number of
hours the treadmill has been
used.
An “E” for English miles or
an “M” for metric kilometres
will appear in the Speed dis-
play. Press the Speed + but-
ton to change the unit of
measurement.
IMPORTANT: The Calories/Pulse display should be
blank. If a “d” appears in the display, the console is in
the “demo” mode. This mode is intended to be used
only when a treadmill is displayed in a store. When the
console is in the demo mode, the power cord can be
plugged in, the key can be removed from the console,
and the displays and indicators on the console will au-
tomatically light in a preset sequence, although the
buttons on the
console will
not
operate.
If a “d” appears
in the Calories/Pulse display when the information
mode is selected,
press the
Speed – button so the
display is blank.
To exit the information mode, remove the key.
HOW TO LEVEL THE TREADMILL
If the treadmill wheels
are touching the floor or
if the
treadmill rocks
slightly, turn one or both
of the Levelling feet
under the upright base
until the wheels are off
the floor and the rocking
motion is eliminated.
Note: If necessary, tip
the treadmill and use a
phillips screwdriver to
turn the Levelling feet.
CHANGING THE ISOLATOR SPRINGS
The treadmill features Isolator Springs (6) that cushion
the walking platform. A pair of Gray Isolator Springs is
preinstalled on the treadmill. For a firmer walking plat-
form, the Gray Isolator Springs can be removed and
the included Blue Isolator Springs can be installed.
Fold the treadmill to the storage position (see page
21). Using an hex key, remove the two Isolator Bracket
Bolts (12) from one of the Isolator Brackets (10).
Remove the Gray Isolator Spring (6) from the Isolator
(7) and slide a Blue Isolator Spring onto the Isolator.
Insert the Isolator back into the circular channel in the
Isolator Top Cap (5), and reattach the Isolator Bracket
with the Isolator Bracket Bolts;
start both Isolator
Bracket Bolts before tightening either of them.
Replace the other Gray Isolator Spring (6) in the same
way.
Levelling
Feet
Wheel
12
10
6
5
7
FEATURES OF THE CONSOLE
The treadmill console offers an impressive array of
features that help you get the most from your workouts.
When the manual mode of the console is selected, the
speed and incline of the treadmill can be changed with
the touch of a button. As you exercise, the console will
display instant exercise feedback. You can even mea-
sure your heart rate using the handgrip pulse sensor or
the chest pulse sensor.
The console also offers six preset programs. Each pro
-
gram automatically controls the speed and incline of the
treadmill as it guides you through an effective workout.
Four pulse programs are also offered. Each program
adjusts the speed and incline of the treadmill to keep
your heart rate near a target heart rate whilst you exer-
cise. In addition, a fitness test program measures your
VO2 max level. You can even create custom programs
and save them in memory for future workouts.
The console also features iFIT.com interactive technol
-
ogy. Having iFIT.com technology is like having a per
-
sonal trainer in your home. Using the built-in CD player,
you can play iFIT.com CD programs that automatically
control the speed and incline of the treadmill as a per
-
sonal trainer guides you through every step of your
workout. High-energy music provides added motivation.
To purchase iFIT.com CDs, visit our Web site at
www.iFIT.com.
Using the included audio cable, you can also connect
the treadmill to your VCR and TV and play iFIT.com
video programs. Video programs offer the same bene-
fits as iFIT.com CD programs, and allow you to enjoy
breathtaking scenery while you exercise.
To purchase
iFIT.com videocassettes, visit our Web site at
www.iFIT.com.
You can also connect the treadmill to your home com-
puter and access programs directly from our Web site.
Visit www.iFIT.com for more information.
To use the manual mode of the console, follow the
steps beginning on page 12. To use a preset program,
see page 14. To use a pulse program, see page 16.
To use the fitness test program, see page 18. To cre
-
ate and use a custom program
, see pages 19 and
20. To use an iFIT.com CD program, see page 21. To
use an iFIT.com video
program
, see page 24. To
use an iFIT.com program directly from our Web
site, see page 25.
Note: If there are thin sheets of clear
plastic on the console, remove them.
Clip
Key
26
 Loading...