9
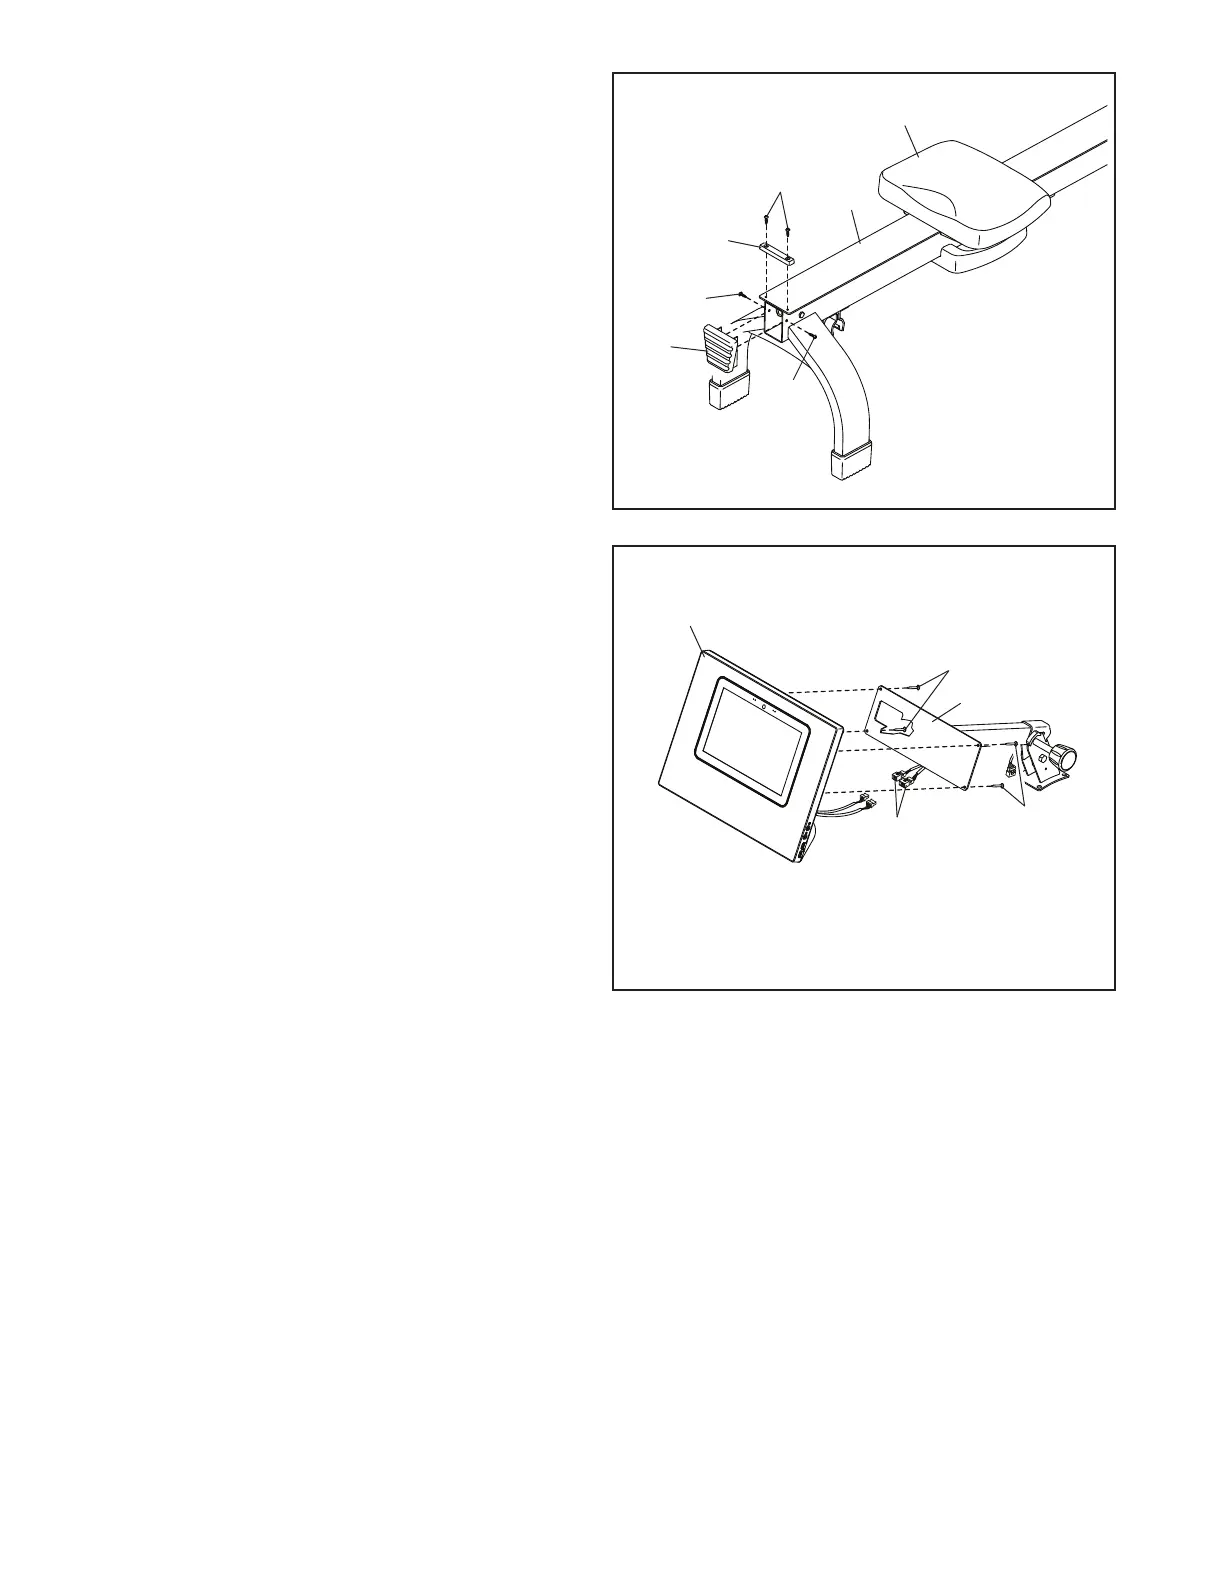
5. Slide the Seat (23) to the front of the Rail (2).
Next, attach the Rear Stop (87) to the Rail (2)
with two M4 x 8mm Screws (104).
Then, attach the Rail Cap (38) to the Rail (2)
with two M4 x 19mm Screws (69).
2
5
6
38
69
69
87
23
104
105
84
76
75
Avoid pinching
the wires
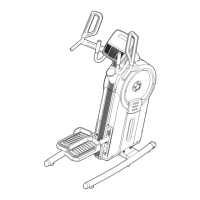
6. While a second person holds the Console (75)
near the Neck (76), connect the wires on the
Console to the matching connectors on the
Upright Wire (84) in the Neck. Tip: The wire
connectors should slide together easily and
snap into place with an audible click. If they
do not, turn one connector and try again.
Insert the excess wire into the Neck (76) or into
the Console (75).
Tip: Avoid pinching the wires. Attach
the Console (75) to the Neck (76) with four
M4 x 12mm Screws (105); start all the Screws,
and then tighten them.
105