EasyManua.ls Logo

Pro-Form SPORT 3.0 - User Manual

Pro-Form SPORT 3.0
32 pages
Print Icon
To Next Page IconTo Next Page
Loading...
USER’S MANUAL
Model No. PFTL39920.2
Serial No.
Write the serial number in the space
above for reference.
CAUTION
Read all precautions and
instructions in this manual before
using this equipment. Save this
manual for future reference.
proform.com
ACTIVATE YOUR
WARRANTY
To register your product and
activate your warranty today, go
to my.proform.com.
CUSTOMER CARE
For service at any time, go to
support.proform.com.
Or call 1-888-533-1333
Mon.–Fri. 6 a.m.–6 p.m. MT
Sat. 8 a.m.–12 p.m. MT
Please do not contact the store.
Serial
Number
Decal

Other manuals for Pro-Form SPORT 3.0

Questions and Answers

  • B
    Bobby SmithAug 15, 2025
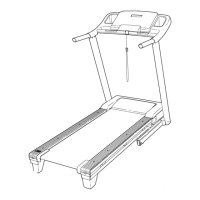
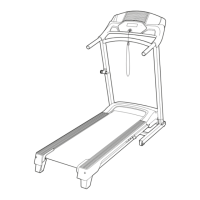
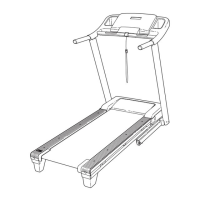
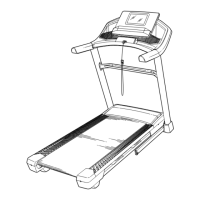
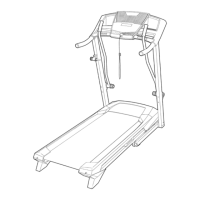
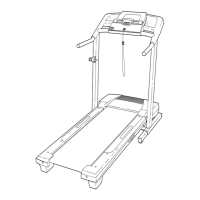
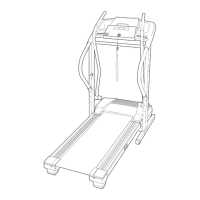
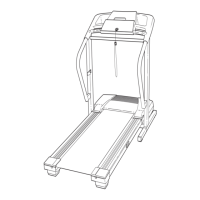
    What to do if Pro-Form SPORT 3.0 power does not turn on?
    • S
      scantrellAug 15, 2025
      First, ensure the power cord is correctly plugged into a surge suppressor, and the suppressor into a grounded outlet. Then, check that the key is properly inserted into the console after plugging in the cord. Also, examine the power switch on the treadmill frame near the cord; if it's protruding, wait five minutes before pressing it back in to reset it. Finally, the console might need activation; refer to assembly step 10 if you haven't activated it.
  • G
    Gregory CollinsAug 18, 2025
    Why does my Pro-Form SPORT 3.0 power turn off during use?
    • J
      James TaylorAug 18, 2025
      If your Pro-Form Treadmill turns off during use, check the power switch; if it has tripped, wait five minutes, then press it back in. Ensure the power cord is securely plugged in; if it is, unplug it, wait five minutes, and plug it back in. Also, try removing and reinserting the key from the console. If the issue persists, please consult the front cover of this manual.
  • R
    rwoodAug 21, 2025
    How to fix Pro-Form SPORT 3.0 walking belt slowing down when walked on?
    • M
      Michael HarmonAug 21, 2025
      If the walking belt slows down when walked on, it might be overtightened. Remove the key and unplug the power cord. Use the hex key to turn both idler roller screws counterclockwise 1/4 of a turn. The belt should be tight enough that you can lift each edge 2 to 3 inches off the platform. Also, your treadmill belt is coated with high-performance lubricant. Never apply silicone spray or other substances to the walking belt or the walking platform unless instructed to do so by an authorized service representative. If the walking belt still slows when walked on, see the front cover of this manual.
  • S
    Shelia DavisAug 25, 2025
    How to fix Pro-Form Treadmill walking belt if it is off-center or slips?
    • B
      Blake AvilaAug 25, 2025
      If the walking belt is off-center, remove the key and unplug the power cord. If the belt has shifted left, turn the left idler roller screw clockwise 1/2 turn with the hex key. If it has shifted right, turn the left idler roller screw counterclockwise 1/2 turn. If the walking belt slips when walked on, first remove the key and unplug the power cord. Then, using the hex key, turn both idler roller screws clockwise 1/4 of a turn.
  • D
    Dr. Krista Gilbert DVMAug 27, 2025
    What to do if Pro-Form Treadmill turns off during use?
    • E
      Elizabeth RodriguezAug 28, 2025
      If your Pro-Form Treadmill shuts off during use, start by checking the power switch. Ensure the power cord is securely plugged in; if it is, unplug it, wait five minutes, and then plug it back in. Another step is to remove and reinsert the key from the console.
  • P
    Pamela TaylorAug 30, 2025
    Why is the walking belt on my Pro-Form Treadmill off-center or slipping?
    • P
      Paul LeeAug 30, 2025
      If the walking belt on your Pro-Form Treadmill is off-center or slips, first remove the key and unplug the power cord. To correct an off-center belt, if it has shifted to the left, turn the left idler roller screw clockwise 1/2 turn; if it has shifted to the right, turn the left idler roller screw counterclockwise 1/2 turn. If the belt slips, turn both idler roller screws clockwise 1/4 of a turn.
  • S
    Stacy JonesSep 2, 2025
    How to recalibrate incline on Pro-Form SPORT 3.0?
    • M
      Marc CowanSep 2, 2025
      To recalibrate the incline on your Pro-Form Treadmill, enter the settings mode. Press the Stop button once, and then press either the Incline increase or decrease button. The treadmill will automatically rise to the maximum incline and then return to the minimum level, recalibrating the incline system.
  • D
    David CarterSep 5, 2025
    What to do if Pro-Form SPORT 3.0 Treadmill console displays remain lit after removing the key?
    • A
      Amanda HayesSep 5, 2025
      The console features a display demo mode. If the displays remain lit when you remove the key, the demo mode is turned on. To turn off the demo mode, hold down the Stop button for a few seconds. If the displays are still lit, see THE SETTINGS MODE on page 19 to turn off the demo mode.
  • C
    Christopher NicholsSep 8, 2025
    Why does the walking belt on my Pro-Form Treadmill slow down when I walk on it?
    • S
      Sara RobbinsSep 8, 2025
      If the walking belt on your Pro-Form Treadmill slows down when you walk on it, it might be overtightened. To fix this, remove the key and unplug the power cord. Then, using a hex key, turn both idler roller screws counterclockwise by 1/4 of a turn. When properly tightened, you should be able to lift each edge of the belt 2 to 3 inches off the platform. Also, it is important to only use the lubricant recommended for your treadmill.
  • D
    davisjonSep 12, 2025
    How to turn off demo mode on Pro-Form Treadmill?
    • F
      Frederick SkinnerSep 12, 2025
      If the console displays on your Pro-Form Treadmill stay lit even after removing the key, the demo mode might be activated. To deactivate it, try holding down the Stop button for a few seconds.

Summary

WARNING DECAL PLACEMENT

Decal Location and Safety Alerts

Shows decal locations and associated safety warnings for operation.

IMPORTANT PRECAUTIONS

EXTENDED SERVICE PLANS

Preventive Maintenance Plans

Details plans covering annual checks, in-home repairs, and defect coverage.

Standard Service Plans

Covers in-home repairs, parts/labor, and wear/tear coverage for defined periods.

BEFORE YOU BEGIN

Treadmill Component Identification

Illustrates and labels the main components of the treadmill.

PART IDENTIFICATION CHART

ASSEMBLY GUIDE

Product Registration and Initial Setup

Register product online and ensure power cord is unplugged before assembly.

Attaching Uprights and Base

Connects the uprights to the treadmill base using specific screws.

Installing Handrail Bottoms and Trays

Attaches handrail bottoms and console trays to the main structure.

Mounting the Console Assembly

Secures the console assembly to the uprights using screws and washers.

Wiring and Handrail Assembly

Connects upright wires to the console and attaches handrail tops and bottoms.

Installing Upright Covers

Covers the uprights for a finished look and protection.

Attaching the Storage Latch

Installs the storage latch mechanism onto the treadmill upright.

Console Activation and Final Checks

Activates the console and ensures all parts are tightened.

CONNECTING THE POWER CORD

Using a Surge Suppressor

Explains the importance of surge suppressors and their specifications for safety.

CONSOLE OVERVIEW

Console Diagram and Features

Illustrates console layout and lists key features like speed, incline, and iFit.

OPERATING THE TREADMILL

Turning On Power and Using Manual Mode

Details how to power on the treadmill and use its manual control functions.

Monitoring Workout Progress

Explains how to view workout data like speed, distance, and calories on the display.

Finishing Exercise and Storage

Covers stopping the belt, zeroing incline, and preparing for storage.

USING ONBOARD WORKOUTS

Selecting and Running Workouts

Guides users on choosing and executing built-in workout programs.

USING IFIT WORKOUTS

iFit App Setup and Connection

Instructions for downloading, setting up the iFit app, and connecting to the console.

Starting and Controlling iFit Workouts

How to select, start, and manage iFit workouts with manual overrides.

Disconnecting iFit and Finishing

Steps to disconnect the smart device and end the iFit workout session.

CONNECTING A HEART RATE MONITOR

Pairing and Disconnecting Monitor

Details how to connect a Bluetooth Smart heart rate monitor to the console.

SETTINGS MODE OPERATIONS

Navigating and Adjusting Settings

Explains how to enter, navigate, and modify various console settings.

SOUND SYSTEM USAGE

Playing Music via Console

Instructions for connecting a device to play music through the console speakers.

OPTIONAL CHEST HEART RATE MONITOR

Benefits of Heart Rate Monitoring

Explains how a heart rate monitor aids in achieving fitness goals.

FCC COMPLIANCE INFORMATION

FOLDING AND MOVING THE TREADMILL

Folding Mechanism and Safety

Step-by-step guide on how to safely fold the treadmill for storage.

Transporting the Treadmill

Instructions on safely moving the folded treadmill using its wheels.

Lowering Treadmill for Use

Steps to unfold the treadmill from its storage position back to ready-to-use state.

MAINTENANCE AND TROUBLESHOOTING

Routine Cleaning and Care

Procedures for cleaning the treadmill and its walking belt.

Troubleshooting Power and Console Issues

Addresses issues like the treadmill not turning on or console displays remaining lit.

Troubleshooting Incline Functionality

Guides on recalibrating the incline system if it is not functioning correctly.

Troubleshooting Walking Belt Performance

Solutions for a walking belt that slows down or becomes misaligned.

EXERCISE GUIDELINES

Determining Optimal Exercise Intensity

Using heart rate zones to gauge intensity for fat burning and aerobic exercise.

Workout Structure and Frequency

Recommendations for warm-up, training duration, cool-down, and exercise frequency.

SUGGESTED STRETCHES

Essential Pre and Post-Exercise Stretches

Demonstrates correct form for basic stretches to improve flexibility and prevent injury.

PART LIST

EXPLODED DRAWING A

EXPLODED DRAWING B

EXPLODED DRAWING C

EXPLODED DRAWING D

ORDERING REPLACEMENT PARTS

Information for Part Orders

Details required information for ordering replacement parts, including model and key numbers.

LIMITED WARRANTY

Warranty Coverage and Limitations

Outlines the product's warranty terms, coverage, exclusions, and transferability.

Pro-Form SPORT 3.0 Specifications

General IconGeneral
FoldableYes
Running Area16" x 50" Tread Belt
Incline0-10%
Speed0-10 mph
Weight Capacity250 lbs
DisplayLCD

Related product manuals