10
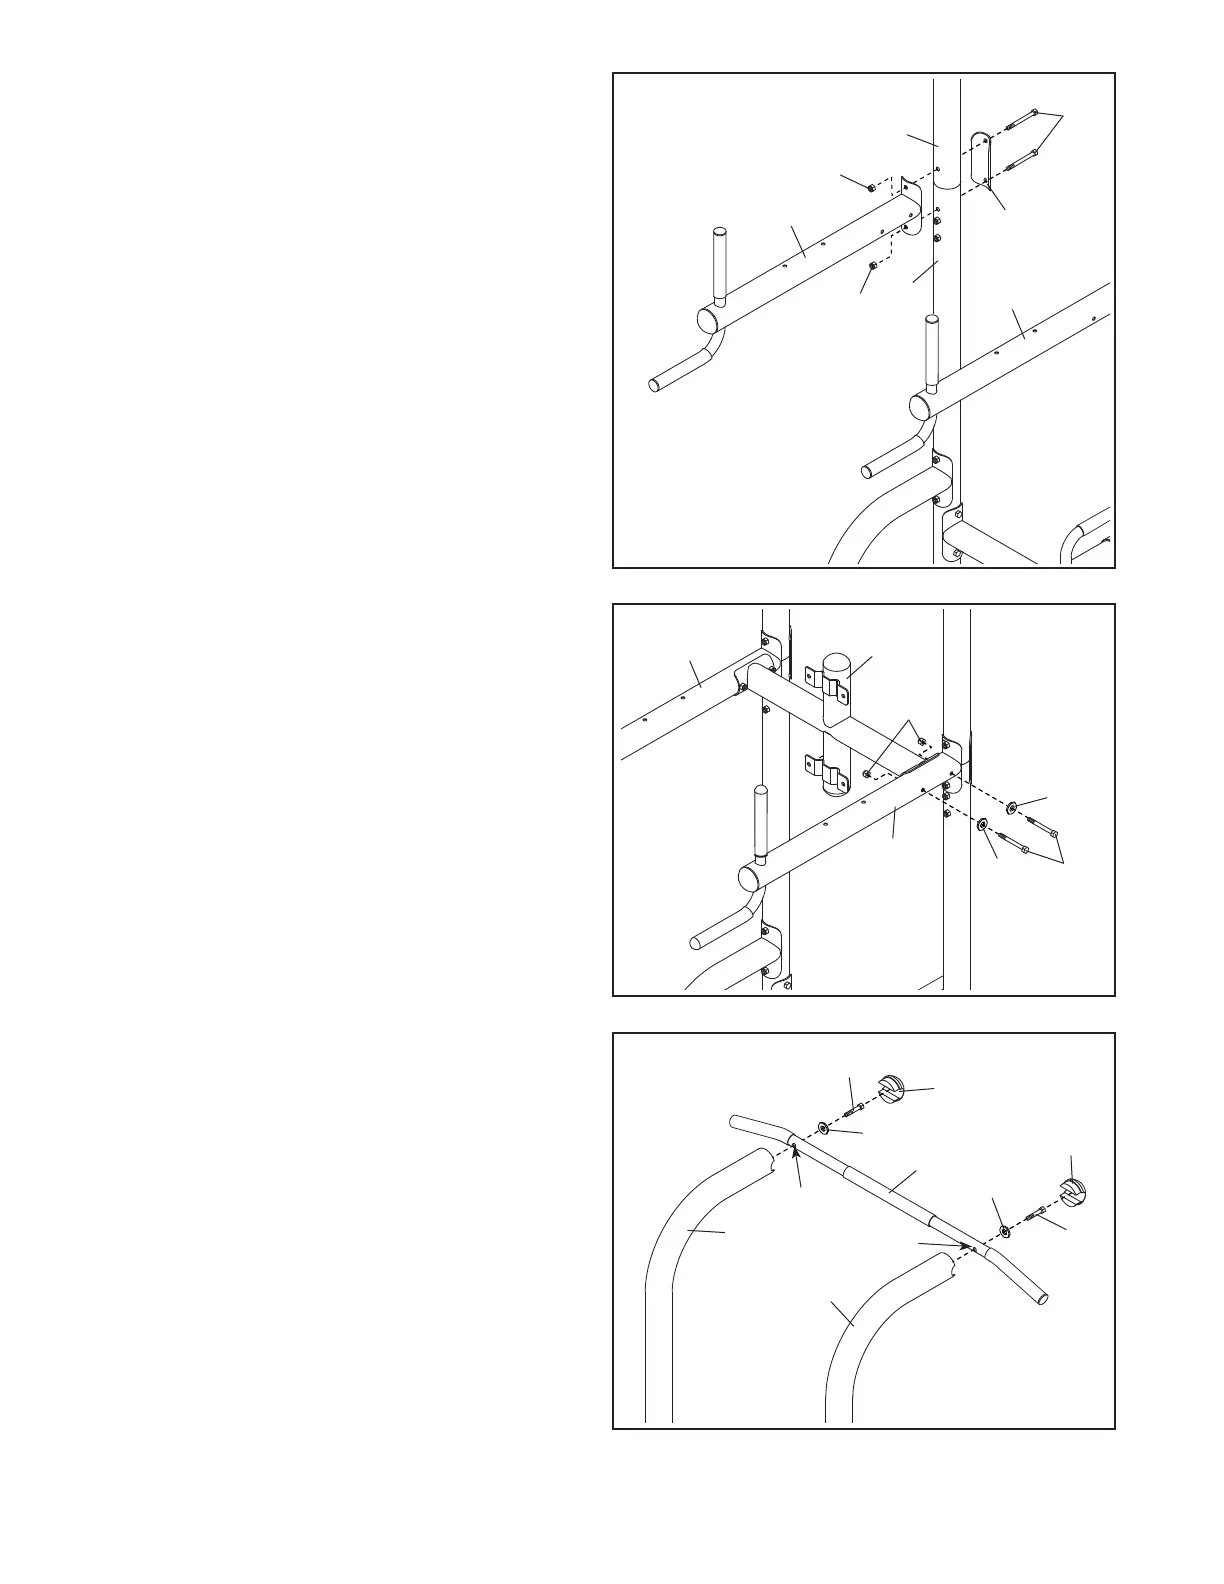
8. Orient the Top Crossbar (7) as shown and attach
it to one of the Dip Arms (5) with two M8 x 75mm
Bolts (17), two M8 Curved Washers (23), and
two M8 Locknuts (22); do not tighten the
Locknuts yet.
Attach the Top Crossbar (7) to the other Dip
Arm (5) in the same way.
7. Attach a Dip Arm (5) to the right Upright
(3) and the Upright Base (2) with two
M8 x 80mm Bolts (27), a Support Plate (13),
and two M8 Locknuts (22); do not tighten the
Locknuts yet.
Attach the other Dip Arm (5) to the left
Upright (not shown) in the same way.
9. Orient the Pull-up Bar (9) so that the indented
holes (D) are on the side shown. Attach
the Pull-up Bar to the Uprights (3) with two
M10 x 45mm Screws (19) and two M10 Curved
Washers (26). Then, press the two Rubber Caps
(12) into the ends of the Uprights.
See steps 3–8. Tighten all the M8 Locknuts (22).
13
5
3
22
5
2
27
22
7
8
5
17
22
7
5
23
23
9
26
26
12
12
9
D
D
19
3
3
19
 Loading...