9
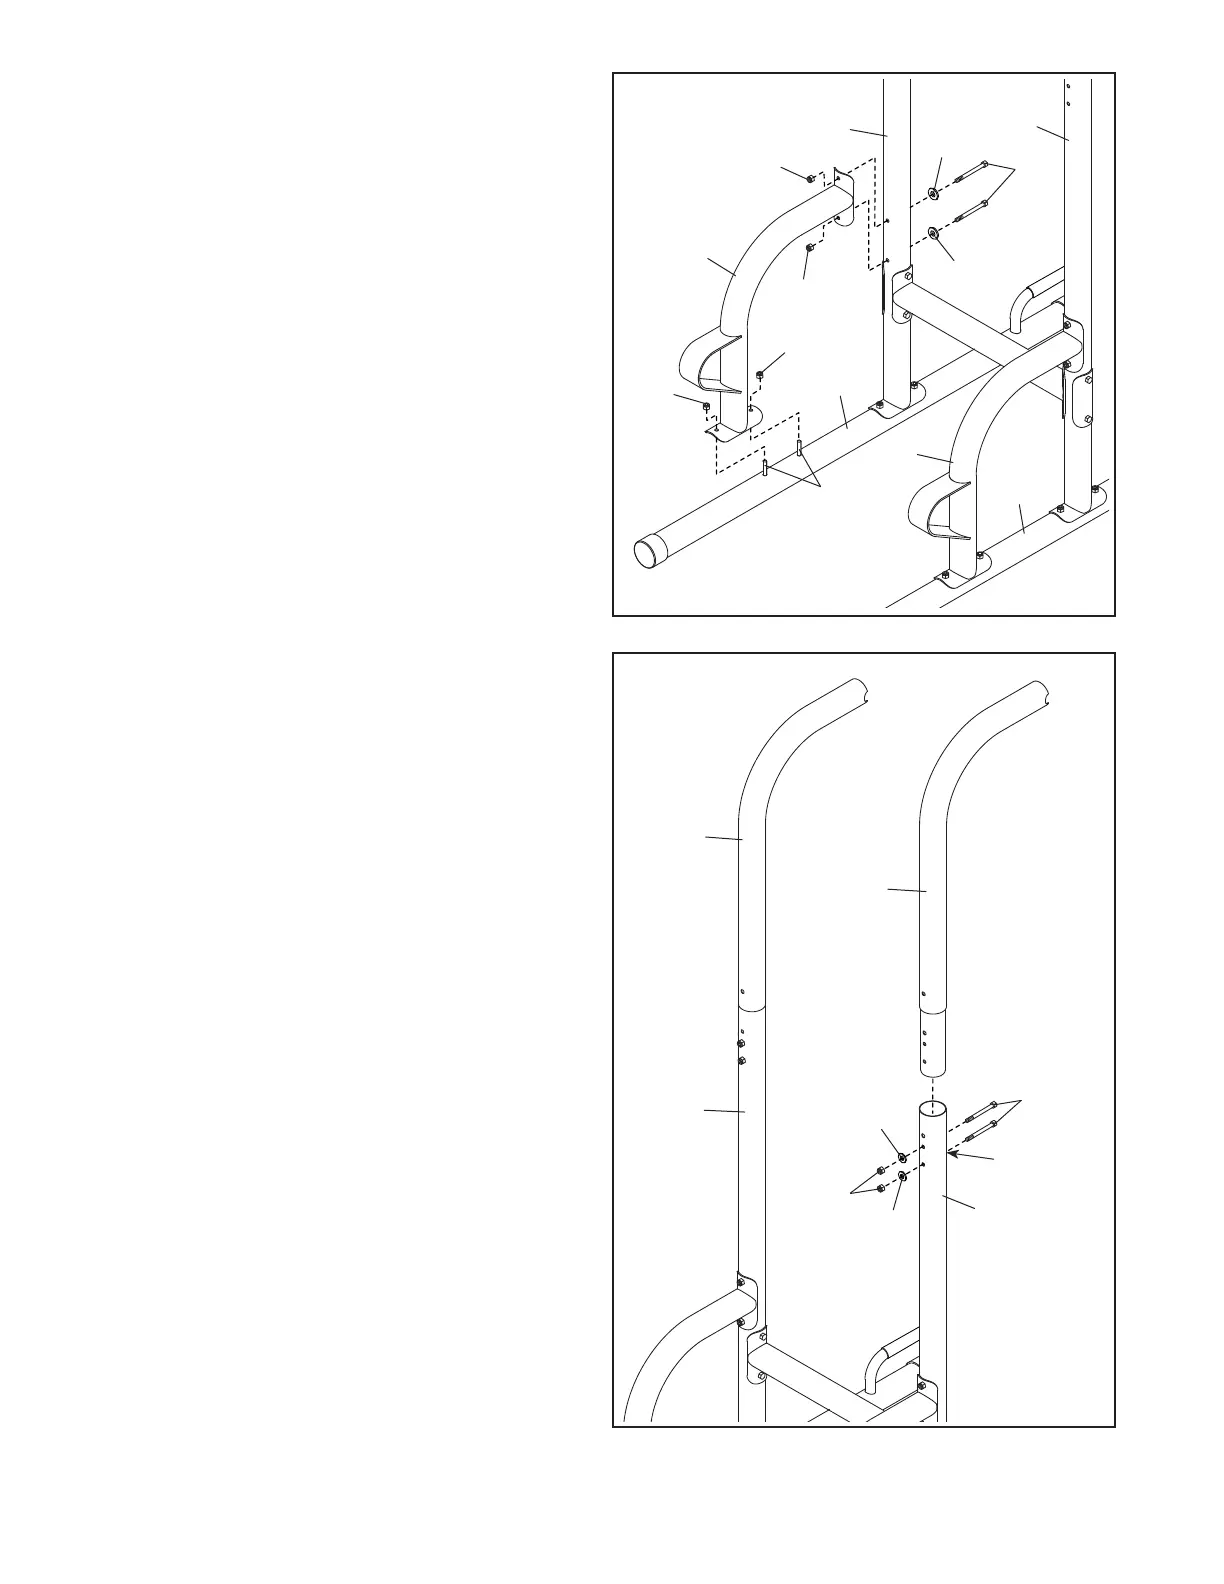
6. Orient one of the Uprights (3) as shown, and
attach it to one of the Upright Bases (2) with
two M8 x 70mm Bolts (24), two M8 Curved
Washers (23), and two M8 Locknuts (22).
Note: The Bolts must be attached in the low-
est set of holes in the Upright and the Upright
Base. Make sure that the bolt heads are in
the hexagonal holes (C) in the Upright Base.
Do not tighten the Locknuts yet.
Attach the other Upright (3) to the other
Upright Base (2) in the same way.
5. Attach a Support (4) to one of the Stabilizers
(1) with the two indicated M8 x 70mm Carriage
Bolts (20) and two M8 Locknuts (22); do not
tighten the Locknuts yet.
Next, attach the Support (4) to the Upright
Base (2) with two M8 x 75mm Bolts (17),
two M8 Curved Washers (23), and two M8
Locknuts (22); do not tighten the Locknuts yet.
Attach the other Support (4) to the other
Stabilizer (1) and the other Upright Base (2)
in the same way.
5
1
1
22
22
20
17
23
23
22
22
2
4
2
4
3
3
2
6
2
22
23
23
24
C
 Loading...