8
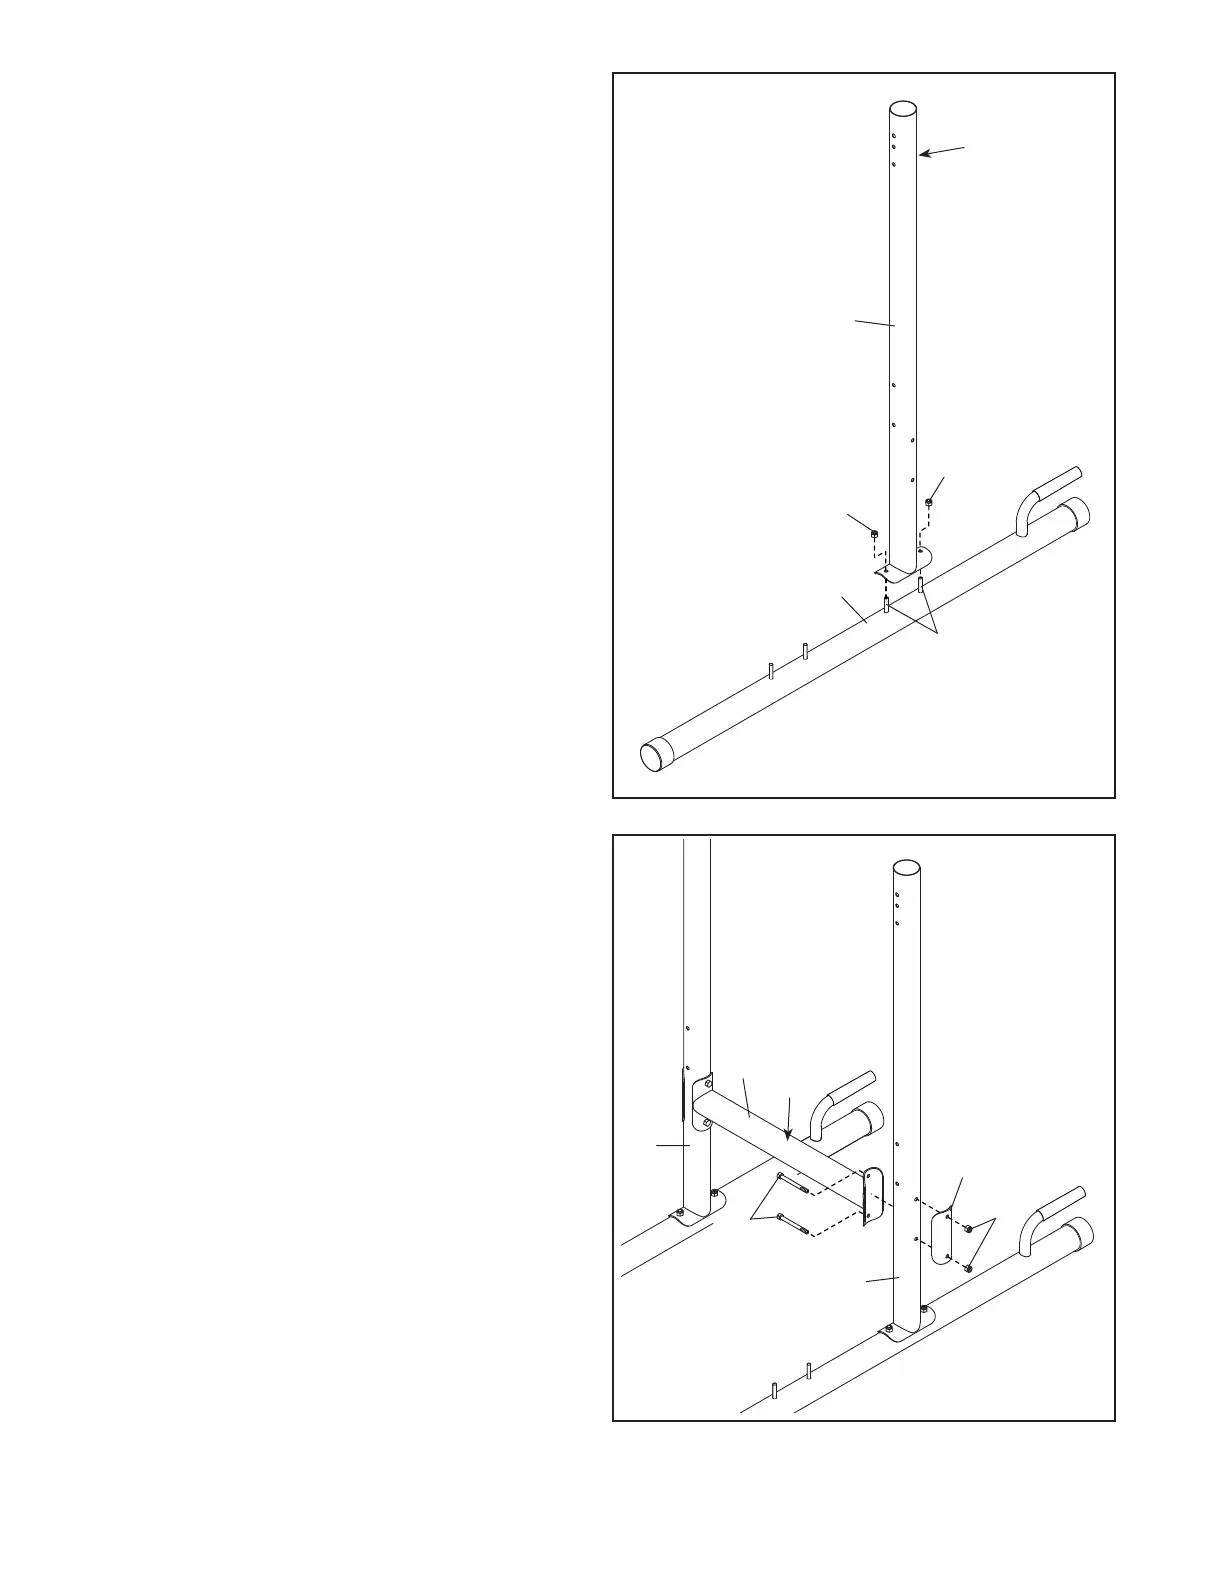
4. Orient the Bottom Crossbar (10) so that the
warning decal (B) is on top. Attach the Bottom
Crossbar to one of the Upright Bases (2) with
two M8 x 75mm Bolts (17), a Support Plate (13),
and two M8 Locknuts (22); do not tighten the
Locknuts yet.
Attach the Bottom Crossbar (10) to the other
Upright Base (2) in the same way.
3. Orient one of the Upright Bases (2) so that the
hexagonal holes (A) are on the side shown.
Attach the Upright Base (2) to one of the
Stabilizers (1) with the indicated two M8 x 70mm
Carriage Bolts (20) and two M8 Locknuts (22);
do not tighten the Locknuts yet.
Attach the other Upright Base (not shown)
to the other Stabilizer (not shown) in the
same way.
22
22
20
1
3
2
A
17
2
10
2
13
22
B
4
 Loading...